A lifted look doesn’t require surgery — the right makeup choices and placement create light, shadow, and structure that trick the eye into seeing higher cheekbones, a more open eye, and a perkier overall vibe. This guide breaks down the principles and gives step-by-step instructions for each area of the face so you can build a quick, natural-looking lift at home. Read through for the “why” and then follow the numbered steps to put the lift into practice.
What Does “Lifting Makeup” Really Mean?
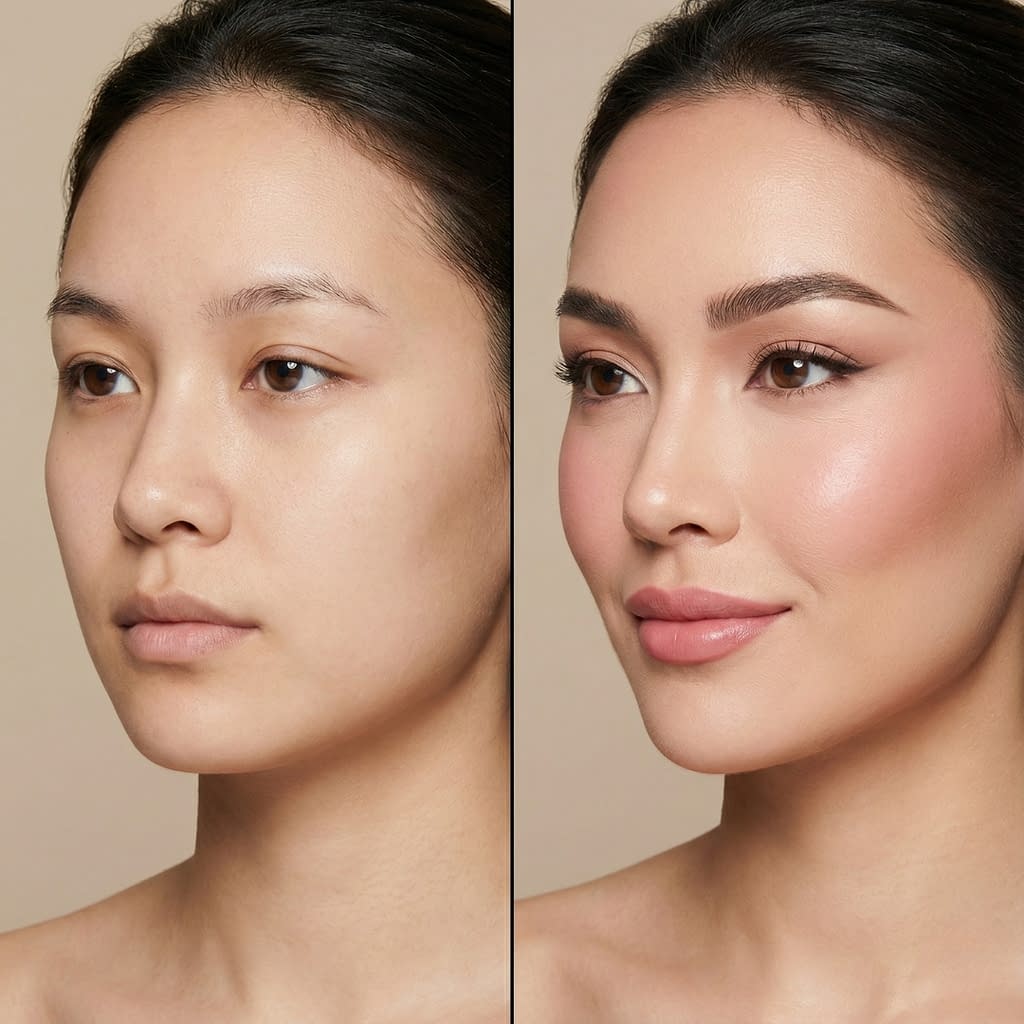
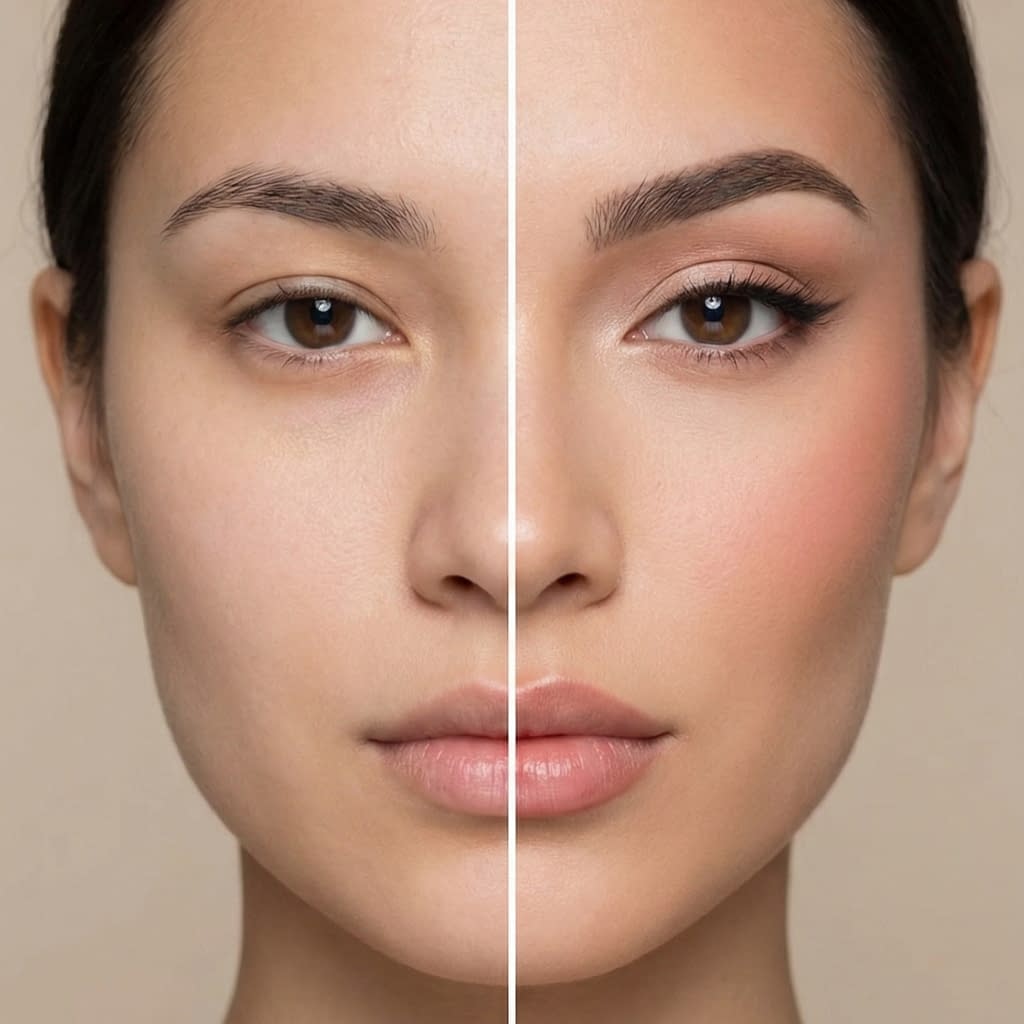
“Lifting” with makeup is about visual engineering: using lighter tones to bring features forward and darker tones to push areas back. It’s not about dramatic, obvious contour lines — the best lifting makeup is subtle and blends into the skin so it looks like you, just a fresher, more elevated version.
Core principles:
- Light reflects — use highlights where you want to bring attention (tops of cheekbones, brow bone, center of lid).
- Shadow sculpts — use soft contour under cheekbones, at the temples, and along the jaw to suggest lift.
- Upward motion: angle strokes and placement upward (blend up and out) to visually pull features upwards.
- Focus on balance: lift the brow and cheek area together so the face reads cohesive rather than patched.
Keep your products skin-like in texture and finish so the effect stays natural in daylight and in photos.
Prep Your Skin for a Lifted Look
A good lift starts with a skin canvas that’s smooth, hydrated, and primed to reflect light correctly.
Step-by-step skin prep:
- Cleanse to remove oil and residue so products sit evenly.
- Hydrate with a lightweight hyaluronic serum while skin is slightly damp — this plumps fine lines and helps makeup sit on top instead of settling into creases.
- Moisturize using a moisturizer appropriate to your skin type. For instant lift, choose a product that gives moderate luminosity (glycerin + light oils) without grease.
- Eye care: a cooling eye gel or light cream reduces puffiness. Press it in with your ring finger to avoid tugging.
- Prime selectively: use a pore-refining primer on the T-zone and a smoothing or slightly illuminating primer over the cheek area and brow bone to enhance lift. Apply primer with light upward strokes.
Why: hydrated, primed skin makes the “light catch” on high points look natural and keeps contour from patching.
Choose a Lightweight, Skin-Like Base

Heavy foundation flattens the face. The clean, lifted result comes from thin coverage that evens tone without masking texture.
Step-by-step base:
- Choose product: tinted moisturizer, light foundation, or skin tint — one that matches your undertone and has a natural finish.
- Apply sparingly: dot product on forehead, cheeks, nose, chin. Use a damp sponge or fingers to press and sheer it outward. Think “skin, not mask.”
- Conceal strategically: only where you need extra coverage (under-eye, spots) — do not layer heavy product across the whole face.
- Build only where necessary: add thin layers to the center of the face and blend out to the hairline; keep outer face slightly sheerer to preserve dimension.
Tip: use a slightly dewier formula on the high points (cheeks, brow bone) and a more matte finish on the sides to emphasize contrast and lift.
Strategic Concealer Placement for Instant Lift
Concealer is your secret tool for lift when placed correctly.
Step-by-step concealer for lift:
- Brighten under the eyes: apply concealer in a small upside-down triangle under the eye; the point of the triangle toward the cheek helps lift the visual plane.
- Lift the outer eye: extend a thin, soft line of concealer from the outer corner toward the tail of the eyebrow to subtly lengthen and open the eye. Blend well.
- Vertical mid-face brightening: add a tiny dab down the bridge of the nose and a dot on the center of the forehead to draw attention upward.
- Jawline cleanup: run a thin line of concealer under the jaw and blend downward (this sharpens and defines the jaw, supporting a lifted silhouette).
Blend by pressing, not dragging, and set only where needed (under-eye) with a whisper of translucent powder to avoid creasing.
Contour Techniques That Sculpt and Lift the Face
Soft, upward-facing contour creates structure without a harsh, theatrical look.
Step-by-step sculpting:
- Choose the right shade: a contour one to two shades deeper than your skin with a neutral (not orange) undertone. Creams are easier to blend for a natural finish.
- Cheek shadow: make a fish face, find the hollows, and apply contour in an upward diagonal from the mid-ear toward the corner of your mouth but stop halfway — then blend upward toward the temple to lift the cheek.
- Temple & hairline: apply contour lightly at the temples in a crescent motion and blend into the hairline to visually pull the top of the face up.
- Jawline: apply a thin line under the jaw and blend down — this tightens the jaw and makes the face appear more lifted.
- Nose (optional): for long, soft lift, apply narrow lines down the sides of the nose and highlight the bridge — keep lines thin and blend thoroughly.
Finish by buffing edges with a clean brush or sponge for feathered, skin-like shadows.
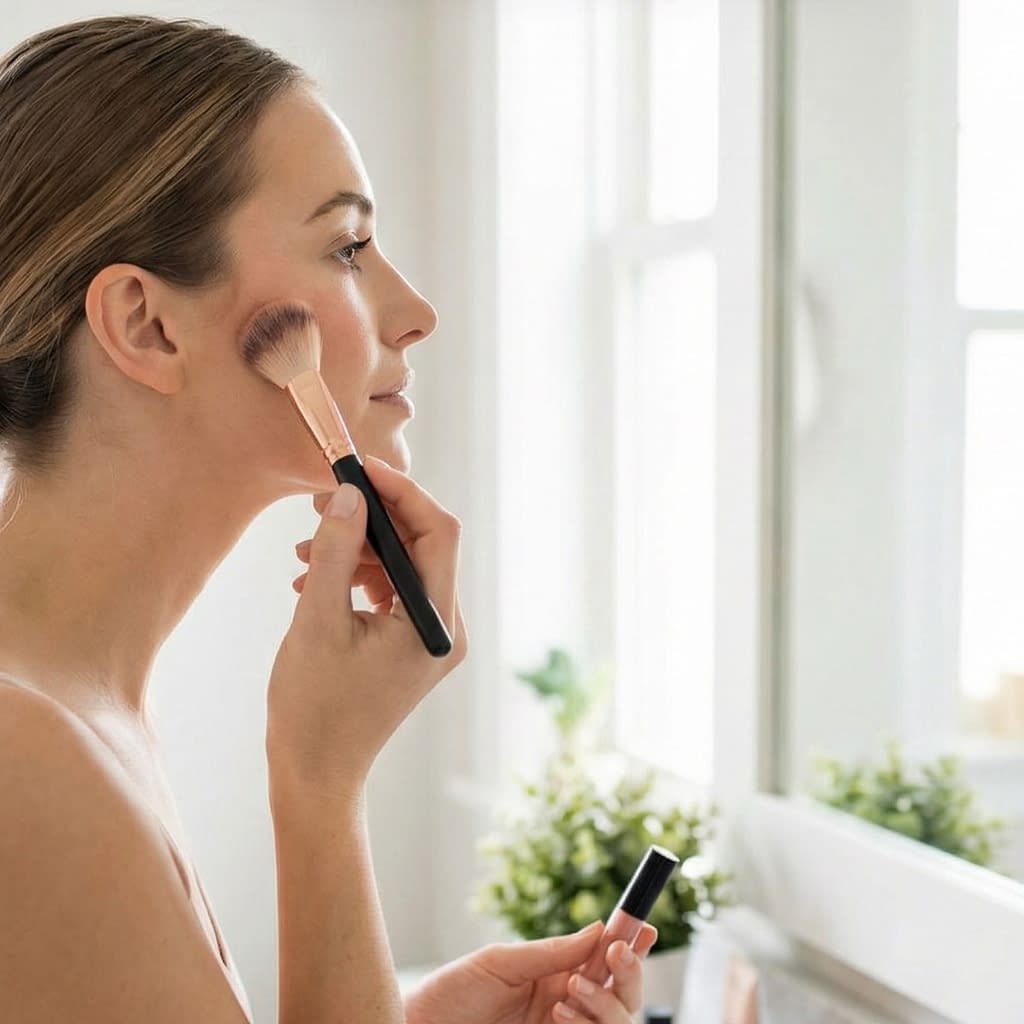
Blush Placement That Raises the Cheeks
Blush is one of the fastest ways to create lift — placement is everything.
Step-by-step blush for lift:
- Choose texture: cream blush is ideal because it melts into skin for a natural look.
- Placement: smile slightly and apply blush to the top of the cheek apple, then sweep upward toward the temple (not across the cheek horizontally). This upward motion reads like a lift.
- Layer lightly: if you need more pigment, build in thin layers rather than one heavy swipe.
- Soft contour + blush: blend the contour and blush together where they meet so the cheek looks sculpted and flush, not separated.
Tip: a peach or rosy tone usually reads youthful and lifts the complexion more than cooler mauves on many skin tones.
Highlighting Tips for a Natural Face Lift Effect
Highlight (used sparingly) pulls features forward and catches the eye where you want focus.
Step-by-step highlighting:
- Choose the right finish: pick a cream or semi-satin highlighter — avoid chunky shimmer.
- Placement: lightly tap highlight on the top of the cheekbone (above where you applied blush), the inner corner of the eyes, just under the arch of the brow, and a tiny touch on the cupid’s bow.
- Center lid: a whisper of highlight on the center of the eyelid pops the eye and makes lids look lifted.
- Blend: blend edges so highlight melts into skin — you want sheen, not sparkle.
Less is more: tiny dots of highlight produce a lift; broad patches of shimmer flatten the face.
Eyebrow Shaping Tricks That Open Up the Face
Brows frame and lift the eye area — shaped the right way, they create a natural brow lift.
Step-by-step brow lift:
- Brush upward with a spoolie to see the natural growth.
- Fill in with hairlike strokes starting from the inner brow and tapering to the tail. Avoid drawing a blocky shape.
- Create the illusion of a higher arch by softly defining the highest point slightly more than you naturally have — draw a subtle upward tail and blend.
- Set with a tinted brow gel that brushes hairs upward and locks them in place for a lifted, groomed look.
- Highlight under the arch: a tiny matte or satin lightening under the arch lifts the brow visually.
Avoid over-plucking — a natural, full brow often looks more uplifting than an overly arched thin brow.
Eye Makeup Techniques That Visually Lift the Eyes

Shape and placement of eyeshadow and liner make your eyes appear higher and more open.
Step-by-step lifting eye makeup:
- Transition shade: sweep a soft matte light-brown slightly above the natural crease and blend upward and outward — creating a higher apparent crease.
- Outer V lift: emphasize the outer V with a slightly deeper color, applied in an upward flick, not horizontal. Blend upward toward the tail of the brow.
- Tightline + minimal wing: tightline the upper waterline for fullness; add a thin wing that angles slightly upward to lift. Keep the wing short for natural effect.
- Bright inner corner: small dot of light shimmer at the inner corner opens the eye.
- Lower lash approach: avoid heavy liner across the lower lash; instead lightly smudge shadow on the outer third below the lash line to balance and lift.
Finishing touch: a lash curl and mascara applied with extra weight on outer lashes enhances the lifted, cat-eye illusion.
Lip Liner Tricks That Create an Uplifted Smile
A subtly shaped lip can counteract a downward pull and give a fresh smile.
Step-by-step lip uplift:
- Prep lips: exfoliate and hydrate.
- Outline strategically: map your natural cupid’s bow and then slightly overline the center of the upper lip (not the corners) to create a lifted central focus.
- Emphasize the corners: add a tiny touch of liner at the corners and blend outward so the lip line looks gently turned up.
- Gloss center: a dot of gloss or highlight on the cupids bow and center of the lower lip brings attention to the middle, creating the illusion of upturned lips.
- Keep it soft: avoid sharp, drawn-on edges—blend liner so it’s a natural enhancement.
This technique lifts the mouth without making it appear fake or overfilled.
Avoid Makeup Mistakes That Drag the Face Down
Some common errors negate lifting techniques.
What to avoid:
- Heavy matte powder across the cheeks — flattens natural highlights.
- Dark, heavy lower liner — closes the eye and pulls downward.
- Horizontal blush (applied straight across the apple) — makes cheeks look wider and heavier rather than lifted.
- Harsh, low brows (filling the bottom too strongly) — visually drags the eye downward.
- Too much product at the hairline — overly darkened temples can make the face read heavier.
If something appears “flat” or “heavy,” step back, blend upward, and remove excess product with a damp sponge.
Quick 5-Minute Lifted Makeup Routine
A fast routine that gives an instant lift when you’re short on time.
- Prep (30s): mist + a light moisturizer or primer to hydrate.
- Tinted base (60s): press a skin tint with a sponge, concentrating coverage at center.
- Concealer & brighten (45s): small triangle under eyes, blend. Tiny concealer sweep to the bridge of the nose.
- Contour + blush (60s): quick mohawk contour stroke under cheekbone blended upward, cream blush on apples blended up to temple.
- Brows & lashes (45s): brush brows up, fill sparse bits; curl lashes and one coat mascara focusing outer lashes.
- Highlight & lips (40s): tiny highlight on cheekbones + center lid; balm or tint on lips.
Total: ~5 minutes — lifted, polished, and natural.
Setting Techniques to Keep the Lift All Day
Lock your work in place without killing the glow.
Step-by-step setting:
- Spot-set, don’t powder everything: use a small brush to dust translucent powder only where creasing or oiliness is a concern (under-eye, T-zone).
- Blend again: after powdering, go over the skin with a damp sponge to press everything together for a skin-like finish.
- Setting spray: finish with a fine mist of hydrating setting spray to settle powders and revive dew. Aim spray from arm’s length for even coverage.
- Carry a tiny sponge for midday pressing if needed—blot excess rather than adding more product.
These steps preserve lift and prevent the makeup from migrating into fine lines.
Final Words
A lifted face is the result of considered placement — light, shadow, and texture working together. Focus on prep and hydration, keep base coverage light, place concealer and highlight strategically, sculpt with soft upward strokes, and finish with grooming that opens your features. Practice the techniques in good light and adapt placements to your unique bone structure; small shifts in angle make a big difference. With the steps above you can create a subtle, natural lift that reads beautifully in person and on camera — and it only takes a few minutes once you’ve found your favorite routine.


