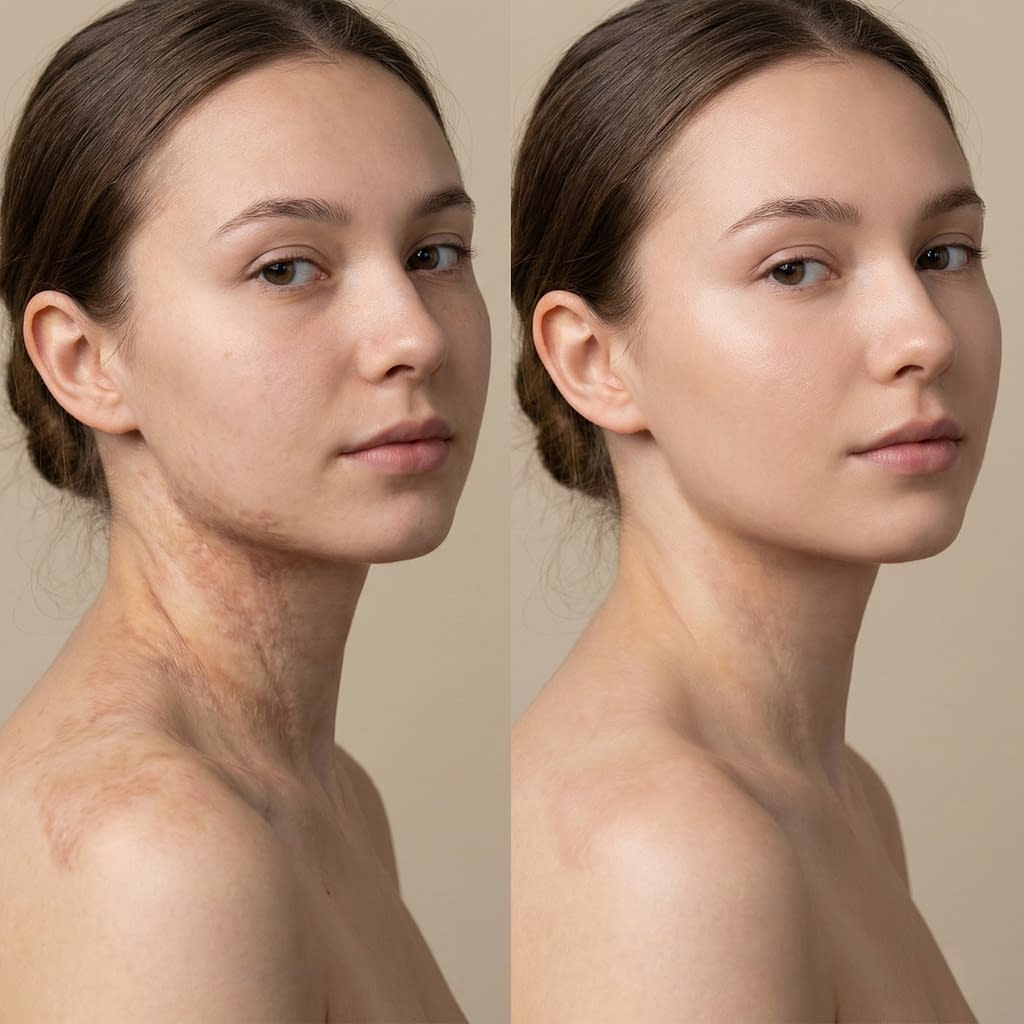
Burn scars can be upsetting, but with consistent, gentle care you can soften texture, reduce redness, improve mobility, and make scars less noticeable over weeks to months. This guide focuses on safe, natural-first steps you can do at home, how and when to do them, what to avoid, and when to see a professional.
Realistic hope, not magic fixes
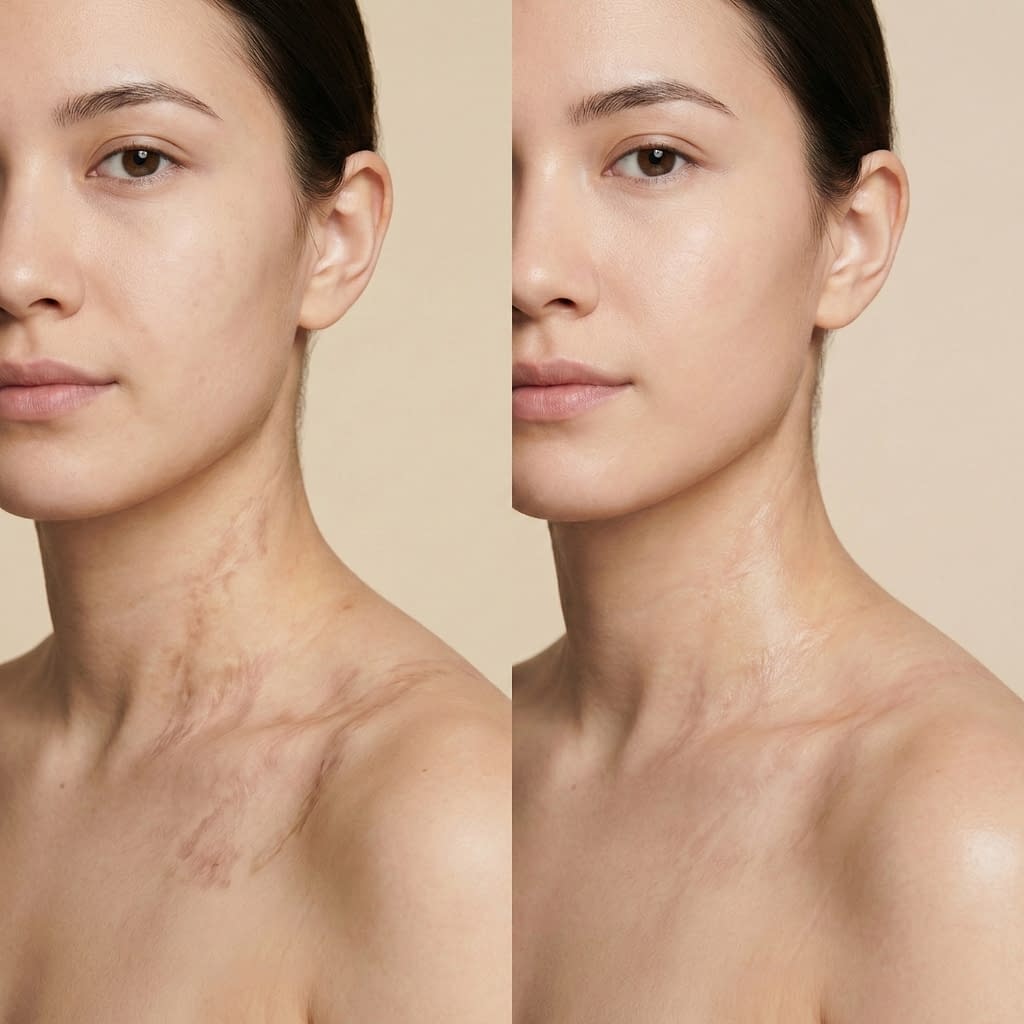
Scars remodel slowly. Nothing natural will erase a deep scar overnight, but the right routine—hydration, sun protection, silicone therapy, massage, and targeted natural topicals—can produce clear, measurable improvement. The key is starting at the right time (only after the wound is fully healed), being consistent, and recognizing when clinical treatments are needed.
What happens in a burn scar
When skin is burned, the body repairs the area by making collagen. If collagen is overproduced or laid down irregularly, scars become raised, tight, or discolored. Home care works by:
- keeping the scar hydrated so collagen lays down more evenly,
- preventing darkening from sun exposure,
- mechanically remodeling tissue through gentle massage,
- and using gentle topical agents that support healthy tissue repair.
When to start home scar care

Wait until the wound is fully closed and there are no open areas, scabs or active infection. Typical signs you can begin conservative scar care:
- skin is intact (no drainage),
- no fresh scabs or stitches still healing,
- the area no longer painful or hot to touch.
If in doubt, get a quick check from a GP or nurse. Starting too early (on open wounds) increases infection risk.
Daily foundation routine
Do these every day—this baseline drives most improvement.
Cleanse gently
- Use a mild, fragrance-free cleanser and lukewarm water. Pat dry with a clean towel.
Hydrate and lock in moisture
- Apply a fragrance-free emollient (cream or ointment) to keep scar tissue pliable. For very dry scars, petrolatum at night is effective.
Protect from sun
- Apply broad-spectrum SPF 30+ whenever the scar is exposed. Reapply every two hours outdoors. UV is the simplest way scars darken permanently.
Consistency note
- Do this daily; sunscreen + moisturizer + gentle cleansing is the most effective, low-effort foundation for improvement.
Silicone therapy — the evidence-based first-line home treatment
Why it helps
- Silicone sheets or gels hydrate the scar and appear to regulate collagen formation, reducing redness and thickness in many people.
How to use
- Only on healed skin.
- Use medical-grade silicone sheets (cut to size) or silicone gel. Follow product directions.
- Sheets are often worn many hours daily (8–24 hrs) as tolerated. Gels generally applied twice daily.
- Expect to use silicone consistently for at least 8–12 weeks to notice change; many people continue longer.
Troubleshooting
- If itching or irritation develops, stop and consult a clinician.
- Clean sheets per instructions and replace when worn.
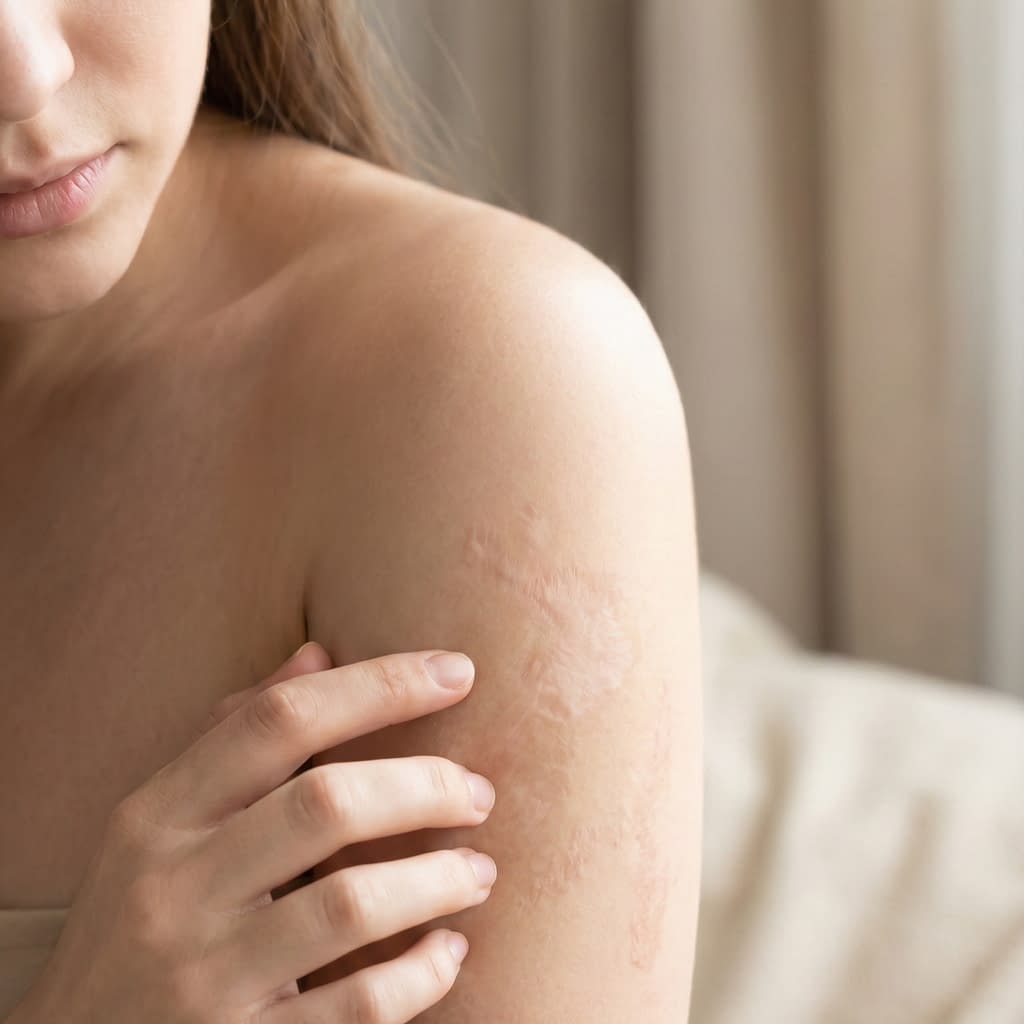
Scar massage — step-by-step technique that helps
Why massage works
- Massage improves pliability, reduces tight bands, helps collagen reorganize, and improves circulation.
How to do it
- Wait until skin is fully healed.
- Use clean hands and a lubricant (fragrance-free cream, a few drops of rosehip or jojoba oil, or a small amount of silicone gel).
- 3–5 minutes per session, 1–2 times daily:
- Circular motions along the scar (firm but comfortable pressure).
- Longitudinal strokes (along the length).
- Cross-friction (side-to-side) to break down adhesions gently.
- If the scar becomes red, painful, or bruised after massage, reduce pressure or frequency.
Practical tip
- Massage after a warm shower when skin is supple, and follow with your moisturizer or silicone application.
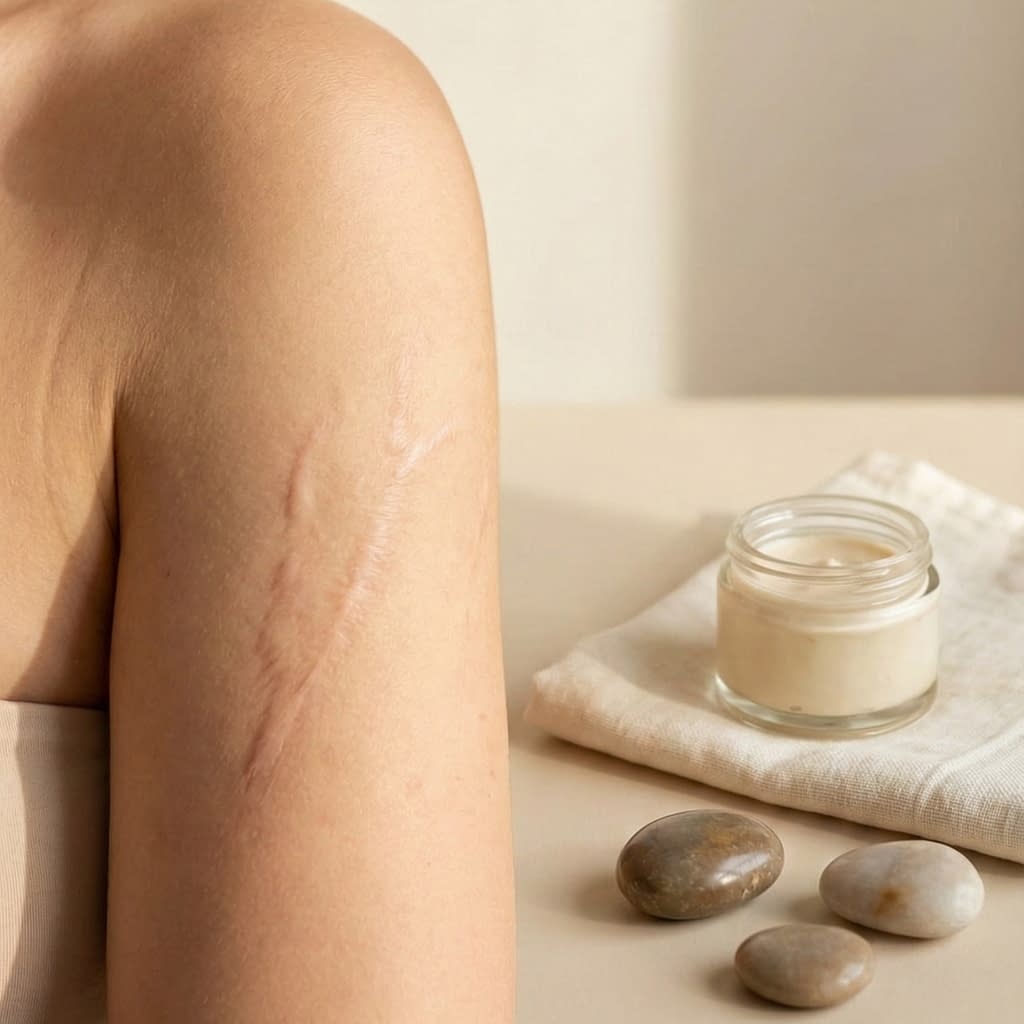
Natural topical options — safe recipes and how to use them
Patch-test first behind the ear or inner forearm for 24 hours.
Aloe vera gel — soothing & hydrating
- Use pure, alcohol-free aloe gel on healed scars once or twice daily.
- Apply thinly; let absorb; follow with moisturizer or silicone if using.
Rosehip oil — regeneration support
- Apply a few drops to scarred area nightly; massage in gently.
- Rosehip is rich in vitamin A precursors and fatty acids that many find supportive.
Honey-based balm — mild antimicrobial plus hydration
- Use medical or Manuka honey–based balms only on healed skin at night to lock in moisture.
- If you have acne-prone skin nearby, use carefully (honey can be sticky).
Onion-extract gel (commercial scar gels)
- Some over-the-counter formulations (onion extract + allantoin) have mixed but sometimes positive evidence; they can be used in addition to silicone but are not replacements.
What to avoid
- Lemon juice, undiluted essential oils, raw plant poultices, or aggressive scrubs on fresh or fragile scars — these can irritate and darken skin.
Food, supplements, and lifestyle that support healing
Nutrition supports collagen remodeling — focus on whole foods.
Eat to help healing
- Adequate protein (eggs, fish, legumes) to supply amino acids.
- Vitamin C–rich foods (citrus, peppers) to support collagen synthesis.
- Zinc sources (nuts, seeds, lean meat) for repair.
- Omega-3 fats (fatty fish, flax) to reduce inflammation.
Hydration & sleep
- Drink enough water and aim for regular sleep to help tissue repair.
Supplements caution
- If you consider supplements (high-dose vitamin C, zinc), consult your doctor first—these aren’t necessary for most people with a balanced diet.
Sun protection strategies that actually work
Sunscreen + physical barriers give the best protection.
Practical sun plan
- Apply SPF 30+ every morning; reapply after swimming/sweating.
- If scar is on face or limb, use hats, sleeves, or clothing with UPF.
- For outdoor activity, consider a higher SPF or mineral sunscreen (zinc/titanium) for sensitive healed skin.
Why it matters
- UV exposure causes hyperpigmentation and makes scars significantly more visible long-term.
Realistic timeline and what improvement looks like
Be patient—skin remodeling is measured in months, not days.
Typical expectations
- Weeks 0–4: improved moisture and reduced itch; scar may feel softer.
- Weeks 4–12: reduced redness, improved texture if treatment is consistent (silicone + massage).
- 3–6 months: continued flattening and color improvement for many scars; continued slow change up to 12–18 months.
Keep photos
- Take consistent photos every 2–4 weeks in the same light to track progress objectively.
When natural care isn’t enough — signs to see a professional
See a dermatologist or burn specialist if:
- The scar keeps growing beyond original wound (keloid formation),
- The scar is very thick, painful, or limits movement,
- There’s persistent infection, or
- You want faster or stronger improvement (steroid injections, laser, microneedling, pressure therapy are medical options).
Early professional input can prevent worsening in high-risk scars.
Common mistakes that slow progress
Avoid these frequent errors:
- Starting treatment before the wound is healed.
- Skipping daily sunscreen.
- Switching products too often—give a method 8–12 weeks to work.
- Overdoing massage (too hard or too early).
- Using harsh or abrasive home remedies.
FAQ
Will a scar ever disappear?
- Most scars improve but rarely disappear completely. Goal = softer, flatter, less noticeable.
Can I use silicone with natural oils?
- Yes—use silicone sheets on dry skin; if you prefer oil, use it during massage and apply silicone after oil has absorbed or use gel-type silicone that works alongside oils. Follow product instructions.
Is it safe to use vitamin E oil?
- Evidence is mixed. Some people react; patch test first. Gentle oils like rosehip or jojoba are usually safer.
When can I exfoliate the scar?
- Only after skin is fully healed and gentle chemical exfoliation should be used cautiously and usually under guidance. Avoid scrubs on new scars.
Simple printable checklist
- Clean scar gently with mild cleanser daily
- Apply fragrance-free moisturizer after cleansing
- Use silicone gel or sheet daily (once wound is healed)
- Massage scar 3–5 minutes daily (when healed) using lubricant
- Apply sunscreen SPF 30+ to exposed scar every morning and reapply outdoors
- Use aloe vera or rosehip oil nightly (patch-tested) as optional adjunct
- Eat protein-rich meals and vitamin-C foods; stay hydrated
- Take photos every 2–4 weeks to track progress
- If scar grows, becomes painful, or limits movement → see dermatologist
Final words
Treating burn scars naturally is not about quick fixes but about steady, gentle support: hydrate consistently, protect from sun, use silicone and massage, add safe natural topicals if tolerated, and maintain healthy lifestyle habits. Many scars respond well to this combined, patient approach. If a scar is worsening, painful, or functionally limiting, seek professional help early—conservative home care and medical treatments often work best together.


