A smooth, skin-like base is the easiest way to look polished without looking made-up. “Cakey” makeup happens when product sits on top of the skin in thick layers, clings to dry patches, or gets pushed and rubbed in the wrong way. The good news: most causes are totally avoidable with a few prep habits, the right amounts, and better tools. Below is a complete, practical guide — bold section headers, step-by-step actions — so you (or your readers) can get a flawless finish every time.
Why Makeup Turns Cakey in the First Place
Cakey makeup is simply product accumulation showing texture instead of melting into skin. Common mechanisms:
- Applying too much product at once.
- Putting foundation onto dry, flaky, or poorly prepped skin.
- Using the wrong formula for your skin type (heavy matte on dry skin, thick oil-base on oily skin).
- Rubbing product instead of pressing/blending, which drags product into lines.
- Layering incompatible products (heavy powder over thick cream without allowing absorption).
- Old, dry formulas or dirty tools that apply patchy layers.
Fixing cakiness is about prevention: less product, better prep, and smarter application.
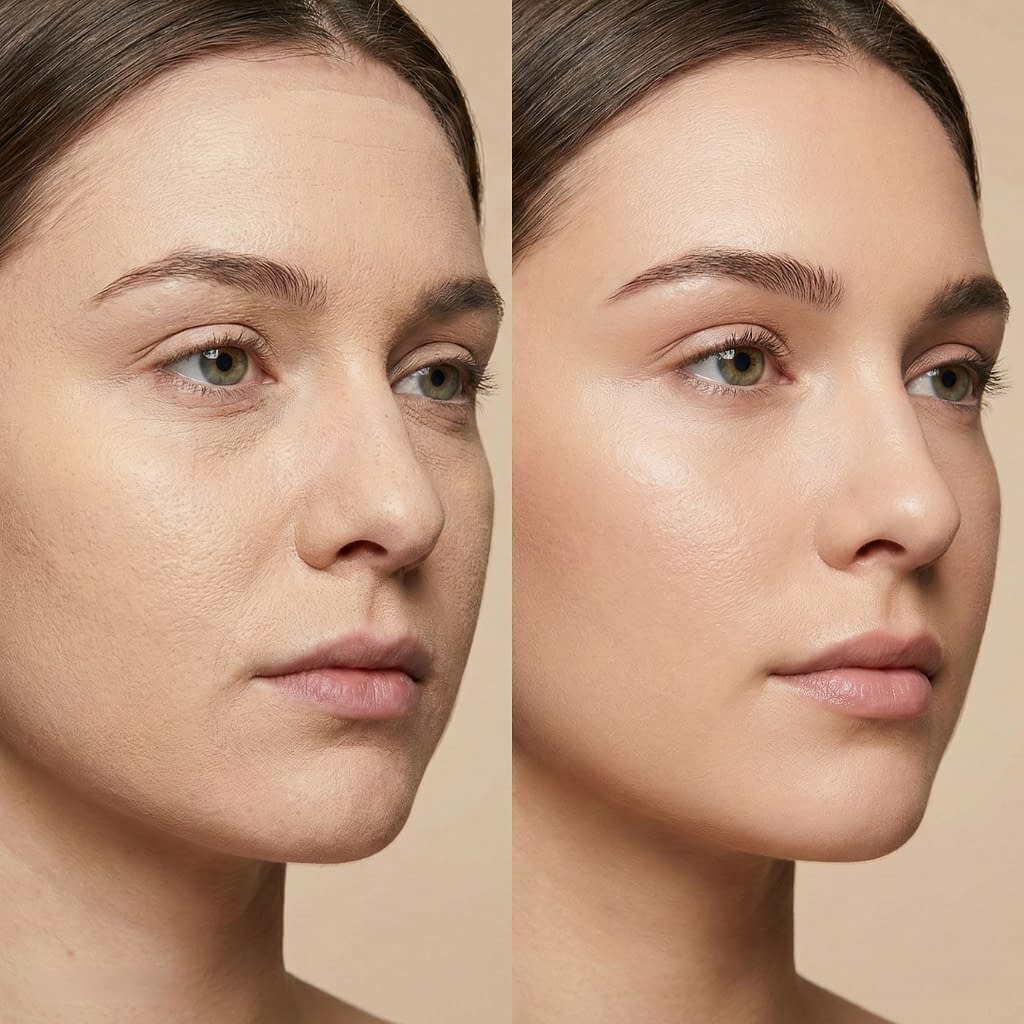
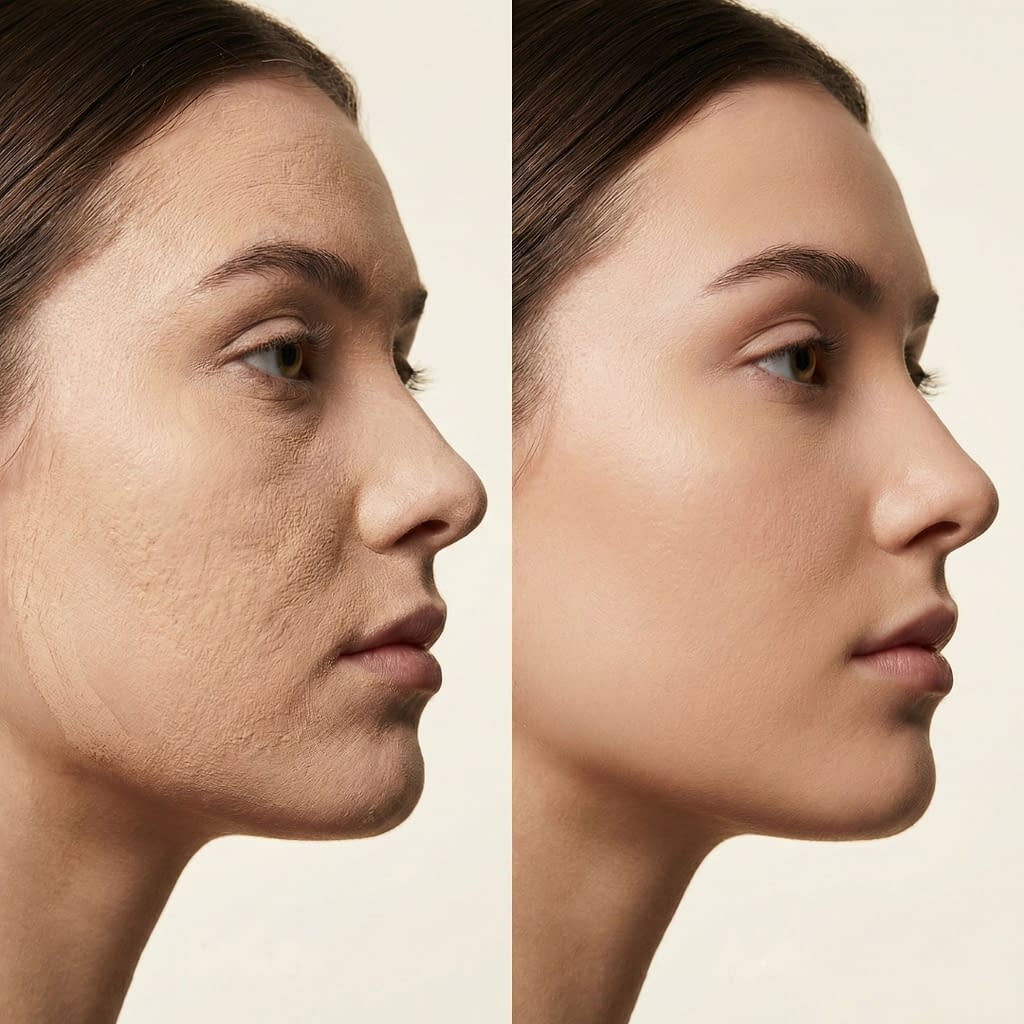
Understanding the Difference Between Smooth vs. Cakey Makeup
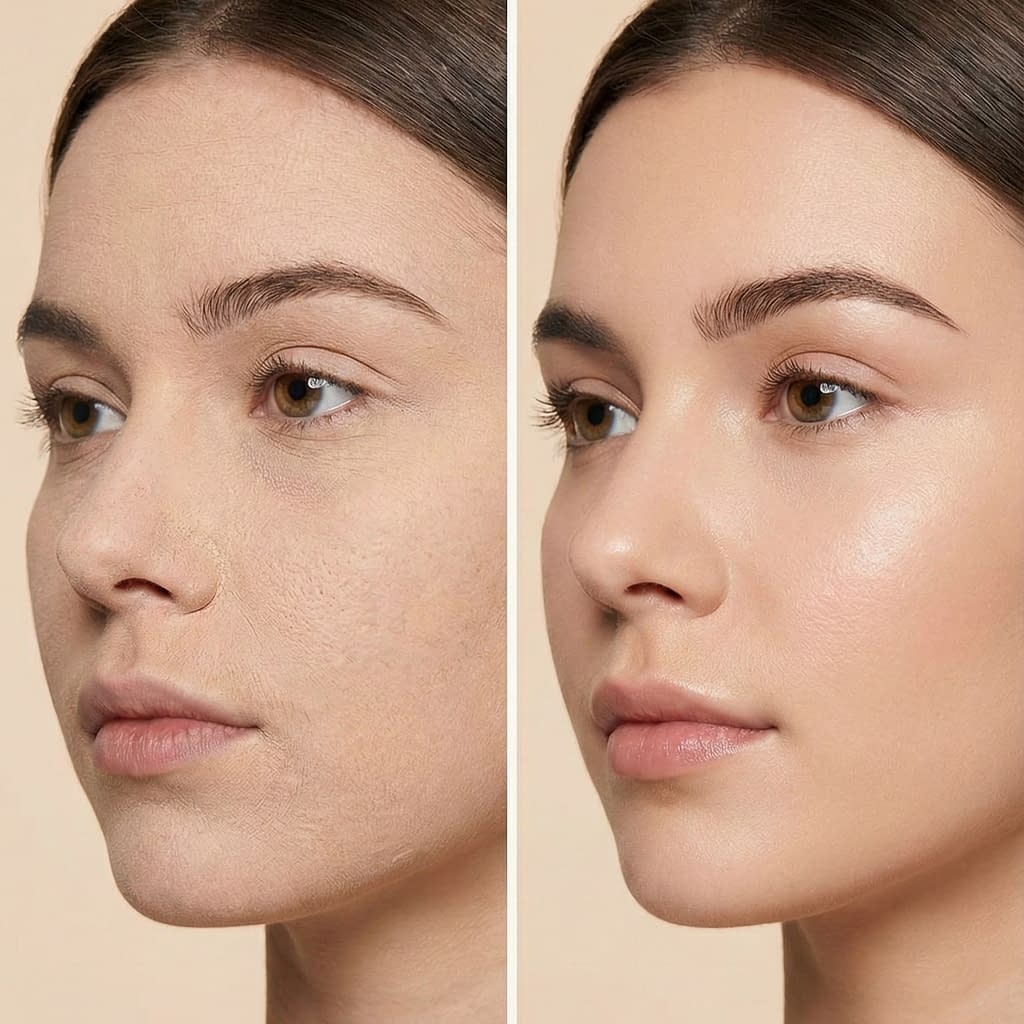
Smooth makeup: thin, even coverage that blurs texture and moves with skin. It’s breathable-looking and shows a little skin through the finish.
Cakey makeup: opaque, sits in pores/wrinkles, looks heavy, and often creases or flakes.
Visual test: smooth makeup will look seamless in natural light and won’t emphasize dry patches; cakey makeup will look like a mask up close or flash photography.
Skin Prep Is Everything: Start With a Clean, Hydrated Base
Step-by-step prep routine (5–10 minutes)
- Cleanse: remove oil, sweat, and product residue with a gentle cleanser. Fresh canvas = smoother finish.
- Tone (optional): a hydrating toner or mist balances pH and adds quick hydration — skip alcohol/strong astringents before makeup.
- Hydrate: apply a lightweight humectant serum (glycerin or hyaluronic acid) to damp skin to draw in moisture.
- Moisturize: follow immediately with your moisturizer (see next section for type). Let it absorb for 1–3 minutes — don’t apply foundation to dripping wet skin.
- Eye care: a thin eye cream helps prevent concealer from creasing. Pat it in and wait a minute.
- Prime selectively (see primer section): only where needed—T-zone, smile lines, or under-eye.
Well-prepped skin equals more slip for foundation and less need for heavy coverage.
Exfoliation Mistakes That Make Makeup Cling and Crack
Over-exfoliation or improper exfoliation increases flakiness; under-exfoliation leaves dead cells that foundation clings to.
Smart exfoliation rules
- Frequency: exfoliate gently 1–2× weekly for most skin types. Sensitive skin: once weekly or use enzyme-based products.
- Method: prefer chemical exfoliants (low % AHA/BHA) or very gentle physical scrubs. Don’t scrub aggressively right before a big makeup day — do it 24–48 hours earlier.
- Patch-test new acids before using on the whole face.
- Don’t combine multiple strong actives (high % acids + retinol) the night before you need a flawless base.
If you see tiny flaky patches the morning you planned makeup, rehydrate and use a damp sponge to press product instead of rubbing.
Choosing the Right Moisturizer for Your Skin Type
The wrong moisturizer can sit under foundation and pill or be too greasy — choose based on skin type.
Quick guide
- Dry skin: richer cream with ceramides, squalane or glycerin; allow 3–5 minutes to absorb before makeup.
- Normal/combination: lightweight cream or gel-cream with humectants + light emollients; balances hydration without excess oil.
- Oily skin: oil-free, water-gel moisturizers with hyaluronic acid and mattifying ingredients; avoid heavy oils under foundation.
- Sensitive skin: fragrance-free, barrier-repair formulas (ceramides, panthenol).
Application tip: apply moisturizer to slightly damp skin to lock in hydration — this reduces the need for heavy foundation.
Primer: When You Need It and When You Don’t
Primers are tools, not mandatory magic.
When to use primer
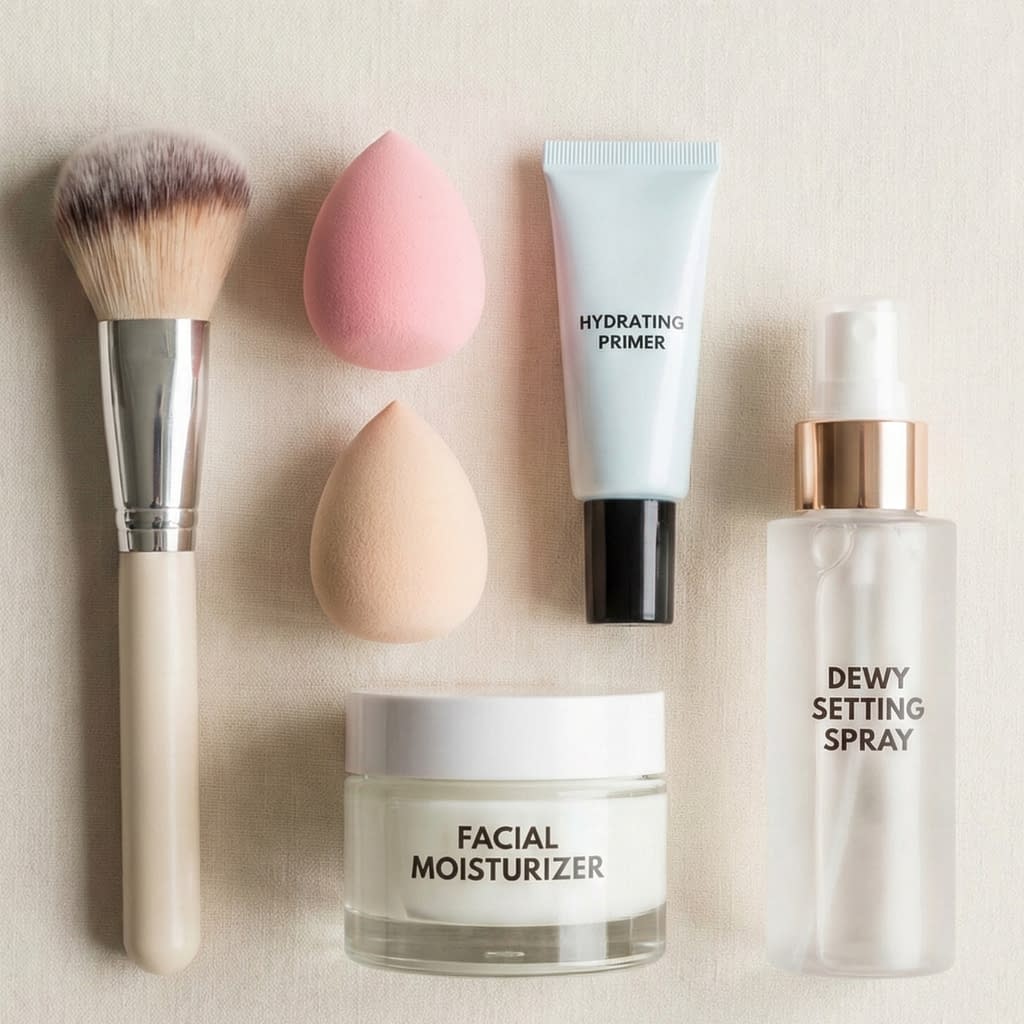
- Use: if you have texture, large pores, or need extra longevity or oil-control. Silicone primers smooth uneven texture; hydrating primers add glow and help thin foundations sit evenly.
- Skip: if your skin is already very smooth and hydrated, or if primer + foundation causes pilling. More products = more chance to pile up.
How to use
- Apply a pea-sized amount only where needed; blend with fingers or a small brush, and let it settle 30–60 seconds before foundation. Too much primer = foundation sliding or clumping.
How Much Foundation Is Actually Enough
You almost always need less than you think.
Practical rule
- Start with a pea-sized amount (or less) for the whole face if using a medium-coverage liquid. For fuller coverage, layer thin amounts rather than one huge dollop.
- Dot foundation in five points (forehead, both cheeks, nose, chin), then blend outward.
- If you need more coverage, add thin additional layers only where required (spots, redness), letting each layer set briefly.
Less product means more skin shows through and less cakey finish.
The Best Way to Apply Foundation for a Skin-Like Finish
Tools and technique matter more than brand.
Tool options & technique
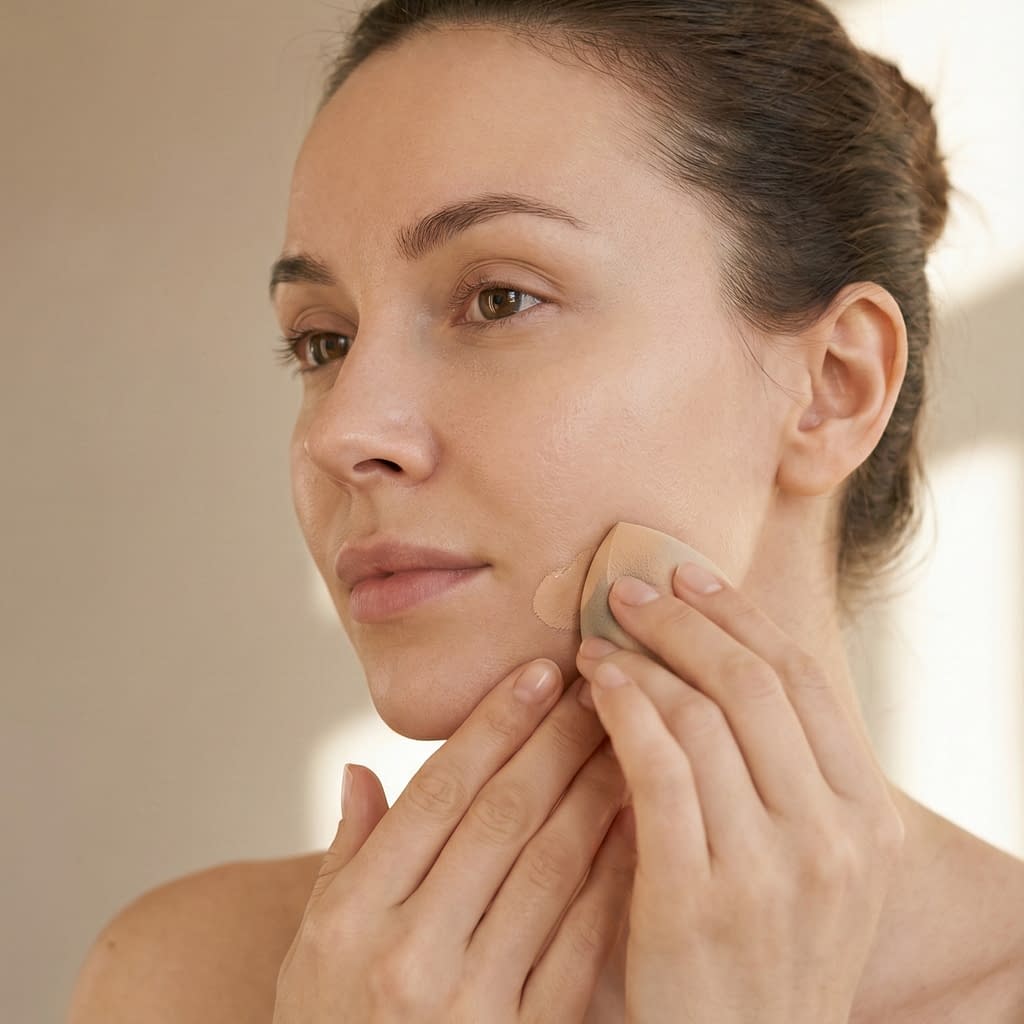
- Damp makeup sponge (recommended): bounces product into skin and compresses pigment into pores for a skin-like finish. Apply small amount; press and bounce (stippling) rather than dragging.
- Dense buffing brush: circular buffing motions can give airbrushed finish if you use thin layers. Use a stippling brush for very thin application.
- Fingers: warm the product and press into skin for natural finish — good for tinted moisturizers and creams. Clean hands first.
Step-by-step
- Dispense small amount on back of hand.
- Pick up product with sponge/brush/fingers.
- Press into center of face outward, using light pressure.
- Build only where needed (under eyes, sides of nose) — avoid slathering the forehead.
- Blend into jawline and neck for seamless transition.
Pro tip: keep motions vertical or stippling for under-eye/cheek area and gentle circular for jaw/forehead; never rub aggressively.
Layering Products Without Overloading the Skin
Layering is about thin, intentional steps.
Layering checklist
- Wait ~10–20 seconds between thin layers to let each settle.
- Alternate texture: apply water-based products (serums) first, then creams, then emulsions, then powders if needed.
- Avoid layering multiple heavy creams and thick foundations — combine lightweight versions instead.
- If using color-correctors or concealers, apply sparingly and press to blend before foundation or apply foundation first then spot-conceal with minimal product.
Think “spot-coverage over a thin base” rather than full-coverage everywhere.
Powder Placement: Where to Set and Where to Skip
Powder is a tool, not a mask.
How to set smartly
- T-zone only: set oily areas lightly with translucent powder using a small puff or brush. Press into skin rather than sweeping to avoid disturbing foundation.
- Under eyes: use a tiny amount of finely milled powder pressed with a damp sponge to prevent creasing — or skip powder and use setting spray if you want dewy under-eyes.
- Cheeks/forehead: skip or use very sparingly; too much powder there looks dry and cakey.
- Baking: avoid heavy baking unless you have very oily skin and need extreme longevity; use minimal product and immediately dust off.
Use a finely-milled, lightweight powder and minimal amounts. Micro-mist setting spray afterwards can melt powder into skin for a natural finish.
How to Fix Cakey Makeup Without Starting Over
Rescue techniques when things already look heavy.
Quick fixes
- Hydrating mist + damp sponge: lightly mist face and use a damp sponge to press and blend the top layer — this often “dissolves” cakiness.
- Spot-swipe: use a micellar water-soaked cotton bud to remove tiny excess in creases (under eye corners, smile lines) then re-blend.
- Blot and reapply: blot shiny or thick areas with a blotting paper, then press a tiny amount of fresh product only where needed.
- Light oil for dry skin: a single drop of facial oil warmed and pressed over the outer layer can add slip and melt heavy powder for dry skin types (use cautiously — not for oily skin).
- Avoid rubbing: never rub to “blend” — pressing and patting is the safest.
If the look is extremely heavy, wiping and reapplying the base may be faster — but try the sponge+misting press first.
Makeup Tools That Make or Break a Smooth Finish
Clean, quality tools are high ROI.
Essentials
- Damp beauty sponge (replace often / clean weekly) — best for a breathable finish.
- Dense buffing brush for liquids/creams (clean weekly).
- Small precision brush or fingers for spot concealing.
- Soft fluffy brush for delicate powder placement.
- Clean sponge or cloth to press and remove excess product.
Tool care: wash brushes and sponges regularly; product buildup causes patchiness and uneven application.
Common Application Mistakes That Ruin an Otherwise Good Base
Avoid these pitfalls
- Applying foundation on dry flakes — always rehydrate first.
- Applying thick layers to hide texture — it makes texture more visible.
- Rubbing makeup around instead of pressing/blending.
- Using heavy, matte formulas on dry skin without a hydrating base.
- Skipping shade testing in natural light — wrong shade can read cakey or mask-like.
- Overusing powder to “set” — powder accumulates and looks heavy in photos.
Fix the root cause rather than piling on more product.
Final Words
Smooth, non-cakey makeup is mostly about respecting the skin: hydrate well, exfoliate wisely, choose formulas that match your skin type, use thin layers, and apply with the right tools and techniques. Start with a minimal base, build only where necessary, and use mist + pressing to melt products into the skin if things look stiff. With practice you’ll learn how much product your skin really needs — and you’ll likely use less while getting better results.


