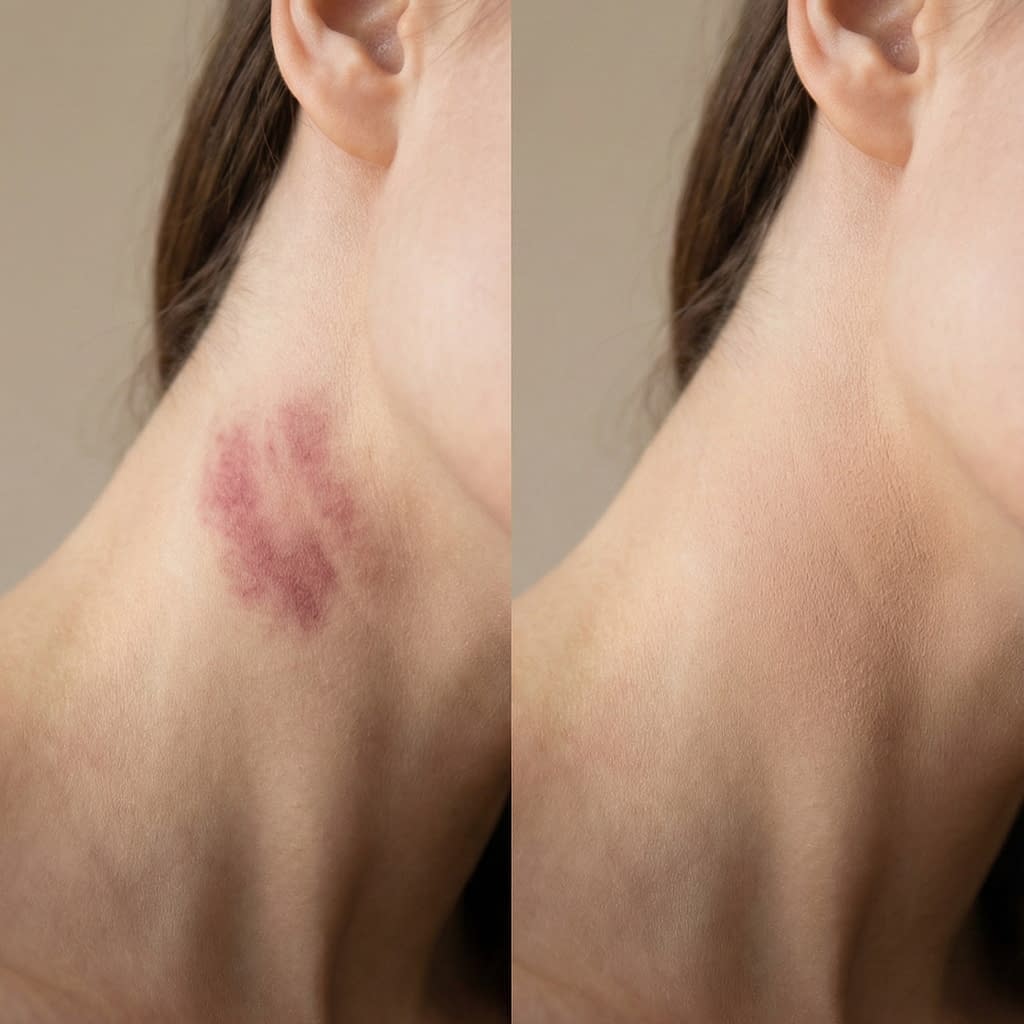
Hickeys are basically bruises caused by broken tiny blood vessels under the skin — and because they sit on visible areas like the neck or chest they can feel awkward. The good news: with the right color-correction technique, careful blending, and smart setting, you can make a hickey practically invisible for hours. Below is a step-by-step, realistic, skin-safe guide that covers color theory, prepping the skin, correcting and concealing for every skin tone, long-wear setting tips, and a few makeup-free tricks to help the bruise fade faster.
What Hickeys Are and Why They’re Hard to Cover
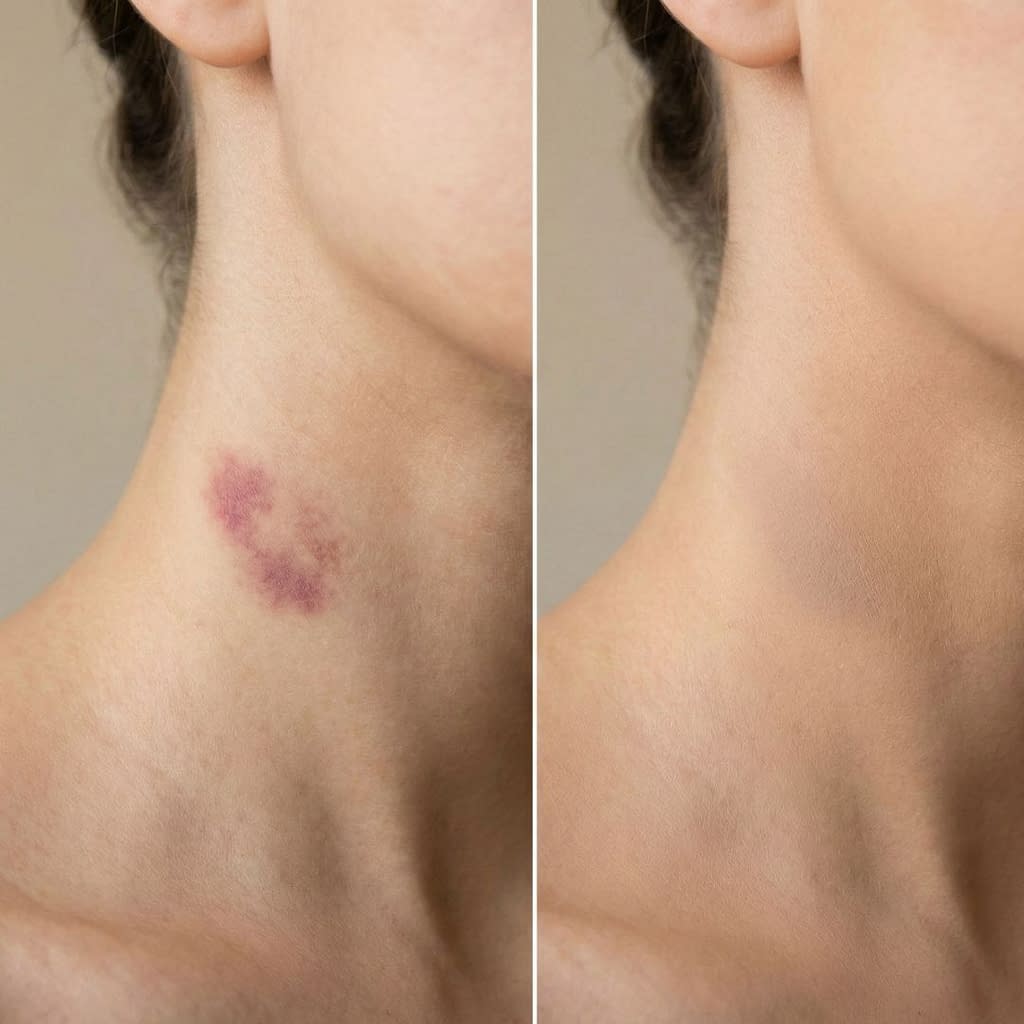
A hickey (a superficial bruise) is caused when small blood vessels under the skin rupture and blood pools in the tissue. That pooled blood creates the dark, often purple/blue/red patch we see on the surface. Because the discoloration sits below the surface layer of skin, simply slapping on foundation usually leaves the mark visible — you need to neutralize the color first (color correction), then build seamless coverage on top without creating a cakey patch.
Understanding Hickey Colors and Stages of Healing
Bruises change color as they heal — that’s important because each color needs a different correction approach:
- Fresh/red hickeys (0–2 days): bright red or pink — easiest to neutralize with a tiny touch of green-corrector before concealer.
- Purple/blue hickeys (2–7 days): common mid-stage color — counter with peach/orange correctors depending on skin tone.
- Green/yellow hickeys (7+ days): late-stage fading — yellow or peach correctors help neutralize green.
Knowing the dominant hue will tell you which corrector to choose.
Why Color Correction Is the Key to Hiding Hickeys
Color correction uses the color wheel: opposites cancel each other out. A thin layer of the right corrector makes the hickey visually closer to skin tone, so your concealer and foundation don’t have to be thick. Correcting first = less product, a more natural finish, and lower risk of creasing or rubbing off.
Choosing the Right Color Corrector for Your Hickey
Quick cheat sheet:
- Red hickey: tiny amount of green corrector.
- Purple / blue hickey: peach to orange corrector (deeper orange for darker skin tones).
- Green-ish bruise: yellow or peach corrector, depending on underlying tone.
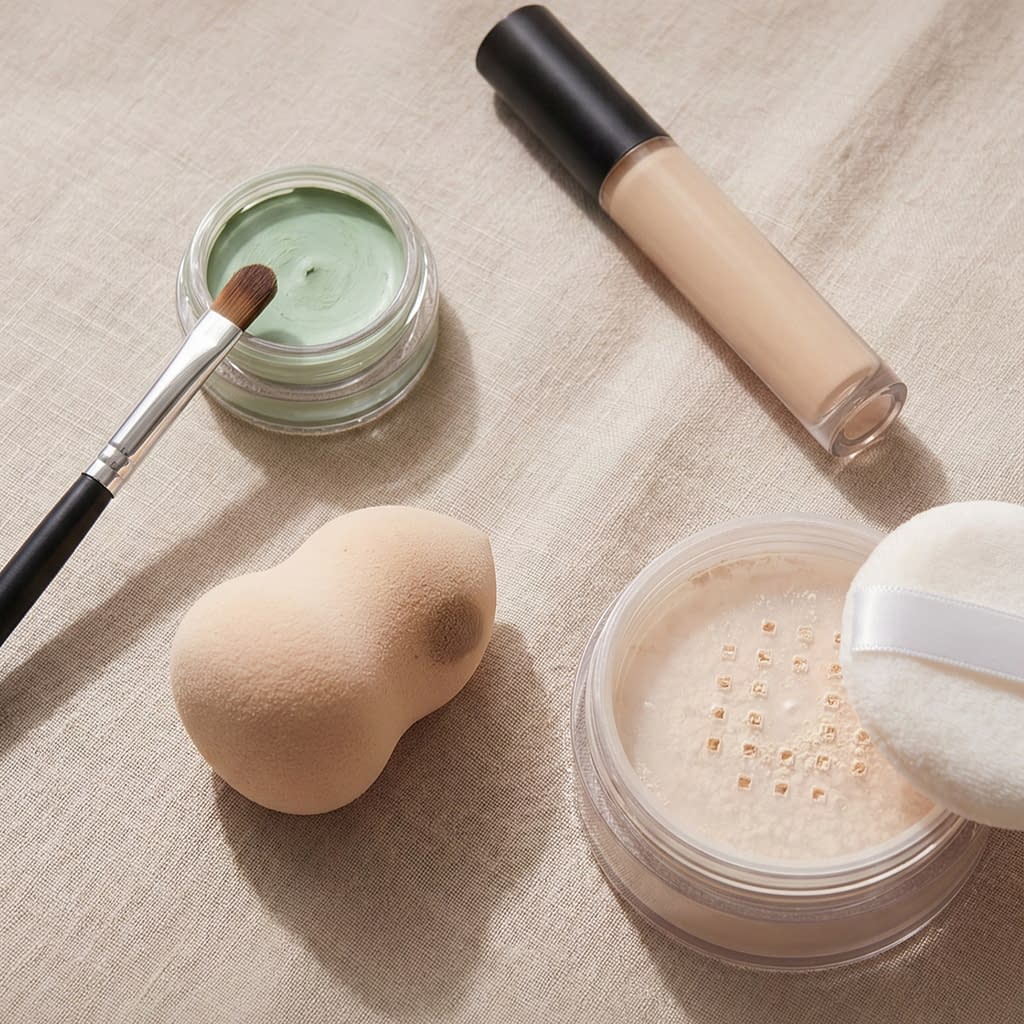
Product format: creamy color correctors (cream sticks, pots) or highly pigmented concealers work best for small targeted areas. Pick a product labeled “high coverage” and fragrance-free if your skin is sensitive.
How to Prep the Skin Before Applying Makeup
Good prep = smooth application + longer wear.
Step-by-step:
- Clean the area with a gentle cleanser or micellar water so oils don’t stop the product from sticking. Pat dry.
- Soothing step (optional): if the bruise is tender, a cold compress before makeup can reduce swelling and redness. Don’t apply makeup to broken skin.
- Moisturize lightly — use a thin, fast-absorbing lotion or serum. Wait 30–60 seconds so the surface isn’t oily.
- Prime (optional for longevity): if you want extra staying power, use a very small dot of a mattifying or smoothing primer, lightly tapped over the area and blended out to the surrounding skin. Let it set 30–60 seconds.
Step-by-Step: Color Correcting a Hickey Properly
Precision is everything — small, thin layers win.
- Choose the corrector that matches the color chart above.
- Apply sparingly: use a tiny brush or the tip of a clean fingertip to deposit a very small amount of corrector only where the hickey is. Less is better — you can always add more.
- Tap, don’t rub: blend the corrector edges by gently tapping with a small sponge or your fingertip so the product sits in the discoloration without spreading outward.
- Thin layers: if the color still shows, add another paper-thin layer and tap again. Avoid thick globbing — that’s what cakes.
- Let it set: wait ~30 seconds so it slightly dries before moving on to concealer.
Applying Concealer Without Making It Look Heavy

After correcting, choose a full-coverage concealer close to your actual skin tone.
Step-by-step:
- Tiny dots: dot a creamy, full-coverage concealer over the corrected area — again, start small.
- Press to blend: use a damp beauty sponge or a small paddle brush to press the concealer into the corrector and skin — avoid dragging motions that remove product or cause streaks. Pressing helps the layers meld.
- Feather the edges: blend the edges outward softly so there’s no abrupt border between covered and natural skin.
- Add another thin layer if needed: for very stubborn discoloration, add a second thin concealer layer and press again.
- Don’t overdo the neck: blend the edges into the neck/chest so the covered area matches surrounding skin in color and texture.
How to Blend Makeup Seamlessly Into the Neck or Chest
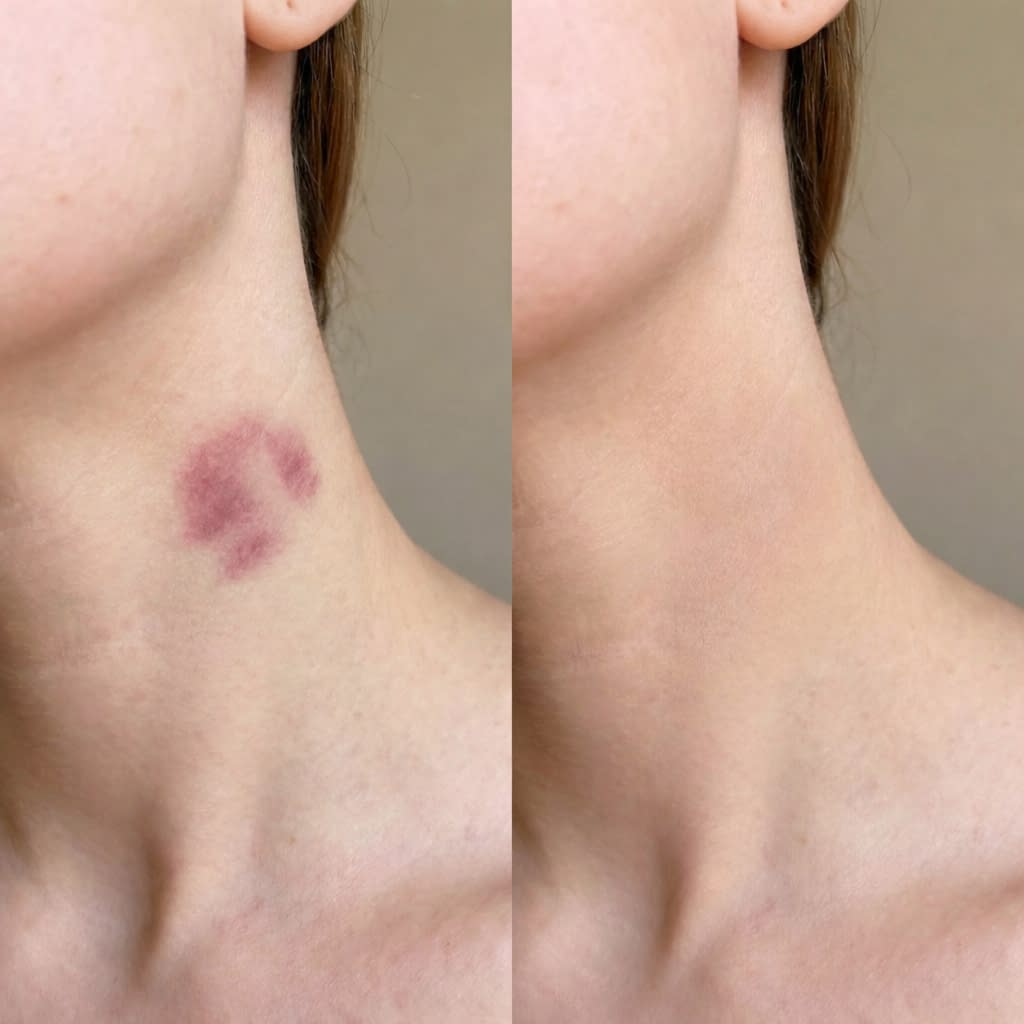
Hickeys are usually in visible areas where the neck meets the jaw — blending into surrounding skin prevents “spotty” patches.
Technique:
- Use a damp sponge to lightly buff the outer edges of the concealer into the neck area.
- If your foundation is separate, apply a tiny amount of foundation to a clean area of the sponge and lightly sweep it from the neck upward to merge tones.
- If the chest shows more texture or hair, use slightly less product and avoid heavy powders that catch on hair.
- Check in natural light (or a phone camera selfie) to ensure there’s no obvious circle of coverage.
Setting Makeup So It Lasts All Day
Setting is essential to avoid transfer and smudging.
Steps:
- Lightly set with finely milled powder: using a small fluffy brush or a velour puff, press a thin layer of translucent or skin-tone powder only on the concealed spot. Pressing locks product in place; sweeping can remove it.
- Use a setting spray: finish with a quick spritz of long-wearing setting spray from ~20–30 cm away to meld layers and reduce powdery appearance.
- Clothing precautions: before putting on tight collars, let makeup set 2–3 minutes and pat with tissue where clothing will touch if needed.
How to Hide Hickeys on Different Skin Tones
Adjust corrector shade intensity to match skin depth.
General rules:
- Fair to light skin: peach / light salmon correctors neutralize blue/purple best. Green for bright red. Use lighter concealer shades.
- Medium/tan skin: deeper peach or soft orange correctors work for purple/blue; green for red as usual. Choose concealer that matches warm undertone.
- Deep/dark skin: use rich orange / red-orange correctors for blue-purple bruises (these are stronger pigments). Most light peach correctors will under-correct darker tones. Use a concealer with enough depth and warmth to match surrounding skin.
- Always test on a small area or the inner jawline to ensure the corrected tone will neutralize properly. The goal is that after corrector + concealer + powder the spot looks like the rest of the neck.
Common Mistakes That Make Hickeys More Noticeable
- Applying too much product — looks cakey and obvious.
- Choosing the wrong corrector shade (e.g., peach on deep purple hickeys for dark skin) — undercorrection shows through.
- Rubbing/blending aggressively — removes product and creates streaks.
- Not setting — product transfers to clothes or rubs off.
- Using heavy powder over hairy areas — powder clings to hair and draws attention.
- Applying makeup to broken or irritated skin — wait and care for healing skin instead.
Makeup-Free Tricks to Help Hickeys Fade Faster
These are supportive measures (not instant camouflage) and generally safe — stop if anything worsens the area.
- Cold compress (first 24–48 hours): helps limit swelling and reduce blood pooling. Wrap ice in cloth and apply for short sessions (10 min).
- Warm compress (after 48 hours): promotes circulation to help break up pooled blood. Use warm, not hot, compresses for 10–15 minutes a few times a day.
- Arnica gel or cream: commonly used topically for bruising (patch test first); evidence is mixed but many people find it calming.
- Vitamin K topical serums are marketed for bruises — they may help with color normalization for some people.
- Gentle massage (after a few days): very light circular massage around (not directly on) the bruise can encourage lymphatic drainage; be gentle and stop if painful.
- Always avoid picking or aggressive rubbing.
If the hickey doesn’t improve or the area becomes infected, seek medical advice.
How to Prevent Makeup From Transferring Onto Clothes
Hickeys are often on collarlines and can rub off — prevent transfer with these tips:
- Patience: allow full setting time before putting on clothes (2–5 minutes).
- Use minimal product and set by pressing powder rather than sweeping.
- Barrier layer: on the outermost thin edge you can lightly dust a little extra powder and press it, which reduces transfer — but don’t overdo it.
- Wear looser collars or a scarf while makeup is fresh if you must change quickly.
- Blot test: after finishing, press a tissue on the area to see if product lifts — if it does, add a light setting spray and press again.
- Keep touch-up products (small concealer or powder) in your bag for emergencies.
Final Words
Hiding a hickey with makeup is a combination of color-smart correction, ultra-thin layers, gentle pressing for blending, and proper setting. Pick the corrector that neutralizes the dominant hue, work in feather-light layers, press blend with a damp sponge, and lock everything with powder + setting spray. For darker skin tones, remember to use stronger orange/peach correctors for blue-purple marks. And whenever possible, combine makeup camouflage with gentle healing measures (compresses, arnica) to speed fading.


