Great makeup doesn’t start with foundation — it starts with skin. The better the canvas, the easier foundation, concealer, and powder lay down (and the longer they stay put). This long, practical guide walks you through every step — cleansing, exfoliating, toning, hydrating, treating, eye prep, priming, lip prep — plus pro tips and product suggestions so you can build a routine that makes any look look better.
Why Skin Prep Is the Secret to Flawless Makeup
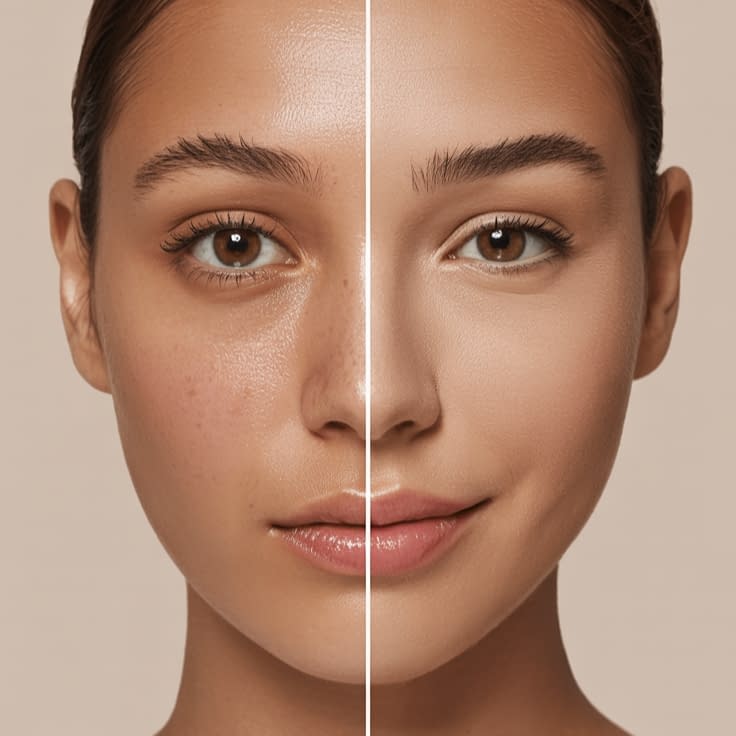
Think of makeup as paint and your skin as the surface. If the surface is textured, dry, oily, or irritated, the “paint” will cling to flaws and look uneven. Prepping skin:
- removes excess oil, makeup residue, and dead skin cells so foundation sits smoothly;
- restores hydration so products don’t flake or cake;
- calms inflammation and reduces redness so correctors and concealers work less hard; and
- protects your skin (sunscreen!) so makeup doesn’t replace basic skin health.
One last non-negotiable: sunscreen under makeup is essential — it should be the last skincare step in your morning routine before makeup to protect skin from UV damage and help long-term skin health. Cleveland Clinic
Step 1: Cleanse
Start with a Fresh Canvas: Gentle Cleansing for Clear Skin
Why: A clean face removes oil, sweat, and product residues so the rest of your prep actually gets absorbed.
How to do it — step by step
- Choose the right cleanser. For most people a gentle, non-stripping cleanser (gel for oily/combination, cream for dry/sensitive) is best. If you’re wearing heavy or waterproof makeup, start with an oil or balm cleanser and follow with your regular cleanser (double cleanse). Recommended gentle basics include Cetaphil or CeraVe-type formulas for balance and tolerance. New York Magazine+1
- Use lukewarm water. Hot water strips oils; cold water doesn’t rinse away makeup as well.
- Massage for 30–60 seconds. Spend time on the T-zone and jawline where oil and product hide.
- Rinse fully and pat dry. Don’t rub. Leave skin slightly damp for follow-up hydrating products (they absorb better on slightly damp skin).
Pro tip: If you remove heavy eye makeup, use a gentle micellar water or cleansing balm on the eyes first, then continue the face cleanse.
Step 2: Exfoliate
Remove Dullness: Why Exfoliation Makes Makeup Glide On
Why: Exfoliation eliminates dead skin and surface texture that causes foundation to cling, cake, or pill. It smooths the skin so foundation spreads evenly and looks natural. Chemical exfoliants (AHAs for surface texture, gentle brightening; BHAs like salicylic acid for oily, acne-prone skin) are usually more even and less abrasive than scrubs. Many pros recommend using chemical exfoliation 1–3× per week depending on tolerance — more often for very resilient skin, less for sensitive skin. Over-exfoliation can damage the skin barrier and make makeup look worse, so start slow. Beautyblender+1
How to exfoliate — step by step
- Decide the method: chemical AHA (glycolic/lactic) for dullness; BHA (salicylic) for congested or oily skin; gentle physical scrub (fine sugar) for very sparse use.
- Patch test first. If you’re new to acids, test on a small area for 48 hours.
- Use it at night (usually). Many acids sensitize to sun; better to use in evening and always follow with sunscreen in the morning.
- Timing before makeup: If using a leave-on chemical exfoliant, apply it in your evening routine. For a daytime exfoliating wipe or enzyme exfoliant (very mild), leave at least 10–20 minutes before applying makeup and hydrate thoroughly. Don’t exfoliate immediately before a major event — give skin 12–24 hours if you’re using stronger acids.
- Frequency: Start 1× weekly → increase to 2–3× weekly as tolerated for most skin types.
Product note: Paula’s Choice 2% BHA is a classic, dermatologist-loved option for clearing pores and smoothing skin texture. Paula’s Choice
Step 3: Tone
Balance and Prep: The Power of Using a Toner Before Makeup
Why: Modern toners are less about “pH correction” and more about targeted hydration and prepping the skin. A hydrating toner (hyaluronic acid, glycerin, soothing botanical extracts) helps even skin texture and provides a light hydration base so serums and moisturizers layer smoothly.
How to use a toner — step by step
- Pick the right toner: Look for alcohol-free, hydrating toners with humectants (hyaluronic acid, glycerin) or calming ingredients (green tea, niacinamide) — avoid astringent formulas that dry you out.
- Apply gently: Pour a few drops into palms and press into skin (patting method) or use a cotton pad and sweep gently. Pressing helps absorption and reduces product waste.
- Wait ~30 seconds for it to sink in before moving to serums/moisturizer.
Pro tip: If you have uneven texture or oiliness, a toner containing a low concentration of AHA/BHA (used cautiously) can be helpful — but avoid layering multiple actives at once before makeup.
Step 4: Hydrate
Hydrate Like a Pro: Moisturizing for Smooth, Plump Skin
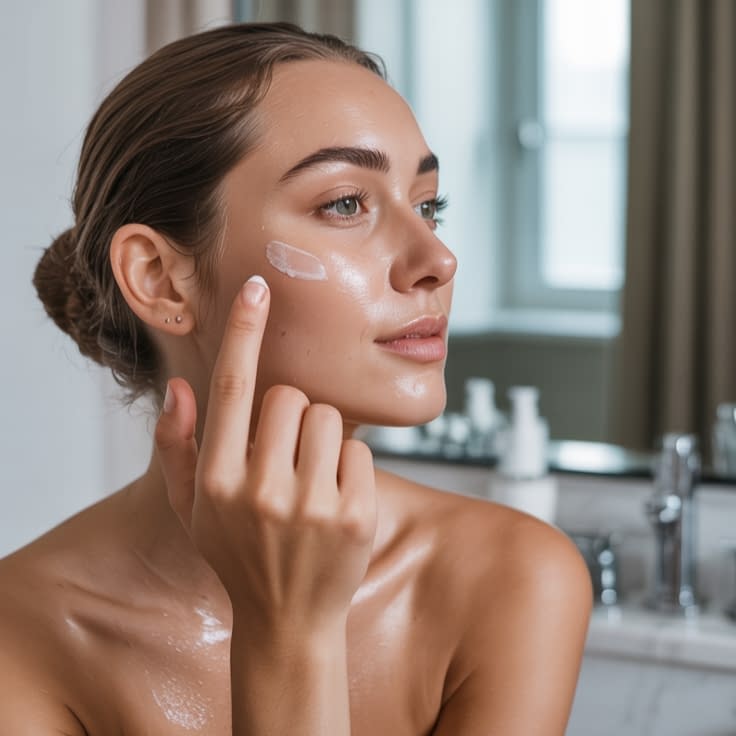
Why: Hydrated skin has more bounce and reflects light more evenly. Dehydrated skin causes foundation to settle into fine lines and look cakey. A good moisturizer creates a smooth, elastic base.
How to hydrate — step by step
- Choose moisturizer by skin type:
- Dry: richer cream with occlusives (shea butter, ceramides, petrolatum).
- Normal/combination: lightweight lotion or gel-cream (hyaluronic acid + glycerin).
- Oily/acne-prone: oil-free, non-comedogenic gel or lotion with humectants and lightweight oils.
(Widely recommended hydrating options like La Roche-Posay Toleriane and Neutrogena HydroBoost are praised for layering under makeup.) InStyle+1
- Apply while skin is slightly damp. This traps moisture and improves absorption.
- Don’t overdo it. Use enough to hydrate, not saturate. Too much cream can cause foundation to slide or separate.
- For extra dry patches: use a light occlusive (vaseline/petrolatum) only on those spots and blend carefully.
Timing tips: Allow moisturizer to absorb (~1–3 minutes) before applying primer or sunscreen.
Step 5: Treat Skin Concerns
Targeted Treatments: Serums for Brightening, Acne, and Pores
Why: Serums are concentrated treatments that address specific concerns — pigmentation, texture, excess oil, and fine lines — so your makeup needs less heavy coverage and looks more natural.
How to use serums before makeup — step by step
- Pick one targeted serum (AM-compatible) depending on need:
- Brightening / antioxidant: Vitamin C serum (topical vitamin C can protect against free radicals, improve radiance, and support sunscreen protection). Use in the morning under sunscreen. PubMed Central+1
- Pore control / oiliness: Niacinamide helps regulate oil and reduce the look of pores (well tolerated and makeup-friendly).
- Hydration boosters: Hyaluronic acid serums for instant plumpness under makeup.
- Layer thin → thick: Apply water-based serums first, wait ~30–60 seconds to absorb, then moisturizer.
- Avoid mixing too many actives in the immediate pre-makeup routine (e.g., don’t layer a fresh retinoid under daytime makeup). Use stronger actives like retinoids at night, and vitamin C/niacinamide/hyaluronic in AM as needed. ACOFP ORG
Pro tip: If you have acne or active blemishes, spot-treat at night rather than before makeup to avoid irritation; a light, non-comedogenic primer helps conceal without clogging.
Step 6: Eye Prep
Don’t Skip the Eyes: Prepping the Undereye for Concealer
Why: The under-eye area is thin and dehydrated, so without prep concealer can crease and cake, making you look older and tired.
How to prep the undereye — step by step
- Hydrate first: Apply a tiny dot of a lightweight eye cream or gel with hyaluronic acid or caffeine to de-puff. Pat, don’t rub. Give it 60 seconds to absorb. (Rollerballs or cooling metal applicators can help reduce morning puffiness.) GQ
- If you have texture or fine lines: use a light hydrating primer on delicate skin around the orbital bone only — not thick occlusives which can make creasing worse.
- For darkness: use a thin, peach/rose corrector before concealer if needed, then a hydrating concealer pressed in with a damp sponge.
- Set lightly: use a very small amount of finely milled translucent powder only where creasing occurs; too much powder ages the area.
Pro tip: Use very small amounts of product — undereye skin needs minimal product. Build coverage gradually.
Step 7: Prime

Lock In the Base: Choosing the Right Makeup Primer for Your Skin Type
Why: Primer smooths skin texture, controls oil, hydrates dry patches, blurs pores, and extends foundation wear. The “right” primer depends on your skin: hydrating primers for dry skin, silicone/pore-filling primers for oily/large-pored skin, and smoothing luminizers for mature skin.
How to prime — step by step
- Select primer by goal:
- Hydration/Glow: silicone-free, water-based, or oil-based luminous primers.
- Oil control / pore blur: silicone-based blurring primers (e.g., Smashbox Photo Finish or similar) fill fine lines/pore shadows and create a matte base. Byrdie+1
- Color-correcting: tint-primers for redness or sallowness.
- Apply a pea-sized amount for the whole face (less is more). Focus on problem zones (T-zone for oil, cheeks for dryness).
- Let it set ~30–60 seconds before foundation so it forms a tacky-but-not-wet layer that helps foundation adhere.
- Choose silicone vs water-based based on skin chemistry: silicone-based primer often gives longer wear but can pill if layered over certain skincare (test combos).
Pro tip: If you wear sunscreen, choose a primer that layers well over your sunscreen (some primers ball up on certain sunscreens). A lightweight hydrating primer often layers best.
Bonus: Lip Prep
Soft, Smooth Lips: Quick Lip Care Before Lipstick
Why: Lipstick highlights texture; chapped lips make even creamy lipstick look dry.
How to prep lips — step by step
- Exfoliate gently: Use a sugar scrub or a soft toothbrush to lightly slough dead skin — do this only if needed (1× weekly).
- Apply an occlusive balm: A petrolatum or lanolin balm 10 minutes before lipstick gives a smooth base. Blot excess with tissue before applying longwear lipstick. Avoid heavy oils under matte liquid lipstick (they’ll make it slip). Health
- Prime if needed: a thin layer of translucent balm or primer on the lip keeps longwear formulas from settling into lines.
Pro Tips
Extra Prep Tips: What Makeup Artists Do That You Don’t
- Start prepping skin 1–2 weeks before a big event. Consistent hydration and sleep improve skin texture more than last-minute hacks. (Professionals often prep clients ahead of shoots.)
- Use a damp beauty sponge for foundation application — it helps thin and blend product seamlessly for a skin-like finish.
- Apply thin layers and build coverage. Heavy first layers cake and move.
- Set strategically: set bright under-eyes lightly; set oily zones with a mattifying powder; leave luminous cheeks mostly untouched until finishing spray.
- Finish with a setting spray to meld powder and liquid into a single, skin-like finish — it reduces powdery texture.
- Match textures: avoid using silicone-heavy primers with water-based, peely sunscreens; test combinations to prevent pilling.
Product Recommendations
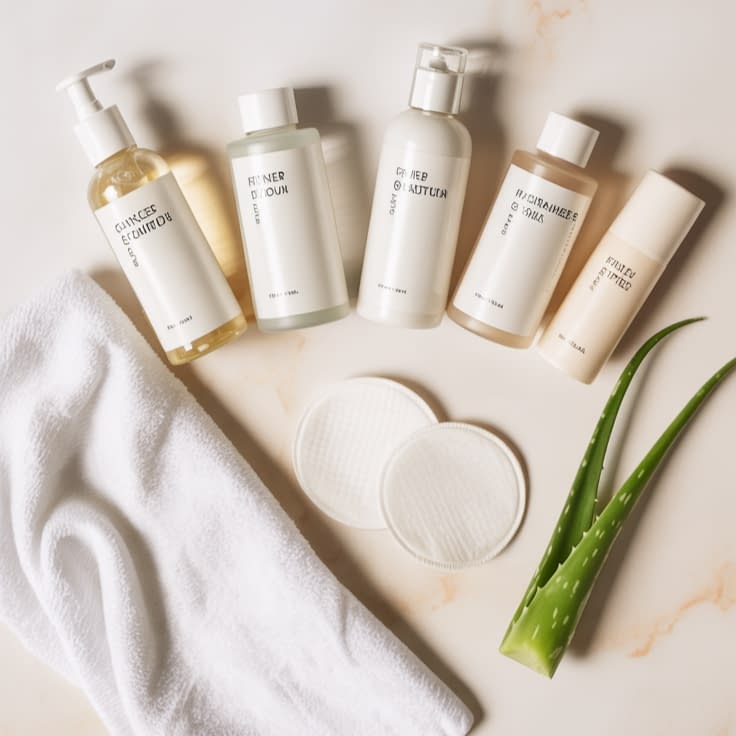
Best Skin Prep Products for Every Skin Type (practical picks and why)
Below are widely recommended, easy-to-find product types and examples that testers and dermatologists often recommend for prepping skin. (I list well-regarded options so you can research/try the one that fits your budget and skin.) Remember: always patch-test new products.
- Gentle cleansers (everyday): Cetaphil Gentle Skin Cleanser — gentle, non-stripping choice for many skin types; use for AM/PM basic cleanse. New York Magazine
- Makeup-removing balms (heavy makeup): Clinique Take The Day Off Cleansing Balm — emulsifies longwear makeup and is a makeup-artist favorite for double-cleansing. Glamour
- Chemical exfoliant (BHA): Paula’s Choice 2% BHA Liquid Exfoliant — cult favorite for smoothing texture and clearing congested pores; a good place to start for oily or textured skin. Paula’s Choice
- Hydrating moisturizer (under makeup): La Roche-Posay Toleriane Double Repair or Neutrogena HydroBoost Gel-Cream — lightweight, hydrates well and layers smoothly under makeup. InStyle+1
- Vitamin C serum (AM): choose a stable L-ascorbic acid formula or a stable derivative product; vitamin C helps brighten and works synergistically with sunscreen. (Research supports vitamin C’s role as an antioxidant and topical brightener.) PubMed Central+1
- Eye prep: look for gel/roller formulas with caffeine + hyaluronic acid for morning depuffing; rollerball eye sticks are popular for quick wake-up. GQ
- Primers (by need): Smashbox Photo Finish Smooth & Blur — pore-blurring and mattifying; hydrating primers (Armani Luminous Silk, or similar hydrating formulas) for dry skin; pick oil-control primers for oily skin. Byrdie+1
- Sunscreen for under makeup: EltaMD UV Clear or La Roche-Posay Anthelios (lightweight face formulas) — look for broad-spectrum SPF 30+ that layers well under makeup. Sunscreen is non-negotiable. Glamour+1
- Lip balm: choose occlusive-rich balms with petrolatum, ceramides, or squalane for nightly repair and quick pre-makeup smoothing. Avoid menthol or strong flavors that can irritate. Health
Note: These examples are representative and well-regarded in multiple tester/editorial roundups and dermatologist discussions — always check ingredient lists and patch-test if you have sensitive skin.
Final Thoughts
The Perfect Makeup Starts Before Foundation
Flawless makeup is mostly preparation: clean skin, gentle exfoliation, targeted treatments, good hydration, careful eye prep, the right primer, and sunscreen. Start with a simple but consistent routine (cleanse → hydrate → treat → sunscreen → prime), test products in small amounts, and build up a prep ritual that suits your skin type. Over time, you’ll spend less effort concealing and more time celebrating the skin you’ve prepared.
FAQ — Frequently Asked Questions About Skin Prep for Makeup
Q: Can I exfoliate the same day I have an event?
A: You can, but avoid aggressive in-office peels or strong actives the same day. Use gentle exfoliation (a mild enzyme or light AHA wipe) at least several hours before makeup and hydrate well. Stronger peel-type treatments are best done days or weeks earlier.
Q: Should I use moisturizer or primer first?
A: Moisturizer first (hydration), then primer (creates the surface/texture for makeup). Wait 30–60 seconds after moisturizer for it to absorb before primer.
Q: Can I skip primer?
A: Yes — if your skin is well prepped, lightweight primers are optional. Primers are most helpful for specific concerns (large pores, oil control, extra slip for longwear).
Q: Do I need sunscreen if my foundation has SPF?
A: Yes — foundation SPF is usually not applied in a thick enough layer to provide sufficient protection. Apply a dedicated broad-spectrum SPF 30+ under makeup. Byrdie
Q: I have sensitive skin — what should I avoid before makeup?
A: Avoid new strong actives (retinoids, high-concentration acids) the day of makeup; favor fragrance-free, hypoallergenic cleansers and lightweight hydrating serums. Patch-test anything new.


