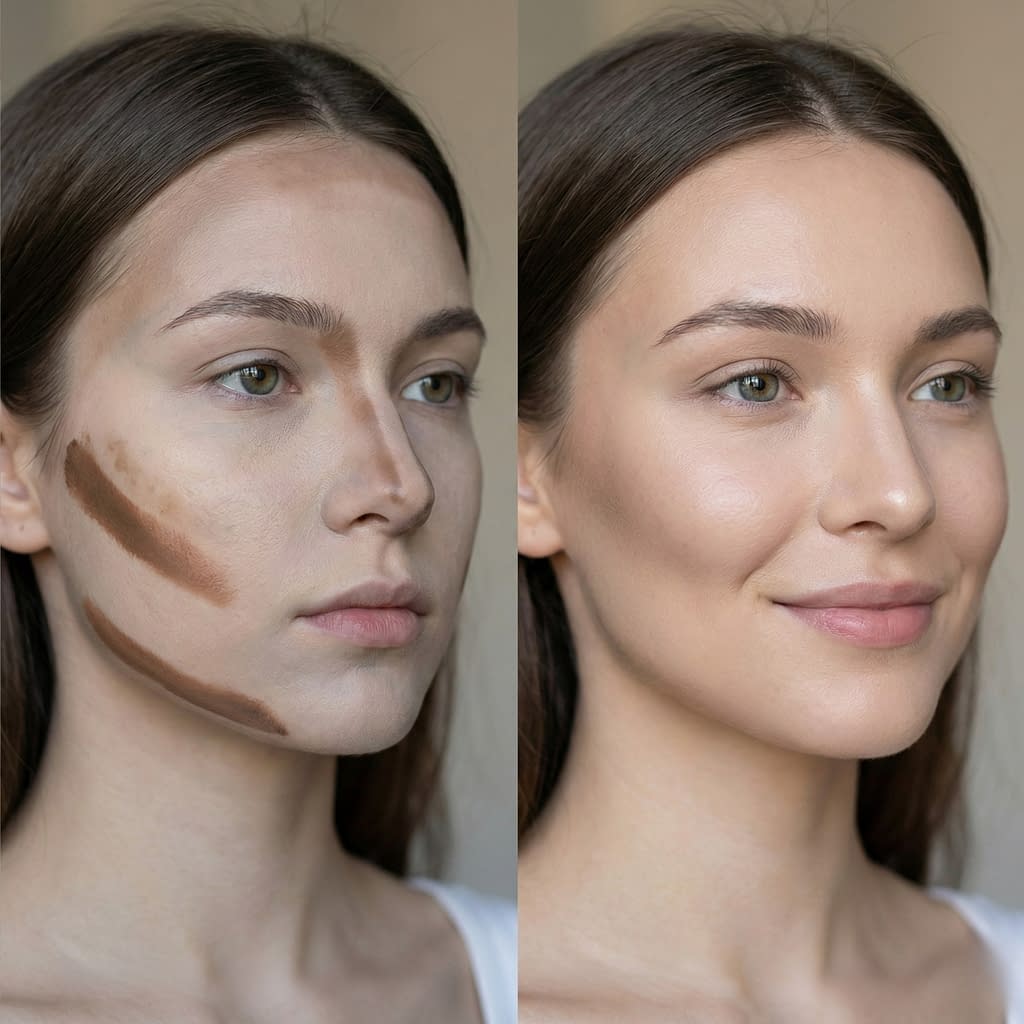
Contouring isn’t cheating — it’s makeup engineering. With the right knowledge and technique you can subtly reshape shadows and highlights to emphasize your best angles, slim areas you want toned down, and lift features that benefit from light. The trick is to look like you — just a refreshed, more sculpted version. Below is a patient, practical, step-by-step guide that covers everything: how contour works, mapping for different face shapes, tools, shade selection, precise steps for forehead, cheeks, nose, jawline and blending, plus quick daily routines and tips for every skin tone. Read it once, practice slowly, and you’ll contour confidently like a pro.
Why Contouring Makes a Difference
Contouring uses two simple optical rules:
- Shadow recedes. Darker shades visually push areas backward.
- Light brings forward. Lighter shades (highlighters) make areas pop toward the viewer.
When used thoughtfully, those rules help you:
- create definition in soft areas (cheeks, jaw),
- balance proportions (short forehead vs long),
- slim the appearance of a wide nose or broaden a narrow chin,
- lift the face by directing light and shadow upward.
Good contouring is not about sharp costume lines — it’s about soft gradients that read natural in daylight and flattering in photos.
Understanding Your Face Shape Before Contouring
Contouring works best when it complements your natural bone structure. First identify your basic face shape (people are often a mix, so choose the closest match).
Common face shapes & contour goals
- Oval: Balanced. Goal: maintain natural symmetry — light contour under cheekbones and gentle jawline definition.
- Round: Wider cheek-to-cheek, shorter vertical length. Goal: elongate the face — contour along temples, hollows, and jaw to add angles.
- Square: Strong jaw and forehead. Goal: soften angles — contour the jaw corners and temples, highlight center of face.
- Heart: Wider forehead, narrow chin. Goal: slim forehead and add weight to chin — contour temples and hairline; highlight chin.
- Long/Rectangular: Long vertical length. Goal: shorten vertically — contour along hairline and under jaw to visually shorten.
- Diamond: Narrow forehead & jaw, wide cheekbones. Goal: soften cheek width and emphasize chin/forehead with highlight.
How to map: Stand in natural light, use a clean mirror, and lightly feel for bone prominences — those are your contour anchors.
The Tools You’ll Need for a Flawless Contour
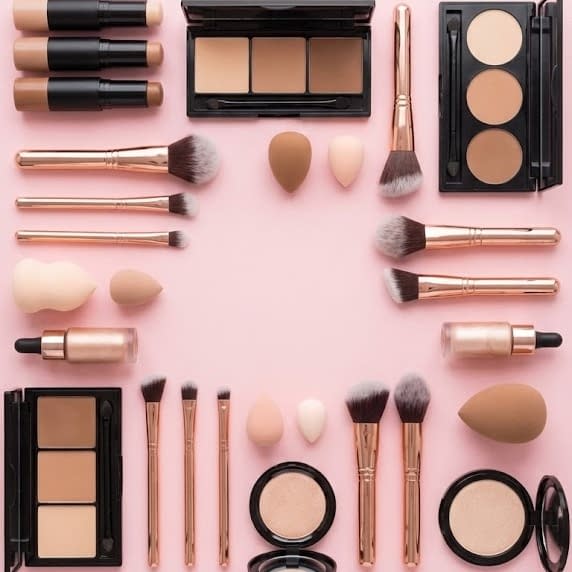
You don’t need a pro kit — you need the right basics and clean brushes.
Essentials:
- Contour product(s): cream or powder contour shade (single pan or stick). Creams are great for dewier skin and easier to blend; powders are better for oily skin and layering.
- Highlighter: cream or powder in a satin finish (not chunky glitter).
- Concealer/foundation: to even skin tone and act as a base.
- Fluffy angled brush (for powder contour) or dense cream blending brush / stippling sponge (for cream).
- Small tapered brush for nose and precision.
- Blending sponge or soft kabuki to diffuse edges.
- Contour palette (optional): gives both cool and warm contour tones and multiple highlighters.
- Setting powder & spray to lock everything in place.
Hygiene tip: keep brushes clean. Contour relies on smooth blending — residue from old product will patch.
Choosing the Right Contour and Highlight Shades
Shade selection is crucial for subtlety.
Contour shade rules:
- Choose a contour that is 1.5–3 shades darker than your natural skin tone. If you go deeper, choose a shade with a neutral to cool undertone (avoid orange/red for a natural shadow).
- For fair skin, go +1.5 to +2 shades with subtle taupe or soft cool brown.
- For medium skin, go +2 shades with a neutral-cool brown.
- For deep skin, choose rich cocoa or deep espresso tones — avoid ashy greys; warmth can still read natural.
- For very warm complexions, prefer neutral-cool contours to mimic true shadows.
Highlight shade rules:
- Pick a highlight 1–2 shades lighter than your base for subtlety (cream or powder).
- For luminous skin: champagne or soft gold for medium/deep; pearly iced tones for fair skin.
- Avoid overly frosty/warm shades that look like glitter.
Test on jawline in daylight before committing.
Step-by-Step Guide to Contouring the Forehead
Why: Contouring the forehead controls perceived width and length.
Step-by-step (apply after base):
- Map: imagine a soft shadow starting near the temples and following the hairline across the top of the forehead.
- When forehead is wide: place contour along the outer hairline and temple in an upside-down “C” shape, blending inward and slightly downward.
- When forehead is long: place contour just along the top hairline to shorten visually.
- For small forehead: avoid heavy contouring at hairline; instead highlight center of forehead to bring it forward.
- Technique: dab cream/powder lightly and blend outward into hairline, not across the face. Use circular motions to diffuse.
- Check symmetry: tilt your head back a little and view straight-on to ensure evenness.
Remember: the hairline is forgiving — blend into hair so there’s no visible edge.
How to Contour Your Cheeks for Definition
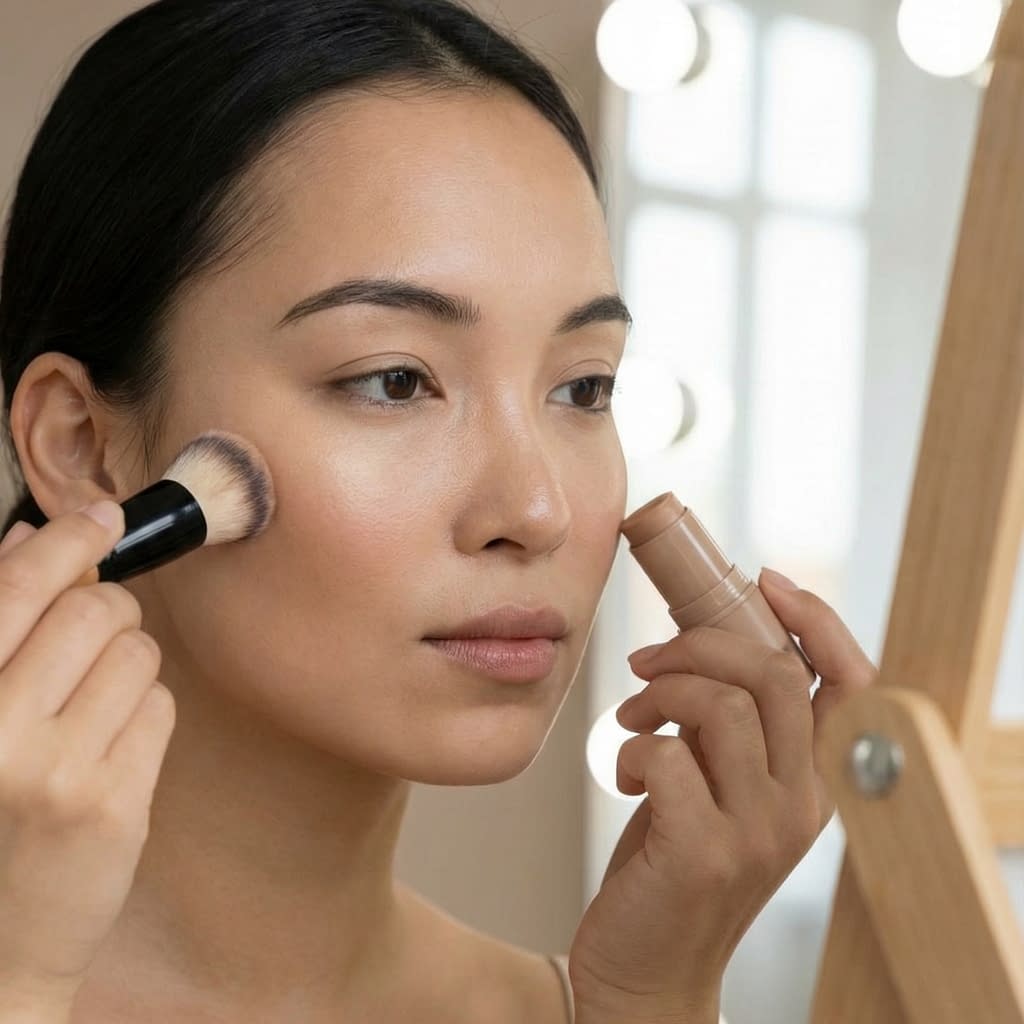
Cheek contouring creates the classic sculpted look.
Step-by-step:
- Find the hollow: suck cheeks or feel under your cheekbones — the hollow sits between the apple of your cheek and your ear.
- Mark the start & end: start contour slightly below the center of your ear (back) and end near the corner of the mouth but stop halfway — a better rule is to stop at the point where a line from the corner of your nose to the outer corner of your eye meets the cheek.
- Angle: drag slightly upward toward the temple to lift the face (not straight horizontally).
- Apply product: use cream contour or powder with an angled brush to stamp a soft line along your hollow following that diagonal. Use light pressure.
- Blend: with a clean fluffy brush or sponge, blend in small circular motions, coaxing the shadow upwards — the gradient must be seamless.
- Layering: if you want stronger definition, build gradually. Avoid one harsh stripe.
- Add blush: apply blush on apples and sweep upward over the contour’s top edge to meld color and shadow, which softens and lifts.
Pro tab: a sculpted cheek should have depth under the cheekbone but a natural lit top — think depth + lift, not hollowed out.
Contouring the Nose for a Sculpted Look
Nose contouring is precision work — less is more.
Step-by-step:
- Tools: small tapered brush for powder; thin warm sable or small sponge for cream.
- Map lines: visualize two thin vertical lines down either side of the nose bridge (not on the tip unless you want to narrow the tip). For widening camouflage, a slight highlight down the center helps.
- Placement for narrow look: place contour lines about 2–4 mm in from the nose edge (distance varies by nose width) — aim for thin, diffused lines. For wider noses, start closer to the edges.
- Apply: draw a thin line down each side using light strokes. For tip refinement, add a soft shadow under the tip and on the sides of the nostrils to shorten.
- Blend: soften the lines aggressively with a small blender (sponge or brush) by dabbing and pulling gently outward; do not wipe away the line—diffuse it.
- Highlight: add a narrow strip of highlighter down the center bridge (tiny amount) to accentuate the visual slimming. Avoid glitter or heavy shimmer.
- Check in different light to ensure no harsh lines or over-narrowing.
Nose contouring must be extremely subtle — the goal is perceived change, not a painted nose.
Highlighting to Enhance Your Features
Highlight is the partner to contour — place it where light would naturally hit.
Step-by-step placement:
- Center forehead: a tiny touch in the very center for dimension.
- Brow bone: subtle highlight under arch to lift the eye.
- Top of cheekbones: just above where you contoured — press, don’t swipe.
- Bridge of nose: thin strip only.
- Cupid’s bow: dot a tiny bit to make lips appear fuller.
- Inner corner of eyes: small dot to brighten and open eyes.
- Under-eye & center of chin: a soft dusting or a thin layer of cream highlight to bring these forward.
Technique: use a light hand and build. Cream highlight under powder highlight gives glowing depth.
Blending Techniques That Look Natural
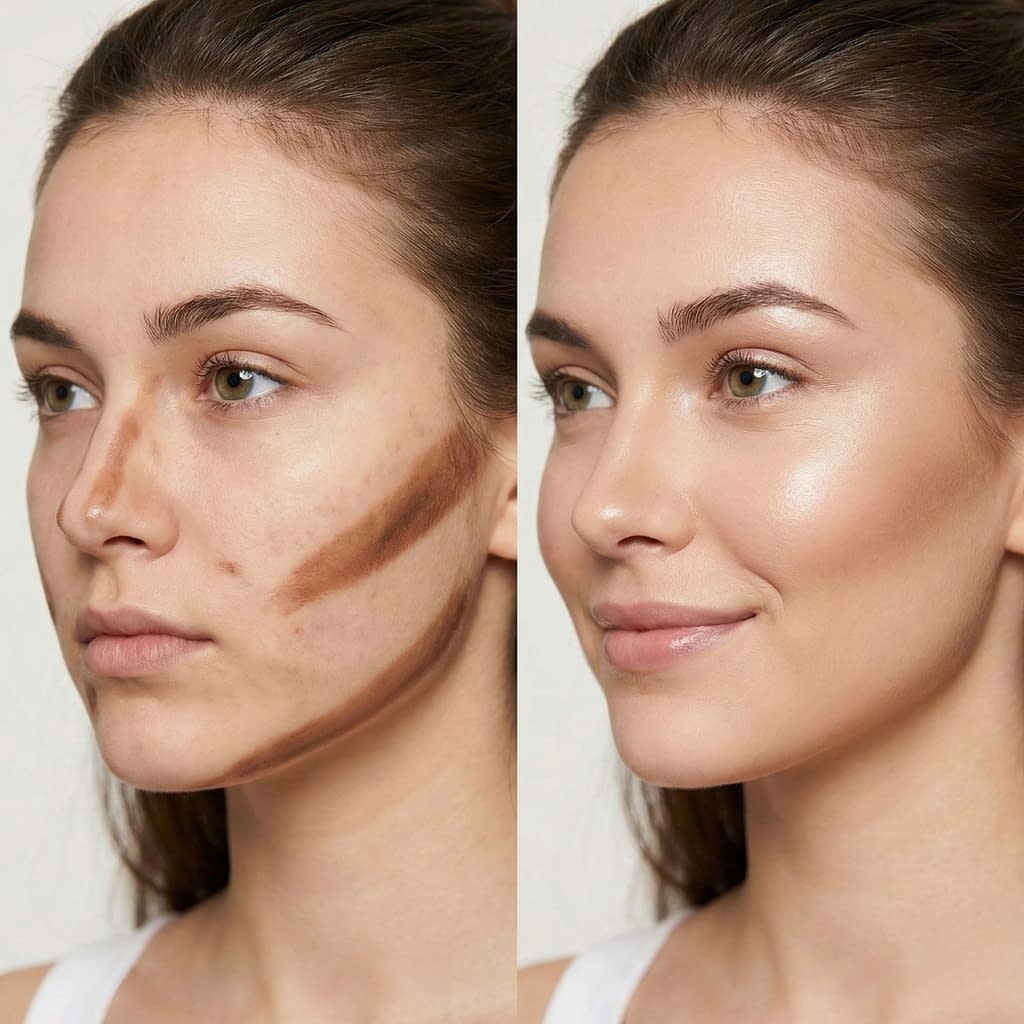
Blending is where the magic happens — it turns lines into believable shadows.
Pro blending tips:
- Work in small increments. Start light and build.
- Stippling motion: when using a sponge, press and roll (don’t drag) to push product into skin.
- Circular buffing: a small dense brush in circular motion melts cream into skin or diffuses powder.
- Edge feathering: always blur the outer edges into skin — there should be no hard lines.
- Mix textures: cream base + light powder on top sets and softens edges.
- Use clean tools: a clean brush gives smoother blends; dirty brushes drag pigment.
- Check from distance: step back, look at 2–3 feet and in different lights to confirm natural look.
If you can see the contour stripe, you haven’t blended enough.
Contouring the Jawline for a Sharper Profile
Jaw contouring provides polish and definition.
Step-by-step:
- Identify areas: for soft jawlines, contour just under the jaw and along the jawline from ear toward chin. For square jaws, focus contour on the corners to soften.
- Apply shadow: use a thin, angled brush and sweep contour shade right under the jawline from ear to chin; for slimming, create a faint vertical shadow under the jawbone.
- Blend downwards: blend the shadow down onto the neck slightly (this naturalizes the shadow). Don’t blend upward into the face.
- Chin balance: a small highlight on the chin center offsets heavy jaw contour and creates shape.
- Avoid over-dusting: heavy powder under the jaw can look dusty — blend with a damp sponge if needed.
For men: stronger, straighter strokes can masculinize the contour; keep edges blended for realism.
Common Contouring Mistakes and How to Avoid Them
Mistakes happen — here’s how to avoid the usual ones.
Top mistakes & fixes:
- Too dark/too warm contour: pick cooler/neutral tones; if it looks orange, tone it down with your foundation or a translucent powder.
- Harsh unblended lines: blend, blend, blend. Use a clean sponge to buff edges.
- Wrong placement (horizontal lines across cheeks): remember diagonal upward placement lifts.
- Too much product at once: remove excess with a clean brush or sponge and build slowly.
- Contour that disappears in daylight: test in daylight before event. A contour for studio flash can look nonexistent in sunlight.
- Texture issues (clumping on dry patches): exfoliate and moisturize before contouring.
- Mismatched undertones: neutral/cool shadows look most natural for contouring — not orange or red.
If you mess up: use a damp sponge to lightly wipe and re-blend; correct and proceed.
Contour Tips for Different Skin Tones
Shade nuance is essential.
Fair skin:
- Use soft taupe with a slight coolness.
- Warm champagne or pearly highlight works well.
Medium skin:
- Neutral brown contours; warm gold/champagne highlights.
- Avoid powder that’s too ashy — choose warmer neutrals that still read like shadow.
Olive/medium-deep:
- Brown with slight olive undertone; avoid ashy grey.
- Gold or soft bronze highlights flatter.
Deep skin:
- Deep, rich chocolate or espresso contours with warm undertones — avoid ashy greys.
- Use rich warm golds or bronze highlighters; creams often blend more naturally than powders.
Always test on the skin, not the back of the hand, and evaluate in natural light.
Quick Contour Routine for Everyday Makeup

Five-minute daily contour that looks natural.
- After base: apply light coverage base (tinted moisturizer).
- Cheeks: sweep a small amount of contour powder/cream into the cheek hollows in a slight upward diagonal. Blend with sponge.
- Forehead: add tiny shadow at the temples/hairline if desired and blend.
- Nose (optional): dot two thin lines down sides and blend.
- Jaw: soft line under the jaw, blended down.
- Cheek highlight & blush: quick cream blush on apples blended up; tiny highlight on top of cheekbones.
- Set: lightly dust translucent powder on T-zone and set with a spritz of setting spray.
This routine gives definition without looking made-up and suits busy mornings.
Final Words
Contouring is a learned craft: with mapping, the right shades, the correct tools, and patient blending you can sculpt your features naturally and beautifully. Start with light layers, practice the placements for your face shape, and always finish by stepping back and checking your work in natural light. Over time you’ll gain the muscle memory to contour quickly and consistently, and you’ll have a flexible skill that makes your makeup look professionally finished.


