A spa-level facial at home is absolutely possible — and it’s one of the best ways to give your skin focused care without spending a fortune. Done correctly, an at-home facial helps clear pores, boost circulation, hydrate, and improve product absorption so your skin looks fresher, plumper, and more radiant. Below is a complete, step-by-step, dermatologist-friendly guide you can follow every 1–4 weeks depending on your skin type and goals.
Why At-Home Facials Are Worth It
At-home facials are more than a pampering ritual. They let you:
- Maintain skin health between professional treatments.
- Control ingredients (no hidden harsh chemicals).
- Target specific concerns (oiliness, dryness, congestion, dull tone).
- Save money and time while still getting measurable results.
When you do a facial at home with care and the right sequence — clean → exfoliate → steam → treat → mask → hydrate — you increase circulation, speed cell turnover, and improve how well active ingredients penetrate. Consistency matters: a monthly or biweekly at-home facial plus daily good skincare is powerful.
What You Need Before Starting Your Facial
Gather everything first so you can relax into the process.
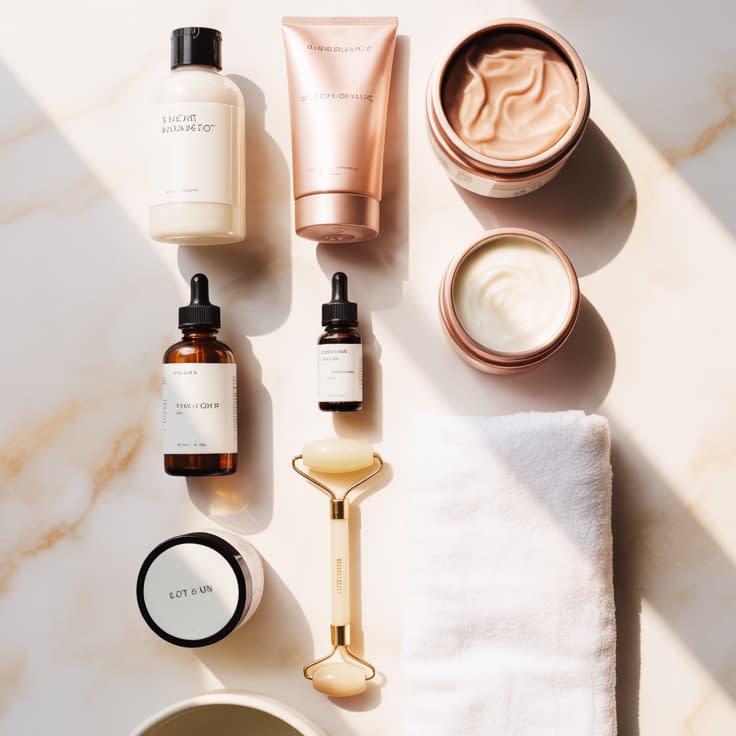
Basic products & tools
- Gentle cleanser (appropriate for your skin type)
- Exfoliator (physical scrub or chemical exfoliant like AHA/BHA)
- Steamer or a bowl of hot water + towel (for DIY steaming)
- Mask(s): clay for oily/blemish-prone, hydrating for dry, calming for sensitive
- Toner or essence (hydrating, alcohol-free)
- Moisturizer (day or night formula depending on time)
- Serum(s) (vitamin C in AM, hyaluronic acid/niacinamide in PM)
- Sunscreen (if you finish in daytime)
- Optional: extraction tool, metal or silicone spatula, jade roller or gua sha, cotton pads, soft towels, headband
Cleanliness & setup
- Work in a clean, well-lit space.
- Sanitize tools and your hands.
- Lay out towels and have a small trash/bin nearby.
- Play soft music or dim lights for a spa feel if you like.
Step 1: Cleanse Your Skin Thoroughly
Cleansing removes surface oil, dirt, and makeup so active steps work.
Why it matters
Makeup and sunscreen block exfoliants and masks. A proper cleanse is the foundation.
Step-by-step cleanse
- Tie hair back and wash hands.
- If wearing heavy makeup or sunscreen, start with an oil-based cleanser or micellar water to dissolve residues (30–60 seconds). Use damp cotton pads rather than scrubbing.
- Follow with a gentle water-based cleanser suited to your skin type. Use lukewarm water and massage the cleanser for ~60 seconds to encourage circulation.
- Rinse thoroughly and pat skin dry with a soft towel — leave slightly damp if you’ll apply a chemical exfoliant (many work best on dry skin; follow product directions).
Tip: Double cleanse only when needed (heavy makeup, sunscreen, or oily days).
Step 2: Exfoliate to Remove Dead Skin Cells

Exfoliation smooths texture, decongests pores, and improves absorption.
Types of exfoliation
- Chemical exfoliants (AHAs like glycolic/lactic for surface dullness; BHA/salicylic acid for oily/clogged pores). Gentler PHAs (gluconolactone) suit sensitive skin.
- Physical exfoliants (very gentle scrubs, konjac sponge). Use sparingly—avoid harsh beads or rough scrubs.
How to exfoliate safely
- Frequency:
- Normal/combination: 1–3×/week (chemical or gentle physical).
- Dry/sensitive: 1×/week or gentle PHA.
- Oily/acne-prone: 2–3×/week with BHA or low % AHA.
- Chemical route: follow product instructions — many are leave-on (serums/peels) or rinse-off masks. Start low strength and patch test.
- Physical route: dampen skin, apply a pea-sized amount, massage lightly for 30–60 seconds, rinse.
- Aftercare: rinse, pat dry, and continue to steaming or treatment. Avoid over-exfoliating; if skin burns, stings, or peels heavily, stop and soothe.
Warning: Don’t combine multiple strong actives (e.g., high % AHA + retinol) in the same session — keep it simple.
Step 3: Steam Your Face to Open the Pores
Steaming increases circulation and softens sebum for easier extraction.
DIY steam method
- Boil water and let it cool 30 seconds (to avoid scalding). Pour into a bowl.
- Optionally add a few drops of chamomile or green tea (soothing) — avoid citrus essential oils.
- Drape a towel over your head and position your face about 6–10 inches above the bowl. Steam for 5–8 minutes only.
- If using a steamer, follow device instructions — 5–10 minutes is typical.
Benefits
- Softens blackheads and whiteheads.
- Improves circulation, which boosts glow and product absorption.
Safety: Don’t steam if you have rosacea flare-ups, very sensitive or reactive skin, or active broken skin. Shorter steaming time reduces risk.
Step 4: Extract Blackheads Safely (Optional)
Extractions can clear clogged pores but must be done gently to avoid scarring.
When to extract
- Only after steaming and if the comedone is visibly open and soft.
- Do not extract inflamed acne (pustules) — that increases infection risk.
Safe extraction step-by-step
- Sanitize any metal extractor with alcohol and your hands.
- Wrap a tissue around clean fingers or use a sterilized loop.
- Apply gentle, even pressure around the blemish — push around, not straight down. If it resists, stop.
- Clean the area with a toner or antiseptic wipe and apply a calming serum (e.g., centella or niacinamide).
- Limit extractions to a few stubborn spots per session to prevent trauma.
Pro tip: If you’re unsure or have many congested pores, a professional extraction by an esthetician is safer.
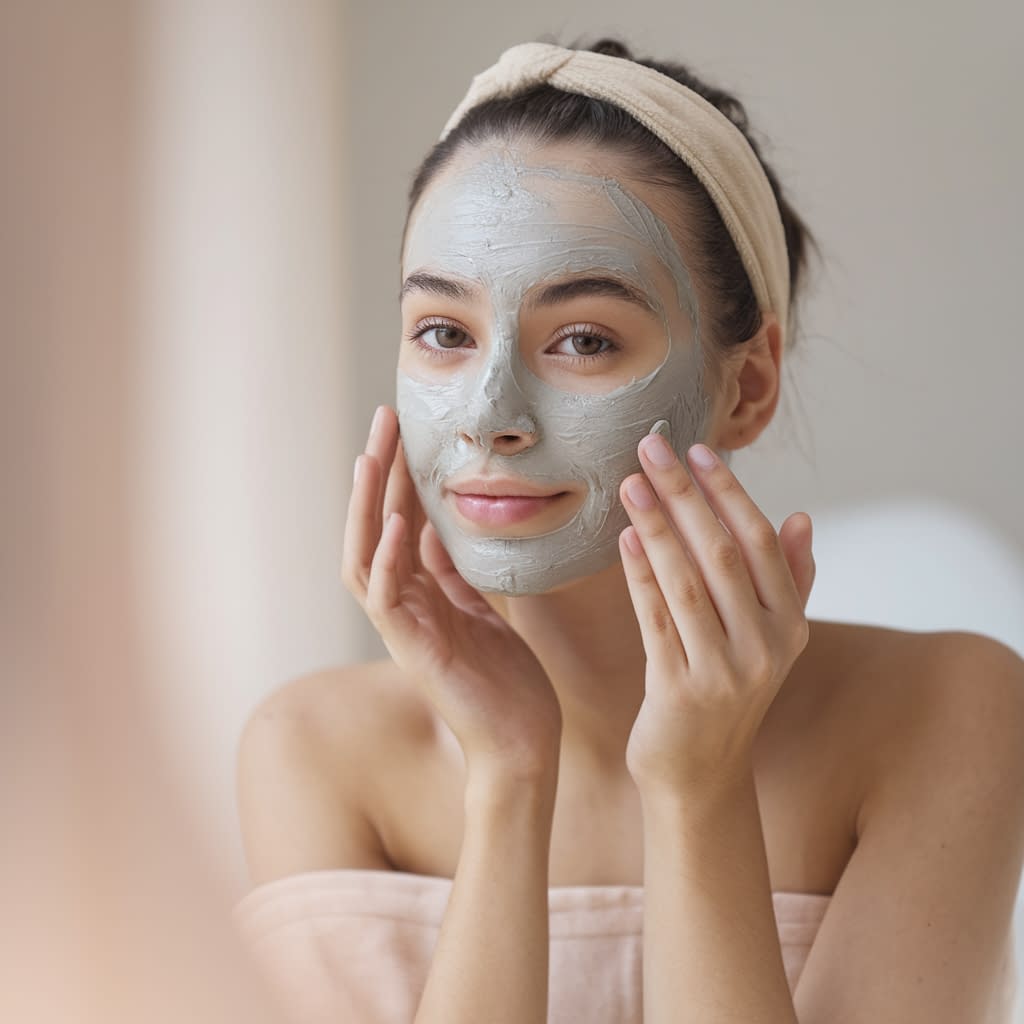
Step 5: Apply a Face Mask for Deep Treatment
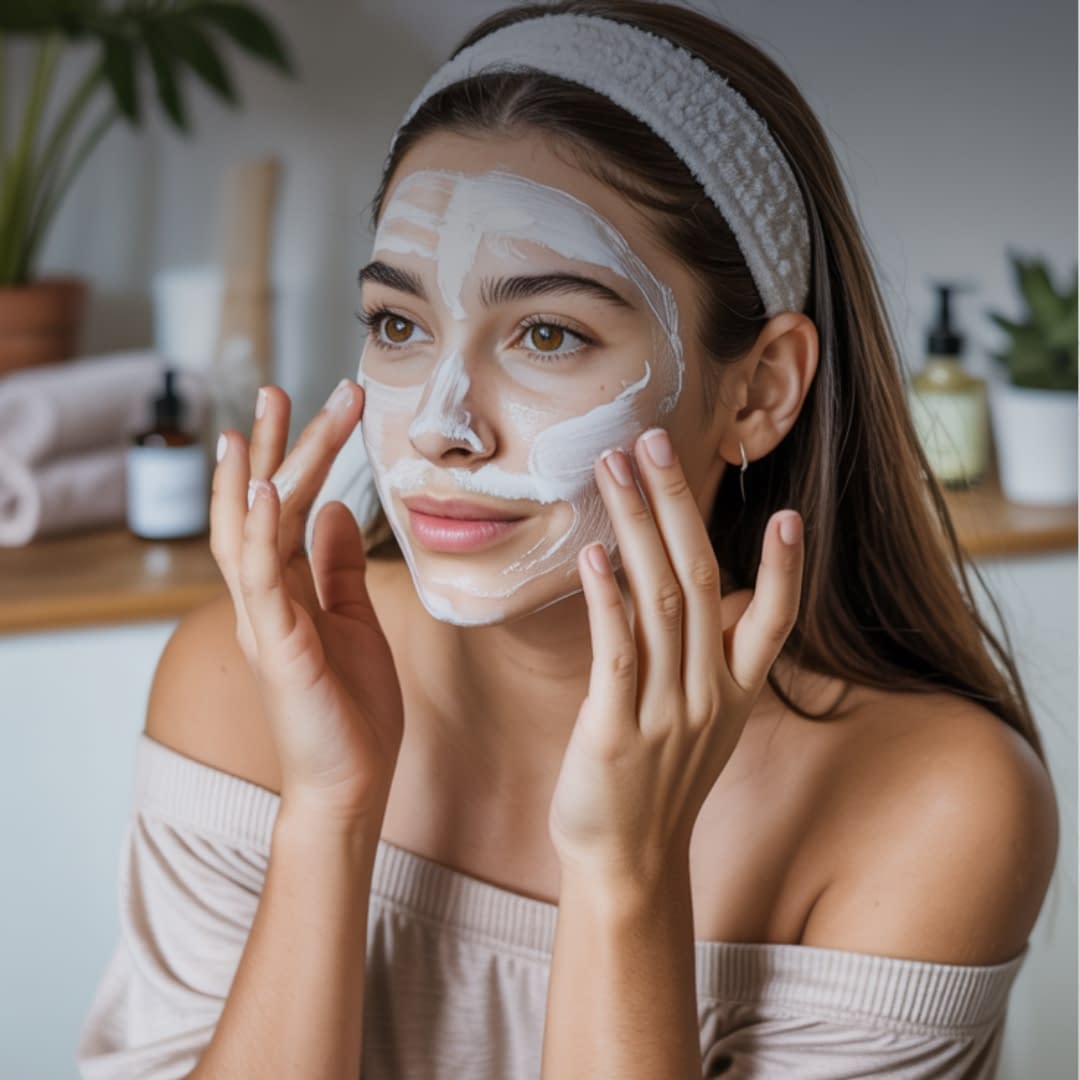
Masks are where you target concerns: detox, hydrate, soothe, or brighten.
Mask choices & timing
- Clay mask (kaolin, bentonite): 5–10 minutes for oily/congested skin. Rinse before it fully dries to avoid over-drying.
- Hydrating mask (sheet, gel, cream): 10–20 minutes for dry, sensitive, or dehydrated skin.
- Soothing mask (aloe, oatmeal): 10–15 minutes for redness/irritation.
- Brightening mask (vitamin C, gentle AHA): follow product timing; avoid layering strong acids post-exfoliation unless product is formulated for it.
DIY mask options (gentle)
- Honey + yogurt (hydrating + mild exfoliation): 1 tbsp yogurt + 1 tsp raw honey — 10–15 minutes.
- Oatmeal + banana (soothing): blend 1 tbsp oats + ½ banana — 10–15 minutes.
- Clay + aloe (detox but not drying): mix 1 tsp clay + 1 tsp aloe vera gel — thin layer for 5–8 minutes.
Application steps
- Apply an even layer avoiding the eye area.
- Relax for recommended time (set a timer).
- Rinse with lukewarm water, pat dry.
- Follow with a toner/essence to restore pH and prep for serums.
Step 6: Tone Your Skin to Balance pH
Toning rebalances skin, removes residual cleanser/mask, and hydrates if you choose a nourishing formula.
Which toner to pick
- Hydrating toners (hyaluronic acid, glycerin): for dry or sensitive skin.
- Balancing/alcohol-free toners (witch hazel light, rose water): for combination or normal skin.
- Exfoliating toners (low % AHA/BHA): use sparingly and not on the same day as a strong chemical exfoliant — ideally in separate weekly sessions.
How to tone
- Apply with a cotton pad or press into skin using hands.
- If your toner is hydrating, pat into damp skin to boost absorption.
- Let it dry slightly before applying serums.
Tip: Avoid toners with high alcohol content — they can overdry and strip barrier lipids.
Step 7: Moisturize for Long-Lasting Glow
Moisturizer seals in the benefits from previous steps and repairs the skin barrier.
Choose the right moisturizer
- Oily skin: lightweight gel or lotion with humectants (niacinamide, hyaluronic).
- Normal/combination: balanced cream or lotion.
- Dry skin: richer creams with ceramides, fatty acids, and occlusives.
- Sensitive skin: fragrance-free, simple ingredient lists.
How to apply
- While skin is slightly damp, dispense a pea- to nickel-size amount.
- Use upward, outward strokes and gentle patting motions to seal in hydration.
- For daytime, follow with SPF (min SPF 30) as the final step. For nighttime, consider a slightly thicker night cream or a facial oil layered last.
Extra: If performing a facial in the morning, always finish with sunscreen. Post-exfoliation skin is more sun-sensitive.
Step 8: Add a Serum for Extra Benefits
Serums deliver concentrated actives. Choose based on your goal:
Common serums & when to use
- Vitamin C (AM): antioxidant brightening, evens tone — use before moisturizer and always pair with SPF.
- Hyaluronic acid (AM/PM): hydrating humectant — layer on damp skin then cream.
- Niacinamide (AM/PM): barrier support, pore appearance reduction, helps oily/prone-to-breakouts skin.
- Retinoids (PM only): boost cell turnover and collagen — introduce gradually; do not combine with strong acids in the same session.
- Peptides (PM/AM): for firmness and repair.
How to layer
- Start with water-based serums (hyaluronic, vitamin C) first.
- Apply treatment serums (niacinamide, peptides).
- Finish with thicker serums or facial oils if used.
- Wait 30–60 seconds between layers if needed for absorption.
Safety: If using retinoids, avoid strong exfoliants the same day. Patch test new actives and introduce them one at a time.
Tips to Enhance Your At-Home Facial Results
Small extras boost effectiveness and the luxury factor.
Frequency & routine
- Maintenance facial: every 1–2 weeks for oily/combination or acne-prone skin.
- Hydration/soothing facial: weekly for dry/sensitive skin.
- Deep treatments: 2–4×/month depending on tolerance.
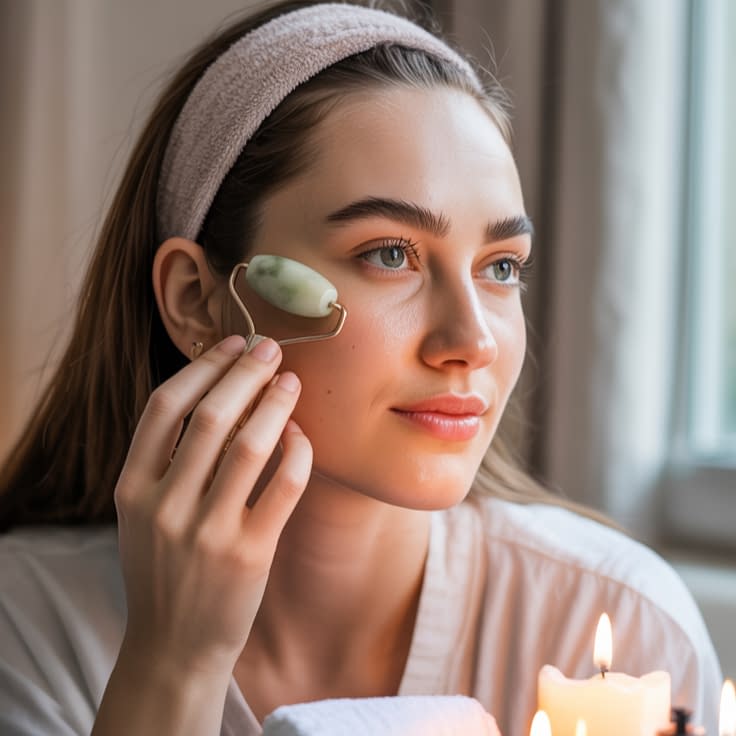
Extra tricks
- Gua sha or facial massage after moisturizer to boost lymphatic drainage and relaxation (5 minutes).
- Cool compress or cold jade roller after extractions to reduce redness.
- Use a vitamin C serum in the morning and hyaluronic/niacinamide in the evening for balanced care.
- Sleep with a silk pillowcase to reduce friction and moisture loss.
- Track results with photos every 4 weeks to notice subtle improvements.
Common Facial Mistakes to Avoid
Avoid these errors so your facial helps instead of harms.
- Over-exfoliation — doing chemical + physical + peel in one session leads to irritation and barrier damage.
- Using hot water — it strips oils and damages the barrier. Use lukewarm only.
- Picking or aggressive extractions — leads to scarring and infection.
- Mixing too many actives — strong acids + retinoids + vitamin C at once increases the chance of burning.
- Skipping sunscreen after exfoliation — sun sensitivity increases post-exfoliation.
- Using DIY watery masks without preservative — these can grow bacteria; prefer single-use fresh DIY masks or store-bought stable formulas.
- Not sanitizing tools — contamination causes breakouts or infections.
Final Thoughts
An at-home facial is a powerful, low-cost way to care for your skin — when it’s done thoughtfully. The golden rules: cleanse well, exfoliate gently, steam wisely, treat with purpose, and hydrate generously. Build a cadence that fits your skin (weekly to biweekly maintenance plus daily good skincare) and be patient — skin renewal takes time.
Start with one focused facial routine this week: follow the steps above, note how your skin feels, and repeat at a frequency your skin tolerates. Over time you’ll notice clearer pores, smoother texture, and a healthier glow — all from the comfort of your home.


