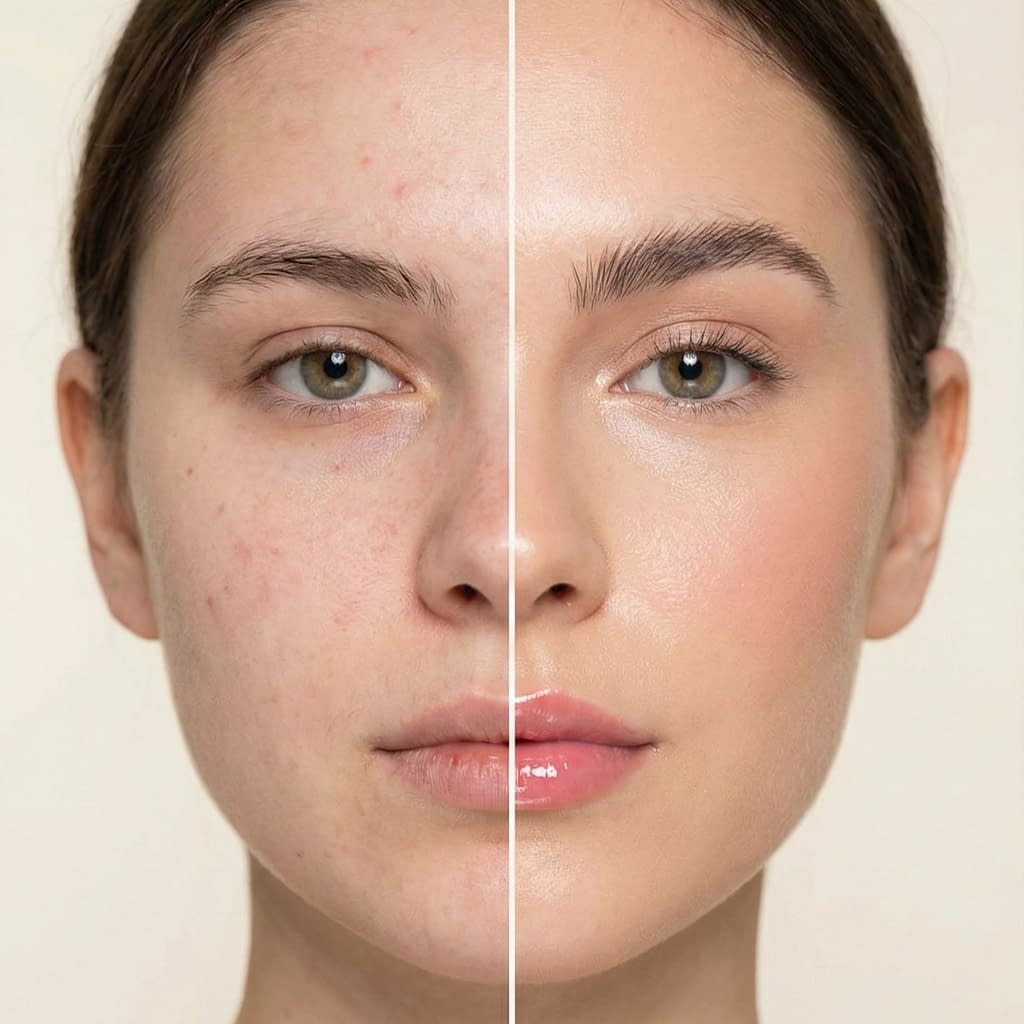
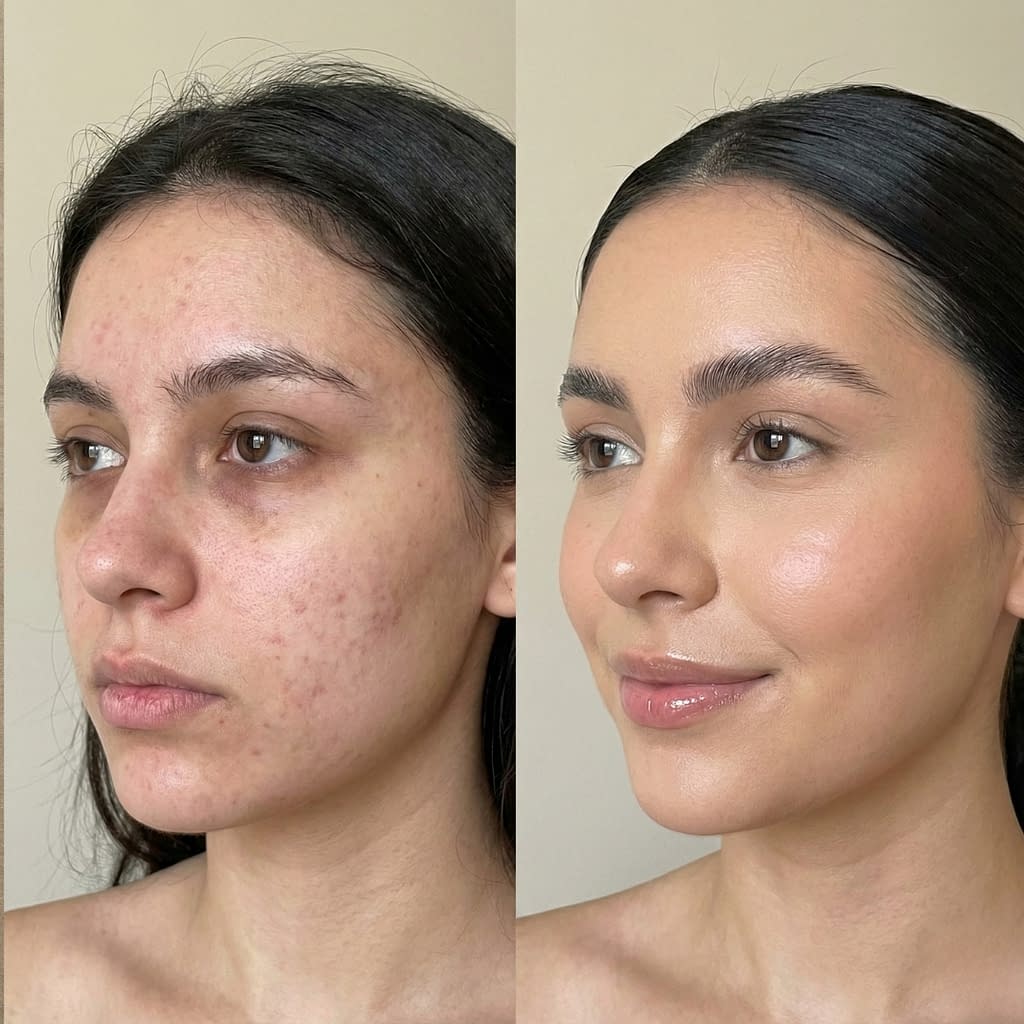
A polished, “clean girl” makeup look is all about looking like your best, well-rested self — minimal, fresh, and effortlessly put-together. It leans on skincare-first prep, sheer coverage, soft structure (especially brows), a natural flush, and a healthy, lit-from-within finish. Below is a full, practical guide you can follow step-by-step — from prepping skin to a five-minute routine — so you leave the house looking modern, polished, and authentically you.
What Is the Clean Girl Makeup Look?
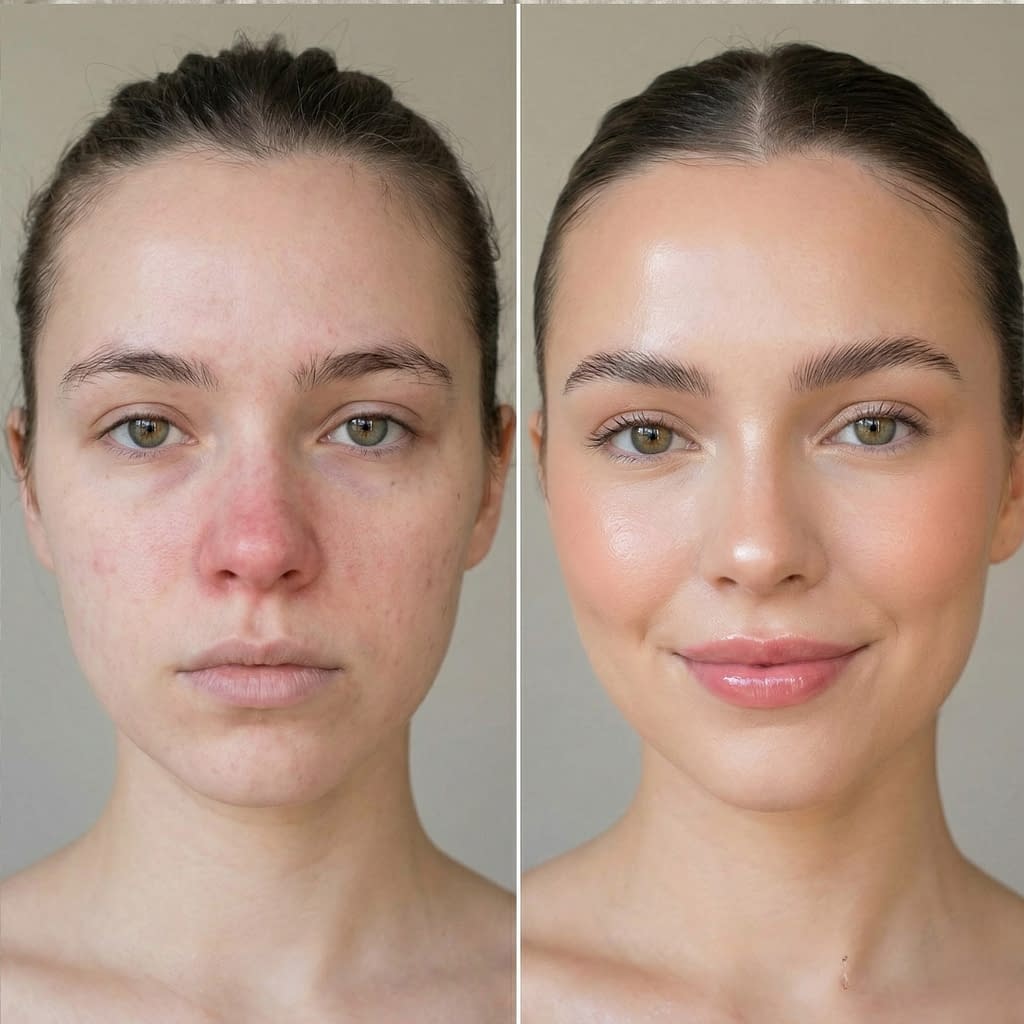
The clean girl aesthetic is a minimalist beauty vibe: skin-forward, slightly dewy, and intentionally undone in the best way. Think even, luminous skin (not heavy full coverage), softly groomed brows, subtle eye definition, a natural cheek flush, and lips that look hydrated and slightly enhanced. The purpose is to read polished in daylight and close-up, not masked.
Key principles:
- Skin-first: skincare is the base for everything.
- Less product, more technique: thin layers and smart placement.
- Soft structure: defined yet natural brows and cheekbones.
- Fresh finish: subtle glow, not greasy or glittery.
The Skin-First Philosophy: Why Skincare Comes Before Makeup
Clean makeup starts with healthy skin. When your barrier is balanced and hydrated, makeup applies smoother, sits better, and lasts longer.
Step-by-step skin-prep rules:
- Cleanse morning and night. Start with a gentle cleanser to remove overnight oils and pollution.
- Hydrate quickly: apply a hydrating serum (hyaluronic acid) while skin is slightly damp — it plumps fine lines and holds water.
- Repair/target: at night use retinol/peptides as appropriate; morning use antioxidants (vitamin C) to protect.
- Moisturize well: pick a lightweight moisturizer in the AM that leaves a slightly dewy finish; a richer option at night.
- Eye care: a hydrating eye cream smooths the area so concealer doesn’t cake.
- Weekly extras: 1–2x hydrating sheet mask or sleeping mask and a gentle exfoliation (AHA or enzyme) once weekly to keep surface texture smooth.
Why it matters: even a great skin tint looks patchy over dry or flaky skin; conversely, hydrated skin reduces the need for heavy coverage.
Prep and Prime: Create a Smooth, Hydrated Base
Primer isn’t mandatory, but the right prep gives your clean look longevity and evens texture.
Step-by-step prep & prime:
- Tone or essence (optional): a hydrating mist immediately after cleansing evens pH and preps.
- Serum: hyaluronic acid or light peptide serum. Apply to slightly damp skin and press in.
- Moisturizer: thin layer; let absorb 30–60 seconds.
- Primer (selectively): for large pores or oily zones use a matte, pore-refining primer only on the T-zone; for overall glow use a dewy primer or illuminating lotion. Apply sparingly.
- Sunscreen: if tinted base contains SPF, you can skip a second SPF step; otherwise use a thin, broad-spectrum SPF 30 as the final step of skin prep (and allow a minute to absorb).
Technique tip: apply products by pressing (patting) rather than rubbing for minimal friction and better absorption.
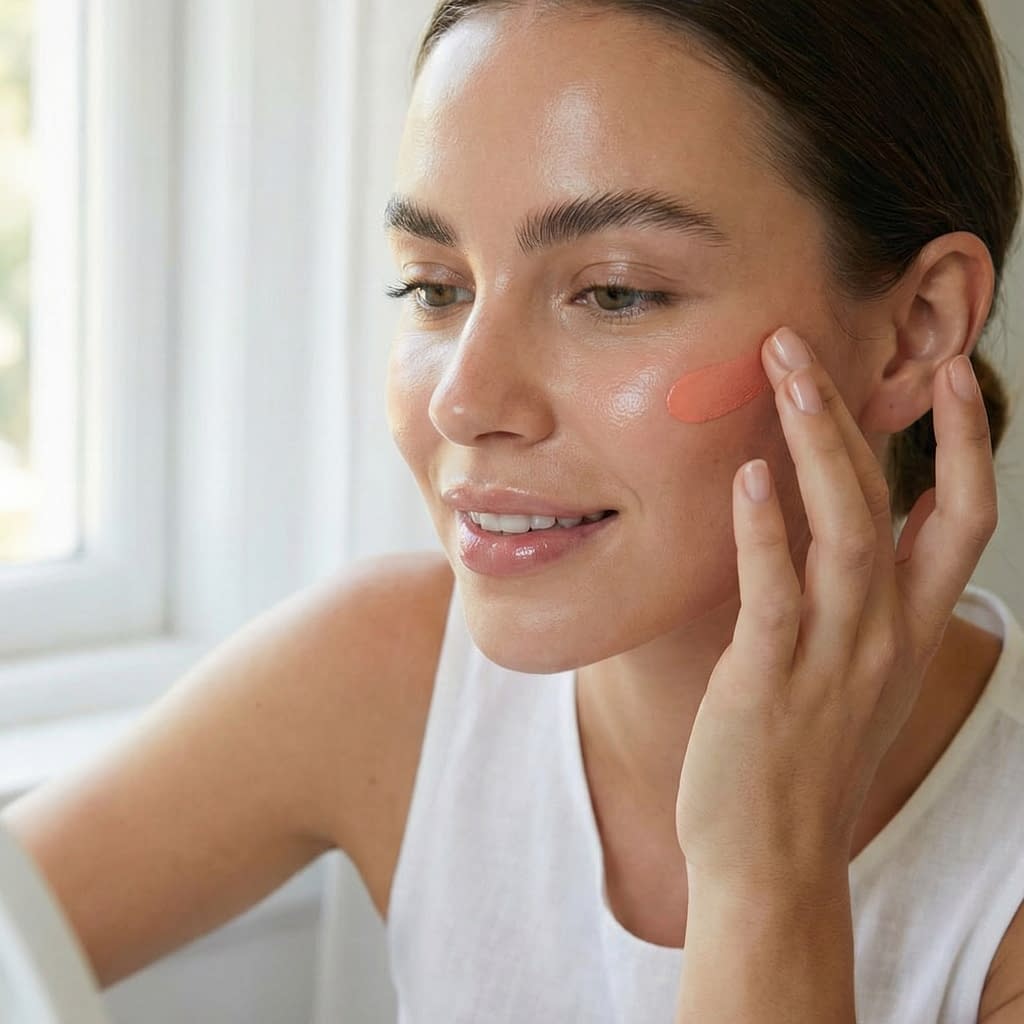
Tinted Base Options: Tinted Moisturizer, BB Cream, or Light Foundation

The clean look relies on sheer, skin-like coverage. Choose a product that evens tone without masking texture.
How to choose & apply:
- Pick your base:
- Tinted moisturizer — best for very natural skin with slight discoloration.
- BB/CC cream — adds skincare benefits and light coverage.
- Sheer foundation — for more coverage while still looking natural (use a dewy formula).
- Application tools: damp sponge for skin-synced finish, or fingers for fastest, most natural result.
- Method: dot product on forehead, cheeks, nose, chin; press outwards in gentle, bouncing motions. Build only where needed (avoid layering all over).
- Spot-correct, not paint: reserve extra product for areas that need it (redness, hyperpigmentation) and blend edges well.
- Undereye & redness: use concealer (next section) rather than heavy base under eyes.
Finish: you want skin to show through — pores and freckles can be visible. That’s part of the clean aesthetic.
Concealer Techniques for a Natural, Undetectable Finish
Concealer should brighten and correct without a cakey look.
Step-by-step concealing:
- Choose the right texture: lightweight, hydrating concealers for under-eye; more pigment or stick formulas for spot coverage.
- Shade rules: under-eye conceal one shade lighter for brightness; spot-conceal with a shade matching skin tone.
- Application: apply minimal dots — a small triangle under the eye or tiny dot on a dark spot.
- Blend: use a damp sponge or ring finger (light warmth helps) and press concealer into the skin. Don’t swipe.
- Set sparingly: if creasing occurs, lightly dust translucent powder only on the places that crease (under-eye) via a small fluffy brush or a soft puff. Avoid baking — just a whisper to prevent creases.
Pro tip: if your under-eye is dry, mix a drop of facial oil with concealer before applying for seamless blending.
Soft, Structured Brows That Frame the Face
Brows are the backbone of the clean makeup look: neat, slightly enhanced, and natural.
Step-by-step brow grooming:
- Brush up: use a spoolie to brush hairs upward and see the natural shape.
- Trim stray long hairs (if needed) and tweeze only obvious outgrowths; leave the natural arch.
- Fill with hairlike strokes: use a thin eyebrow pencil or microbrow pen in short, upward strokes to mimic hairs starting near the inner brow and tapering outward. Focus on sparse areas.
- Soften & set: brush through with spoolie to diffuse, then apply a clear or tinted brow gel to hold hairs in place and add slight color.
- Highlight subtly: a tiny sweep of matte cream or highlighter under the brow arch on the bone adds lift without obvious shimmer.
Goal: brows should look like your own hair but neater and slightly fuller — not drawn-on block brows.
Minimal Eye Makeup: Neutral Shadows and Light Definition
Eyes stay soft: neutral tones, a touch of depth in the crease, and a subtle brightening at the inner corner.
Step-by-step eye shading:
- Prime lightly: a thin layer of concealer or primer on lids prevents creasing and improves color payoff.
- Transition shade: using a soft, matte taupe, sweep in the crease with a fluffy brush using windshield-wiper motions — concentrate on outer third and blend gently.
- Lid color: swipe a satin or soft matte cream/beige shade across the lid to even tone.
- Outer depth: add a slightly deeper shade in the outer V (small amount) and blend — keep diffuse.
- Inner corner/center pop (optional): a whisper of satin on the center lid or inner corner brightens but keep it tiny — you want glow, not glitter.
Keep contrast low; the goal is approachable depth, not a dramatic eye.
Liner and Mascara: Subtle Techniques That Open the Eyes
Liner and mascara should define lashes without creating heaviness.
Step-by-step liner & mascara:
- Tightline the upper waterline with a soft, waterproof pencil for lash fullness that doesn’t show as an obvious line.
- Optional thin wing: if you like a bit more definition, use a soft gel or pencil to draw a thin, slightly lifted line on the outer third of the lash line. Keep it thin and blended.
- Lower lash restraint: avoid dark lower-lid liner — instead use a nude or soft brown smudge on the outer third if desired.
- Curl lashes: clamp at root, hold 5–8 seconds.
- Mascara: choose a lengthening, separating mascara. Wiggle at the base and sweep upward, focusing on outer lashes for a lifted look. Use one or two light coats only.
- Comb through: use a clean spoolie to separate any clumps and ensure natural fanning.
Result: lashes look lifted and visible, not clumped or heavily sculpted.
Natural-Looking Cheek Color: Blush and Cream Bronzer Tips
Cheeks give healthy life to the face — pick cream textures for a skin-like glow.
Step-by-step cheek application:
- Choose tone: soft peach or rose for most skin tones; deeper berry for richer complexions.
- Placement: smile gently and apply cream blush lightly to the apples, then blend upward toward the temple along the cheekbone for a lifted effect.
- Blend: press out with fingertips or a sponge for seamless integration with base.
- Bronzer: use a light-touch bronzer under the cheekbone, at the temples, and along the jawline for warmth and subtle contour. Cream bronzer works best for clean makeup.
- Highlighter (tiny amount): a dot of cream highlighter on the high point of cheekbones and a touch on the cupid’s bow, blended out — keep it soft and dewy, not glittery.
Layer cream products under a powdered translucent finish if you need longevity, but for pure glow leave them as-is.
Lips That Look Like Your Best Natural Shade: Balms, Stains, and Glosses
The clean look favors hydrated, enhanced-lips — not heavy lipsticks.
Step-by-step lip finishing:
- Prep: exfoliate lips gently and apply a hydrating balm.
- Lip stain/tint for all-day: dab a stain with a fingertip in the center and press outwards for a bitten-lip effect.
- Balms & gloss: pick a sheer balm or a light gloss with minimal shimmer. Apply in the center to mimic natural plumpness.
- Lip liner (optional): use a nude liner barely inside the natural lip line to define without obvious borders.
- Blot: if you applied stain, blot once to remove excess transfer while leaving natural color.
Aim for hydrated, slightly enhanced lips — the goal is “your lips but better.”
Dewy Finish vs. Matte Touches: How to Set Without Losing Glow
Setting is essential but keep the glow alive.
Step-by-step setting:
- Targeted powder only: lightly set the T-zone or any shiny spots with a small amount of translucent powder using a fluffy brush or puff. Avoid over-powdering cheeks if you want dew.
- Setting spray: mist a hydrating setting spray from arm’s length to melt powders into the skin and refresh the dew.
- Layer sparingly: if you need extra longevity, press a very thin layer of loose powder with a sponge under the cheek area only where creasing occurs.
- Finish check: natural finish should still catch light softly — it’s better to reapply setting spray than to powder too much.
Technique: push products into skin rather than sweeping them across to preserve glow.
Hair and Grooming Tips to Complement the Clean Makeup Look
Clean makeup pairs best with simple, effortless hair and grooming.
Quick hair & grooming checklist:
- Sleek low bun or soft waves are perfect complements.
- Face-framing pieces (soft wispy strands) keep the look gentle.
- Neat, natural nails or a simple neutral polish.
- Minimal jewelry — small hoops or studs and a delicate chain feel modern and clean.
- Groomed body hair and smooth skin (moisturized legs/arms) complete the polished vibe.
The idea: your overall presentation should feel calm and intentional.
Common Mistakes to Avoid When Doing Clean Makeup
- Too much product: hides the “clean” effect — use less and build only where needed.
- Over-contouring: heavy contouring reads harsh rather than polished. Keep shaping subtle.
- Heavy lower eyeliner: closes the eye and contradicts the fresh look.
- Skipping skincare: no makeup will look fresh on flaky or dehydrated skin.
- Overblending or buffing to oblivion: you want to see skin texture; don’t buff away natural dimension.
If something looks heavy, step back, remove excess with a damp sponge, and re-evaluate.
Quick 5-Minute Clean Girl Routine for Busy Days
A rapid routine when you’re short on time but want to look polished.
- Prep (30 seconds): mist face and rub a light moisturizer into skin.
- Tinted base (60 seconds): dot tinted moisturizer or BB cream and press with fingers.
- Conceal (30 seconds): quick brightening under-eye triangle with light concealer and press.
- Brows & mascara (60 seconds): brush brows and fill sparse spots with pencil; curl lashes and one coat mascara.
- Cheek + lips (40 seconds): swipe cream blush on apples and blend; dot balm or stain on lips.
- Finish (20 seconds): quick spritz of setting spray. Done.
This routine prioritizes the basics for an instant clean look.
Final Words
The clean girl makeup look is less about a list of products and more about a philosophy: invest in skin, use minimal product with precise technique, and favor natural structure over heavy sculpting. Start by improving your skin’s base, use light layers for coverage, nurture groomed brows and lashes, and add a soft cheek and lip that feels like you. Over time you’ll learn which small tweaks (a different brow shape, a slightly warmer blush tone) make this aesthetic uniquely flattering for your face.


