
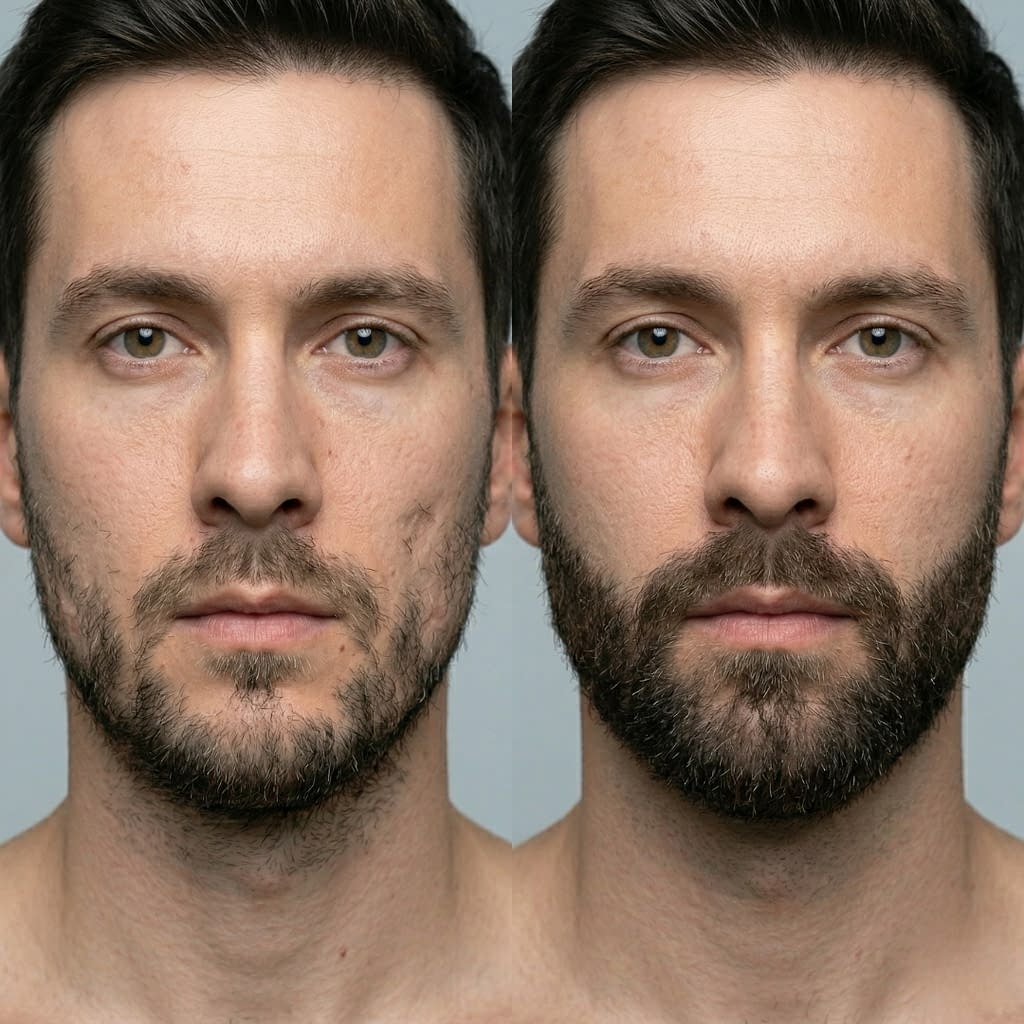
A patchy beard can be frustrating, especially when the rest of your facial hair grows in well but a few areas stay thin or uneven. It can make the beard look unfinished, even if the shape is good and the overall style suits your face. The good news is that you do not need to live with obvious gaps or resort to something that looks painted on. With the right products and a careful technique, you can fill in beard patches in a way that looks natural, subtle, and believable.
Using a brow pencil or beard tint is one of the easiest ways to improve the appearance of patchy facial hair. A pencil gives you precision and control, while tint helps create a softer, more even effect. The key is to match the color, use light layers, and blend everything so the filled-in areas disappear into the rest of the beard. When done properly, the result should look like fuller facial hair, not makeup.
In this guide, you will learn why patchiness happens, how to choose between pencil and tint, how to prep the beard, and how to fill in sparse areas step by step. You will also learn how to keep the result natural, how to avoid the most common mistakes, and how to make the look last through the day.
Why Beard Patches Happen and Why They Are So Common
Patchy beard growth is extremely common. It does not mean your beard is bad, and it does not mean you are doing something wrong. Beard density varies from person to person because of genetics, hormones, age, skin condition, and the pattern in which hair grows on different parts of the face. Some areas may grow in thick and quickly, while others stay lighter, slower, or more uneven.
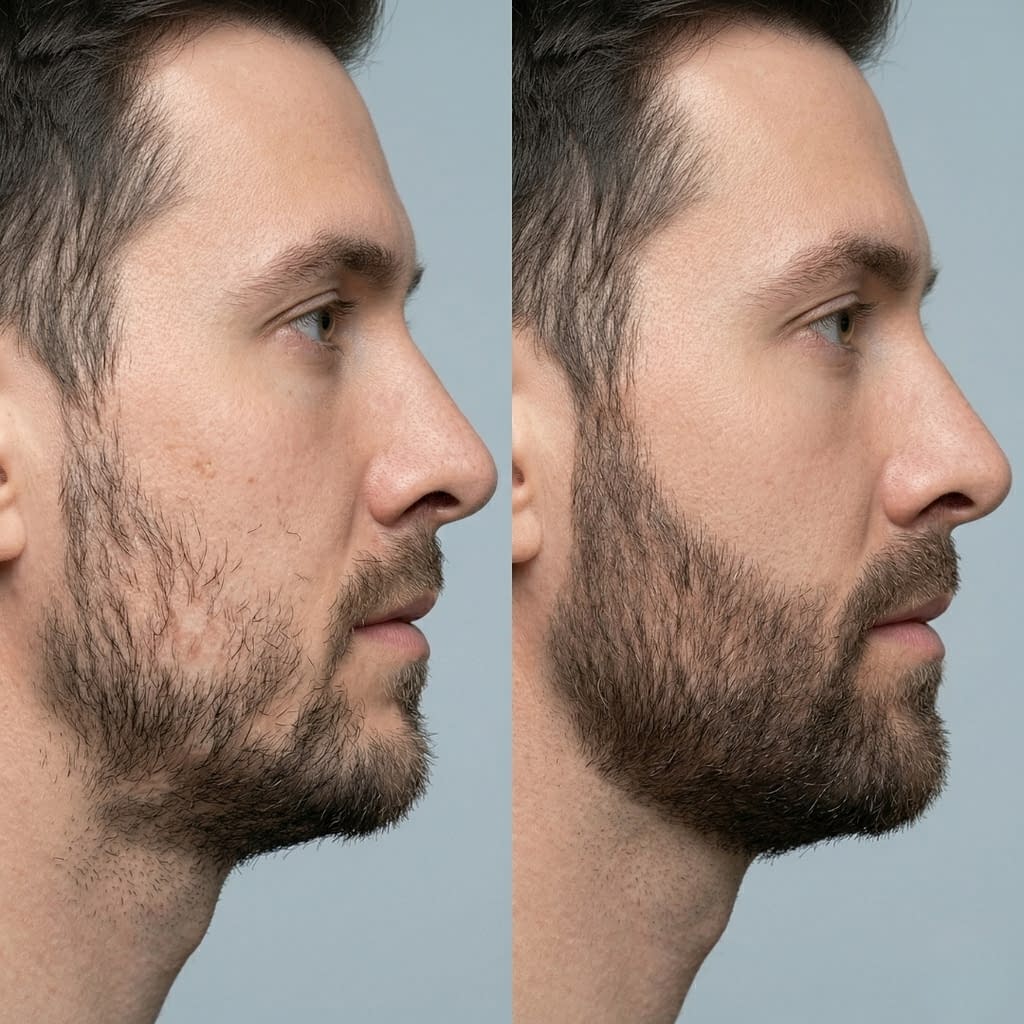
Many men notice patchiness along the cheeks, around the chin, or near the jawline. Some people also have gaps near the mustache or the sideburn area. Often, these gaps become more noticeable when the beard is longer because the full sections grow out while the sparse sections remain thin. That contrast makes the beard look less uniform.
Step by step: why patchiness develops
- Hair follicles do not all grow at the same speed.
- Some facial areas are naturally less dense.
- Hormones and age affect growth patterns.
- Beard length can make sparse areas stand out more.
- Lighting and grooming choices can make the patchiness appear even more visible.
Patchy growth is normal, and that is why fill-in techniques are so useful. They help balance the beard without changing your natural growth pattern.
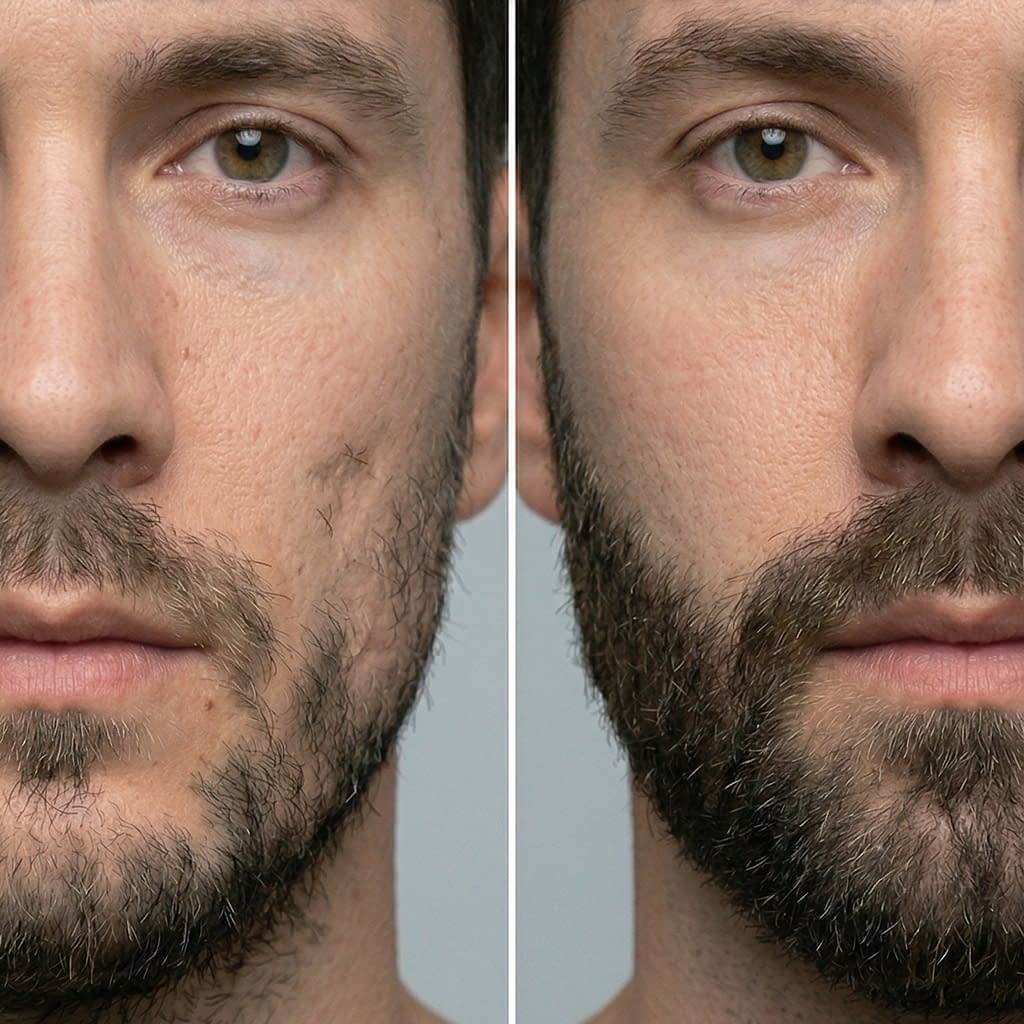
How to Tell Whether Your Beard Needs Filling In
Not every beard needs a fill-in. Sometimes the beard just needs a better trim, a cleaner shape, or a little patience while it grows. The goal is to know whether the issue is real patchiness or just the way the beard is styled.
A beard may benefit from filling in if the gaps are obvious even after trimming, if certain areas look significantly lighter than the rest, or if the beard looks uneven in photos and under natural light. You may also notice that the beard looks better from a distance than up close, which is a sign that the overall shape is good but density needs help.
Step by step: check whether fill-in would help
- Look at your beard in natural daylight.
- Notice whether the thin areas break up the shape.
- Compare the left and right sides for balance.
- Check whether the patchiness is visible after combing the beard into place.
- Decide whether you want to improve density, shape, or both.
If the beard is mostly full but has a few weak spots, a pencil or tint can make a big difference.
Brow Pencil vs Beard Tint Which One Works Best
Both brow pencil and beard tint can help fill in patchy areas, but they work differently. The best choice depends on how much coverage you need, how natural you want the finish to look, and how much time you want to spend.
A brow pencil gives you precision. It is excellent for small gaps, lighter patches, or areas where you need to draw in individual-looking hairs. It is also easier to control if you are new to filling in beard patches. Beard tint, on the other hand, creates a softer and more blended finish. It is better for larger sparse areas or for people who want the beard to look fuller overall rather than line by line.
Step by step: how to choose
- Use a brow pencil if the patch is small or sharply defined.
- Use beard tint if the beard is generally light or uneven in multiple areas.
- Choose pencil if you want quick touch-ups.
- Choose tint if you want a more uniform look that lasts longer.
- Combine both if you need a stronger yet still natural result.
Many people start with a pencil because it is more forgiving, then move to tint once they know how much coverage their beard really needs.
Choosing the Right Shade for a Natural Beard Look
The right shade is one of the most important parts of making the fill-in look real. If the color is too dark, it can look harsh or fake. If it is too light, it will not cover the patchiness well enough. The best shade usually matches the beard hair you already have, or it may be one shade softer if you want a more subtle effect.
For a natural look, it is usually better to avoid black unless your beard hair is truly very dark. Soft brown, dark brown, ash brown, or neutral shades tend to look more realistic on most faces. If your beard has some warmth or redness, a slightly neutral tone often blends better than something too warm or too cool.
Step by step: choosing the shade
- Compare the product to your beard hair in daylight.
- Match the mid-lengths of the beard, not the darkest strands.
- Avoid colors that look shiny or overly bold.
- Test the shade on a small area first.
- Check the result from a short distance and in a mirror.
The best shade should disappear into the beard once it is blended. If it stands out on its own, it is probably too strong.
How to Prep Your Beard Before Filling in Patchy Areas
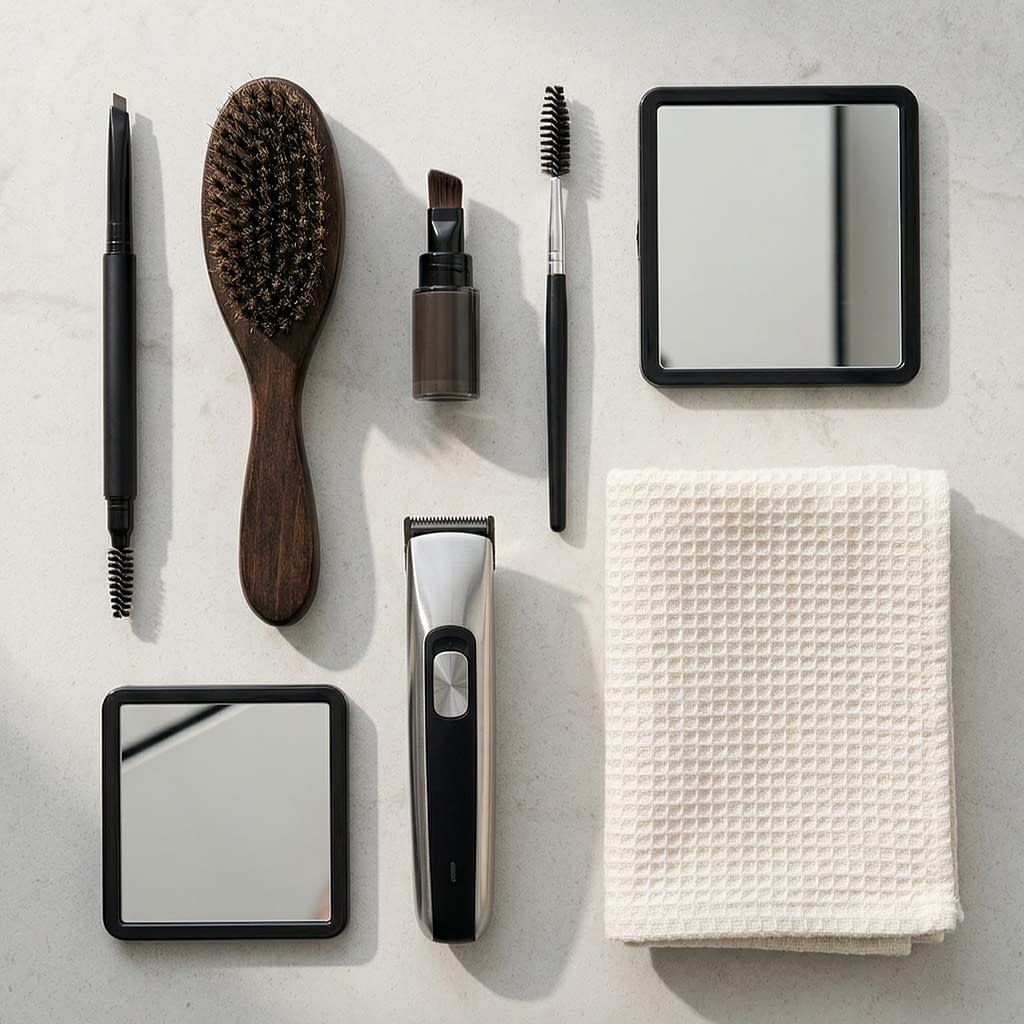
Good prep makes a huge difference. A clean, dry, and combed beard gives you a smoother surface to work on and helps the product blend better. If the beard is oily, damp, or tangled, the pencil or tint may go on unevenly.
Before filling in, wash the face and beard gently if needed, then dry thoroughly. Brush or comb the beard in the direction you usually wear it so you can see the patchy areas clearly. If the beard is too long or uneven, a light trim may help define where the gaps are. Prep is not about making the beard perfect. It is about making the fill-in easier and more believable.
Step by step: prep routine
- Cleanse the beard area lightly.
- Dry the beard completely.
- Brush it into its natural shape.
- Trim stray hairs if the outline looks messy.
- Identify the exact patches that need attention.
A well-prepped beard gives you better control and helps the fill-in last longer.
Step-by-Step Guide to Filling in Beard Patches with a Pencil
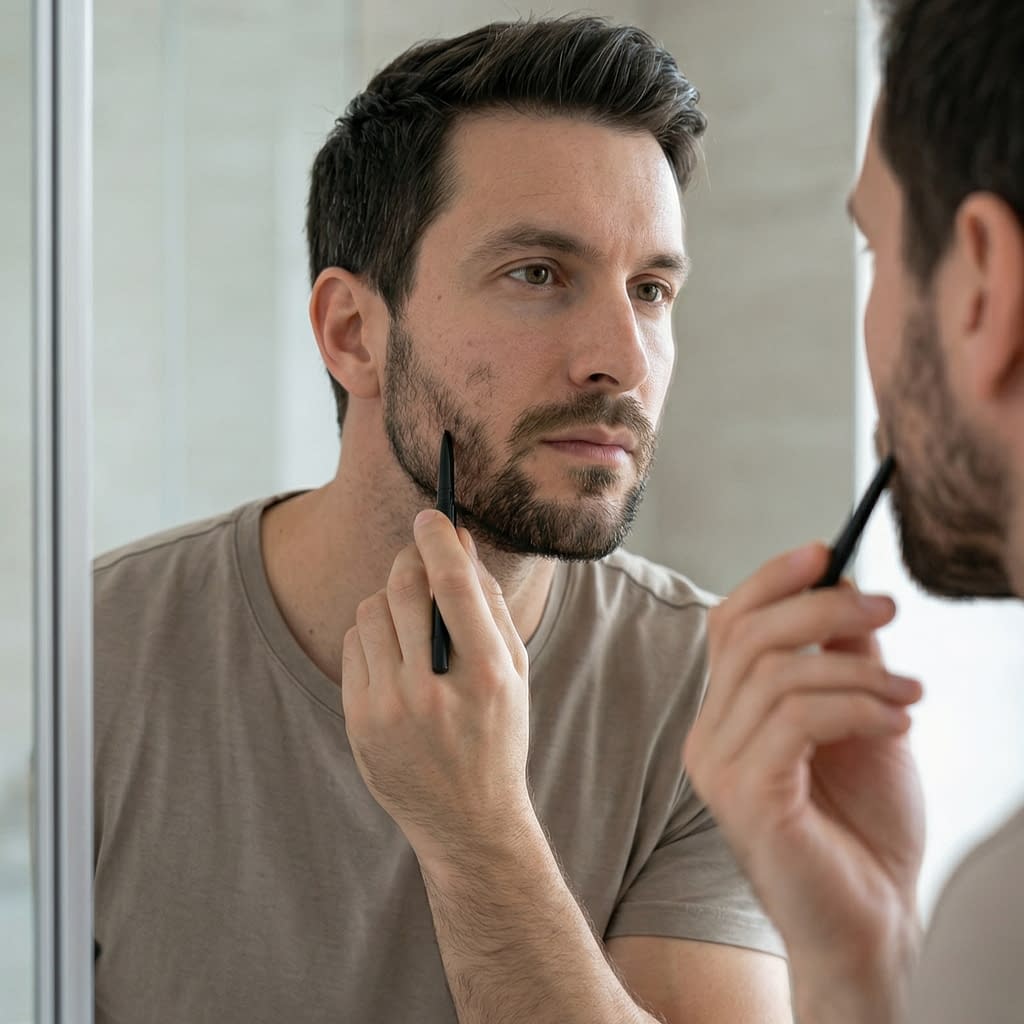
A brow pencil can work very well for beard patches when used with a light hand. The idea is not to color the entire beard. Instead, you create the impression of denser facial hair by drawing soft, hair-like strokes where the beard is thin.
Start with a sharpened or fine tip if possible. The stroke should be thin enough to look like individual hairs, not thick blocks of color. Apply the pencil lightly in the direction of hair growth, then blend just enough to soften the edges while keeping the texture visible. If you press too hard, the area will look filled in rather than naturally dense.
Step by step: pencil application
- Identify the patchy area.
- Use short, hair-like strokes in the direction of growth.
- Keep pressure light.
- Build the color slowly, not all at once.
- Brush the area gently with a clean spoolie or beard comb.
- Check the beard from different angles to make sure the patch blends in.
Helpful tips
Choose a brow pencil with a matte finish rather than a shiny one. Pencil works best when you mimic the random look of natural facial hair instead of drawing one smooth line. The more irregular and fine the strokes look, the more realistic the result.
How to Use Beard Tint for a More Even, Fuller Look
Beard tint is useful when you want a softer and broader fill-in effect. It can help create overall fullness, especially if the beard has several lighter or thinner sections. Tint usually works more like a color wash than a drawing tool, so it is better for blending the beard together rather than detailing tiny gaps.
If you use tint, choose a formula designed for facial hair whenever possible. That makes it easier to control the application and reduces the risk of looking too heavy. Apply carefully only where the beard needs more density. If you are using a temporary tint product, focus on the outer and mid areas of the patch rather than saturating the entire beard area at once.
Step by step: tint application
- Start with a clean, dry beard.
- Test the tint on a small hidden area first if you are unsure.
- Apply a small amount to the patchy section.
- Use a brush, applicator, or fingertip as directed by the product.
- Blend it into the surrounding beard.
- Let it set fully before touching or grooming the area.
Tint can look very natural when used in thin layers. The goal is evenness, not total coverage.
Blending Tips to Make Filled-In Areas Look Natural
Blending is what makes or breaks the result. Even if the color is perfect, the beard will look fake if the filled area has obvious lines or dense blocks of pigment. The transition between the patch and the fuller beard should be soft and gradual.
A beard comb, spoolie, or clean fingertip can help soften the product. After applying pencil or tint, lightly comb through the beard in the same direction as the hair growth. This helps distribute the product and breaks up any harsh edges. Check the beard in daylight and from a few feet away. If the patch still reads as a block of color, keep blending lightly until it looks more like natural density.
Step by step: blending process
- Apply the product in thin layers.
- Comb through the beard gently.
- Focus on smoothing the edges of the filled area.
- Add more product only if the patch is still visible.
- Recheck the beard in natural light.
Blending should make the fill-in invisible at a glance. If you can easily spot where the product was applied, keep softening it.
How to Match Beard Color with Your Hair and Skin Tone
Matching beard color is about making the fill-in look like it belongs to your face. Hair color alone is not enough. Your skin tone matters too, because a shade that looks good on one person may look too harsh or too dull on another.
If your beard and hair are both dark, a deep brown or soft black may work well. If your beard has some warmth, a neutral brown often looks more natural than something too orange. If your skin tone is lighter, you may want to avoid very dark shades that create too much contrast. If your skin tone is deeper, a richer brown may blend better than a flat black.
Step by step: shade matching
- Compare the color to both beard hair and skin tone.
- Choose a shade that looks natural in daylight.
- Avoid anything that creates a harsh outline.
- Test on one small patch before filling larger areas.
- Adjust based on how the color looks after blending.
The right color should work with your overall look, not just the beard itself.
Common Mistakes That Make a Patchy Beard Look Fake
Several common mistakes can make a filled-in beard look obvious rather than improved. The most common issue is using too much product. Heavy application can make the beard appear drawn on, especially under bright light. Another common mistake is choosing the wrong shade, which creates an unnatural contrast between the fill-in area and the rest of the beard.
Other mistakes include skipping prep, not blending enough, filling in areas that do not actually need it, and trying to create complete uniformity. Real facial hair is never perfectly even, so the goal is to enhance the beard, not erase all texture.
Step by step: avoid the fake look
- Start with a very small amount of product.
- Match the color carefully.
- Blend thoroughly.
- Keep some natural variation in the beard.
- Check the finish in daylight before leaving the house.
The more subtle the fill-in, the more believable it will look.
How to Make Your Beard Fill-In Last Longer Throughout the Day
Once you have filled in the beard, you want it to stay looking natural and balanced through the day. The best way to do that is to start with a clean, dry beard and use a product that suits your skin and environment. If your face gets oily quickly, too much product may break down faster. If the beard is brushed or touched constantly, the fill-in may fade unevenly.
A light setting product can help in some cases, but the best long-lasting result usually comes from careful application and minimal touching. If you need the look to last all day, keep a small pencil or tint with you for touch-ups, and avoid heavy rubbing or washing around the beard area.
Step by step: improve longevity
- Prep the beard well before application.
- Use thin layers instead of thick ones.
- Let tint or product set completely.
- Avoid touching or brushing the area too much.
- Carry a small touch-up tool if needed.
When the fill-in is applied lightly and blended well, it tends to wear more naturally as the day goes on.
Final Words
A patchy beard does not have to stay patchy in appearance. With the right pencil or tint, careful shade matching, and a light hand, you can fill in sparse areas in a way that looks real and polished. The biggest secret is restraint. You are not trying to draw a new beard onto your face. You are simply making the beard you already have look fuller, more even, and more intentional.
The most natural results come from good prep, thin layers, soft blending, and choosing a shade that works with both your hair and skin tone. If you use a pencil for detail and tint for softness, you can build a beard look that feels believable from every angle. Once you get the technique down, filling in patchy areas becomes a quick and useful part of your routine.
A beard does not need to be perfect to look great. It just needs to look balanced, clean, and confident.


