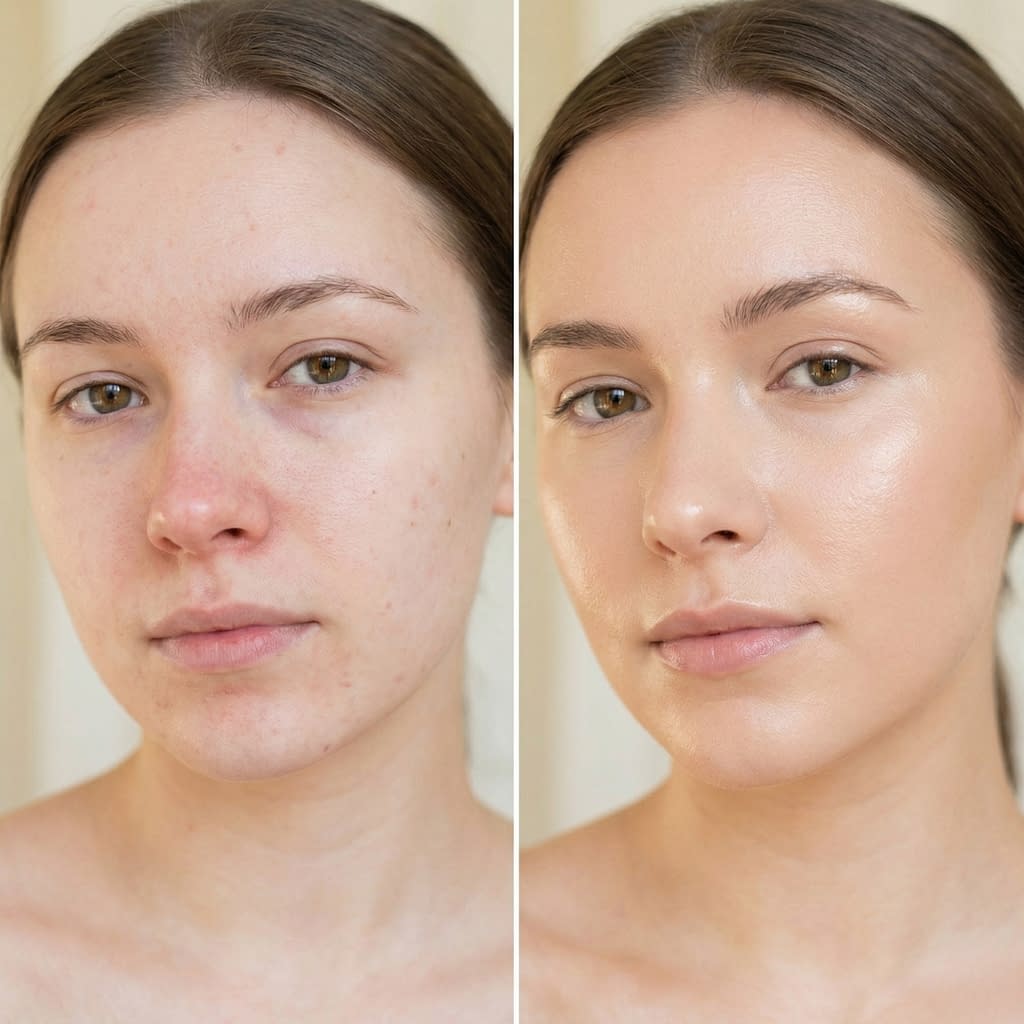
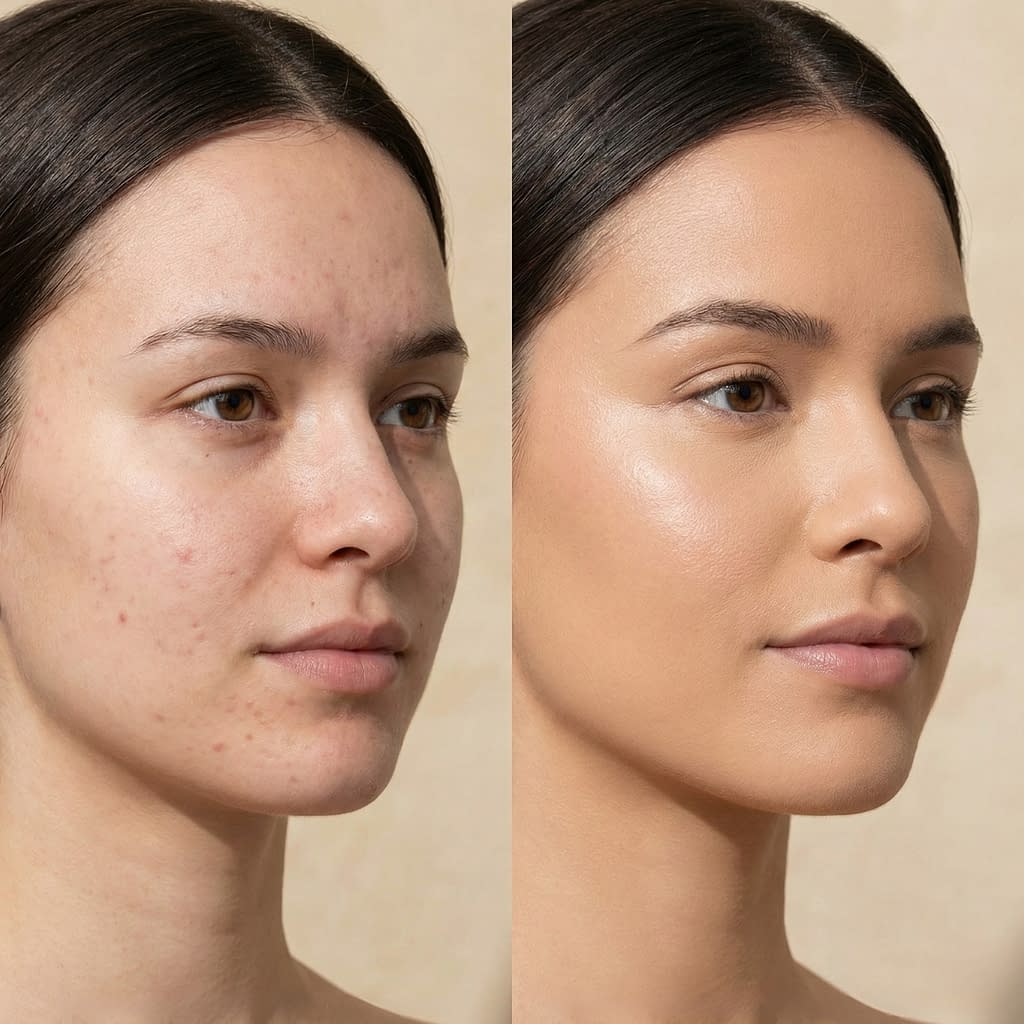
Getting foundation to look like skin is about texture, light, and restraint — not hiding your face under layers. The goal is even, natural coverage that moves with you, reflects light like healthy skin, and still lets your natural features show through. Below is a practical, step-by-step guide that walks you through everything: skincare prep, choosing shade and formula, application methods, smart layering, spot concealing, blending tools, subtle shaping, setting, and day-long maintenance. Follow these steps and your foundation will read like skin — not makeup.
Why Natural-Looking Foundation Matters
Natural-looking foundation flatters everyone because it:
- Keeps the skin’s texture visible (not masked).
- Looks convincing in daylight and photos.
- Avoids the “cakey” or “mask” effect that ages or flattens the face.
- Lets other features (cheeks, brows, lips) shine through.
People notice when makeup looks artificial more than they notice if you’re wearing makeup at all. The trick is to correct and even the skin while preserving its translucency and dimension.
Prep Your Skin for a Flawless Base
Good makeup begins with good skin. Prep creates an even canvas so foundation lays down thinly and lasts.
Step-by-step skin prep
- Cleanse gently to remove dirt, oil, and leftover products. Use a cleanser matched to your skin type.
- Tone (optional) to restore pH and remove traces of cleanser — use a hydrating, alcohol-free toner.
- Treat active concerns (acne, redness) with targeted serums — but let them absorb fully before makeup.
- Apply a lightweight hydrating serum (hyaluronic acid or glycerin) if skin is dry or looks texture-prone. Pat it in.
- Moisturize appropriately:
- Dry skin → richer cream.
- Combination → lightweight lotion.
- Oily → gel or oil-free lotion.
Apply and wait 1–2 minutes to let it sink in (skin should feel slightly tacky, not slick).
- Use an eye cream if you have dry under-eyes — gives a smoother canvas for concealer.
- Prime strategically: choose a primer only if it solves a problem (mattifying for oily T-zone, smoothing silicone for texture, hydrating for dry skin). Apply a very thin layer exactly where needed and let it settle for 30–60 seconds.
Prep tip: less is more. Overloading with heavy creams makes foundation slip. Aim for hydrated, not overloaded.
Choosing the Right Foundation Shade and Formula

Shade and texture are the foundation’s two most important traits.
Shade selection (step-by-step)
- Test on the jawline, not the wrist — jaw gives the most accurate match to face and neck.
- Check in natural light to avoid indoor yellow lighting mistakes.
- Match undertones: cool (pink), warm (yellow/golden), or neutral. If you’re unsure, neutral or slightly warm usually reads best.
- Pick two nearby shades if you’re in-between seasons (summer vs winter skin tone) and mix them as needed.
Formula selection by skin type
- Dry skin: luminous or dewy liquids, tinted moisturizers, or cushion formulas with hydrating ingredients.
- Normal/combination: light-to-medium buildable liquid or serum foundations.
- Oily skin: long-wear matte or natural-matte liquids; oil-control primers help.
- Textured skin / visible pores: lightweight coverage plus light-diffusing/soft-focus formulas; avoid heavy matte powders that sit in creases.
- Want sheer, skin-like finish: consider skin tints, BB/CC creams, or mix a full-coverage foundation with a few drops of facial oil or moisturizer to sheer it out.
If in doubt, choose a more lightweight formula and build in targeted areas rather than starting heavy.
How to Apply Foundation for a Skin-Like Finish
Application method matters as much as product choice.
Universal application steps
- Start with very small amounts. Dot product in 5 points: forehead, nose, both cheeks, chin.
- Work from the center out. The center of the face often needs more coverage; the perimeters less.
- Thin layers: blend each thin layer fully before deciding whether to add more. Multiple thin layers look skin-like — one thick layer looks makeup-y.
- Blend into hairline and jawline so there’s no color break; the neck should subtly match.
- Check in daylight to ensure you’ve blended evenly.
Recommended tools by finish
- Damp sponge (beauty blender): presses product into skin for dewy, blurred finish. Use bounce/patting motions.
- Dense synthetic brush (buffing brush): circular buffing for medium coverage and skin-like texture.
- Fingertips: best for creams and tints — body heat melts product and helps it meld with skin. Use for targeted small areas.
Technique tip: whichever tool you use, the motion should be pressing/rolling — avoid long sweeping strokes that streak.
Layering Techniques Without a Cakey Look
Build coverage only where needed; leave the rest sheer.
Targeted layering plan
- Overall base: apply a thin, sheer layer across the face to even tone.
- Spot build: for redness, blemishes, or hyperpigmentation, use a small brush or finger to add a tiny extra layer only over the spot; blend the edges into surrounding skin.
- Use multitasking products like a tint or lightweight serum foundation for everyday base — they’re forgiving.
- Let each layer set for 10–15 seconds before adding another so it bonds to skin and stays thin.
- Finish with a very light translucent dust only where oil builds or where you need a little extra staying power (T-zone). Use a small fluffy brush and a light hand.
Key rule: never cake a concealer or foundation on top of a moving, oily surface. Blot first, then add a thin correction layer.
Using Concealer Strategically for Seamless Coverage
Concealer should solve, not blanket.
Concealer strategy (step-by-step)
- Color-correct first when needed: use peach/orange correctors for blue/purple under-eyes; gentle green for surface redness (very small amount).
- Choose a concealer one shade lighter than foundation for under-eyes (brightens) and a shade matching foundation for spots.
- Apply minimal product: dot concealer on the darkest point and blend outward. For under-eyes, use a triangle under the eye and blend (lifts and gives dimension).
- Press, don’t rub: use a damp sponge or fingertip to press concealer into the skin for a natural melt-in effect.
- Set only where needed: light dust under the eyes if creasing is a problem, but avoid over-powdering mattifying areas that should still read like skin.
If a spot is stubborn, thin layers of concealer set with a precise micro-powder press will hide it without bulk.
Blending Tools: Brushes, Sponges, and Fingers

Choose the tool that matches the finish you want and the product you’re using.
Tool guide & technique
- Damp sponge: gives the most natural, hydrated finish; holds minimal product and spreads it thinly. Bounce/pat motions.
- Dense buffing brush: provides slightly more coverage and still skin-like if used in light circular buffing motions. Great for liquid/cream foundations.
- Stippling brush: useful for airbrushed finish with thin layers; lightly stipple then buff.
- Fingers: ideal for products that react to body heat (cream bronzers, tinted moisturizers) — use to warm and press into skin.
- Combination: apply foundation with brush for speed, then press with a sponge to remove any excess and fuse it into skin.
Cleaning and maintenance: wash brushes and sponges regularly (weekly) — dirty tools leave streaks and harbor bacteria.
Highlighting and Contouring for Natural Dimension
Subtle light and shadow restore dimension lost by even coverage.
Natural shaping steps
- Highlight sparingly: apply a small amount of a light-reflecting cream (not glitter) to the high points — tops of cheekbones, bridge of nose, brow bone. Blend into skin.
- Contour softly: use a shade one to two tones deeper than your skin (cream or powder) under cheekbones, along the jawline, and at the temples. Blend thoroughly so it looks like shadow, not color.
- Layer transparently: cream contour under powder bronzer can create very natural depth when blended well.
- Diffuse edges: always soften the edges of highlight/contour with a clean brush or sponge so transitions read like natural shadow.
Remember: light sculpts skin more than dark — subtlety wins.
Setting Your Foundation Without Drying Your Skin
Setting keeps foundation in place without stealing life from the skin.
Setting tips
- Spot-set, don’t blanket-set. Apply translucent powder only to areas that crease or get oily (under-eyes, nose, T-zone). Use a small puff and press motion.
- Choose the right powder: finely milled translucent powders for most; luminous light-reflecting powders for dry skin. Avoid coarse mattifying powders that highlight texture.
- Use a setting spray to remove any powdery finish and lock everything together — mist 2–3 times at arm’s length in an X and T motion. Choose a hydrating mist for dewy skin or a long-wear setting spray if you need longevity.
- For dry skin: skip powder over cheeks—use spray to set instead. For oily skin: a light dusting across the T-zone then a dewy spray can be very effective.
The goal is to meld the product into the skin so texture reads natural.
How to Maintain a Dewy or Matte Finish Throughout the Day

Different skin types need different maintenance hacks.
Dewy skin maintenance
- Carry a hydrating mist and spritz mid-day to reactivate dew.
- Blot oil lightly (don’t powder the whole face) and re-mist to keep glow natural.
Matte skin maintenance
- Blot with tissue or blotting paper to remove shine without adding product.
- Touch-up with a small travel powder compact only on the T-zone, using a light hand.
Avoid layering heavy powders over the same area repeatedly — it builds up and eventually looks cakey. Instead, blot and reapply tiny, precise amounts.
Common Mistakes That Make Foundation Look Artificial
Watch for these pitfalls — they’re the fastest way to a fake look.
Common errors and fixes
- Wrong shade or undertone: always check in daylight; mix shades if needed.
- Too much product: always start minimal and build only where needed.
- Not blending edges (hairline/jaw): always blend to neck and hairline.
- Over-powdering: powder only where necessary.
- Texture ignoring: heavy, pore-clogging formulas on textured areas look cakey — soften with a light-reflecting product or skin balm instead.
If your foundation looks heavy, remove with a damp cloth and start again with less product.
Skincare Meets Makeup: Ingredients That Enhance the Skin-Like Look
Certain ingredients help foundations sit nicer and look more like skin.
Helpful ingredients
- Hyaluronic acid / glycerin: hydrating humectants in formulas deliver fresh surface sheen.
- Squalane / lightweight oils: give a natural reflect without greasiness.
- Niacinamide: improves barrier and evens tone over time (found in some primers and foundations).
- Silicone derivatives (dimethicone): in primers, they smooth texture but use sparingly if you’re prone to congestion.
- Light diffusers / soft-focus powders: create blurring effect without heavy coverage.
When buying a foundation or primer, scanning the ingredient list for these can help you pick products that will read realistic.
Quick Daily Routine for Effortless, Natural Coverage
A 5-minute routine that looks like skin
- Hydrate & prime: lightweight serum + tiny dot of primer where you need it (30–60s).
- Tint or lightweight foundation: dot and press with damp sponge (90s).
- Conceal: small dots only where required, press to blend (30s).
- Powder only where needed: light press on T-zone (15s).
- Set & refresh: hydrating setting spray to fuse everything (10s).
Practice makes this rhythmic and quick — and your skin will look like skin, not makeup.
Final Words
Making foundation look like skin is less about perfect coverage and more about smart restraint, the right texture, and blending. Start with great prep, choose a shade and formula that matches your skin’s behavior, build coverage in thin, targeted layers, and finish by setting precisely. Use tools that press product into the skin (sponges, fingertips), and favor light-reflecting ingredients to maintain life and dimension. With practice and a gentle hand, your foundation will simply be your skin — even, luminous, and real.


