
Wishing your lipstick would survive coffee, lunch, and a long day of Zooms? You’re not alone. Long-wearing lip color is a mix of the right products, tiny techniques, and a little strategy. Do those consistently and your color will stay vivid, crisp, and comfortable — without feeling like a mask.
Below is a complete, practical guide with step-by-step methods you can use today. I’ll cover prep, formulas, primers, liners, layering, powder-setting, food/drink hacks, emergency fixes, and a short 3-step morning routine you can use on busy days. Let’s make your lip color last.
Why Lipstick Fades and What “Long-Lasting” Really Means
Why it fades:
- Lipstick sits on top of thin, textured, moving skin; eating, drinking, talking and rubbing all remove product.
- Oils from food and your lips break down pigments and binders.
- Excess moisture (saliva) and friction transfer color to cups, masks and napkins.
What “long-lasting” actually means:
- A product that resists transfer and remains visible after normal activity — not indestructible.
- Some formulas leave a stain (color tint) even after the top layer wears off; that’s often the best outcome (color plus a comfortable finish).
Real expectations: with the techniques below, you can get 6–12+ hours of noticeable color, with minimal touch-ups. A few messy meals may still require a quick reapply.
Prep Is Everything: Exfoliate and Hydrate for a Smooth Base
Smooth lips = smooth color. Do this the night before or 30 minutes before application.
Step-by-step lip prep
- Exfoliate gently: use a soft toothbrush or a sugar + honey scrub. Move in small circular strokes for 30–60 seconds to remove flaky skin. Don’t overdo it — once or twice a week is enough.
- Rinse and pat dry.
- Hydrate: apply a thin layer of nourishing lip balm (look for glycerin, squalane, shea) and let absorb 5–10 minutes. If you’re in a hurry, blot the excess with a tissue so the balm isn’t slippery.
- Optional (for very dry lips): use a lip mask overnight the night before a big day.
Why this helps: a uniform surface prevents patchiness and reduces the need for heavy layering that flakes off.
Choose the Right Formula: Matte, Stain, or Transfer-Resistant?
Pick the formula to match comfort and staying power:
- Matte (liquid-to-matte) — often very long-wearing and transfer-resistant, but can feel drying. Best if you want bold, lasting color.
- Lip stains — they dye the lip tissue and usually leave a long-lasting tint. Great for low-maintenance days; reapply balm for comfort.
- Traditional bullet lipstick — comfortable and buildable but transfers more; use with liner and powder to extend wear.
- “Transfer-resistant” claims — many liquid lipsticks advertise this. They work well, but technique (prep + setting) still matters.
Tip: if you have dry lips, choose a long-wear cream-to-matte formula or a stain + balm combo to balance longevity and comfort.
The Power of Lip Primer and When to Use It
Lip primers smooth the surface and create a tacky base that grips color.
How to use primer (step-by-step)
- Apply a thin layer of lip primer after your moisturizer and let it settle 30–60 seconds.
- If you don’t have a primer, a tiny bit of long-wear concealer or foundation worked into the lip can act as a base (this also neutralizes natural lip pigment so color appears truer).
- Pat off any excess — you want a slightly tacky surface, not slippery.
Primer helps especially with satin or creamy formulas that otherwise slide off sooner.
Lip Liner: The Secret to Shape, Grip, and Longer Wear
A liner does three jobs: defines shape, prevents feathering, and gives a base to hold color.
Liner technique (step-by-step)
- Choose a liner close to your lipstick shade — or one shade darker for definition.
- Outline the natural lip edge (or slightly outside if you want more fullness) with light, short strokes.
- Fill the entire lip with liner (not just the outline). This step is crucial — a filled liner = a color anchor that greatly extends wear.
- Blend lightly with a fingertip so there’s no harsh line before applying lipstick.
Filling the lips with liner reduces the amount of product you need to reapply later.
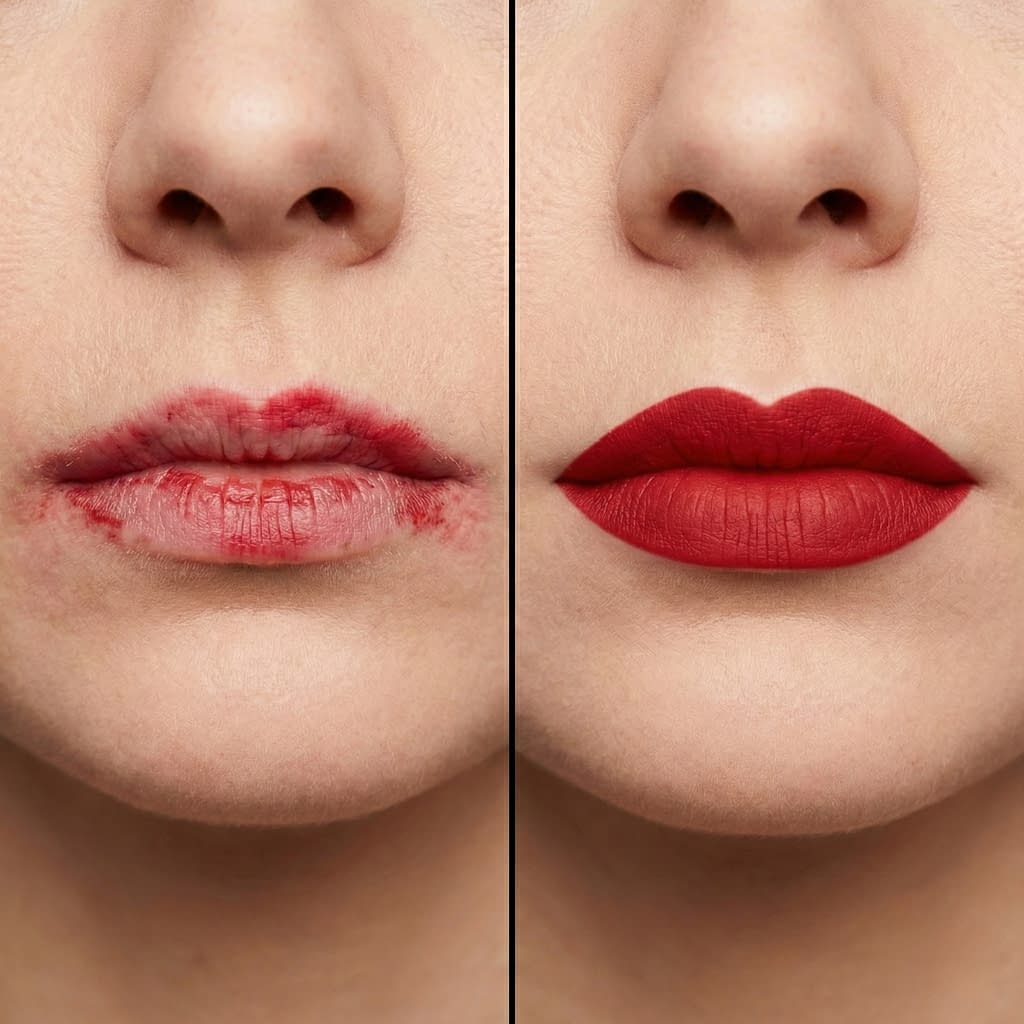
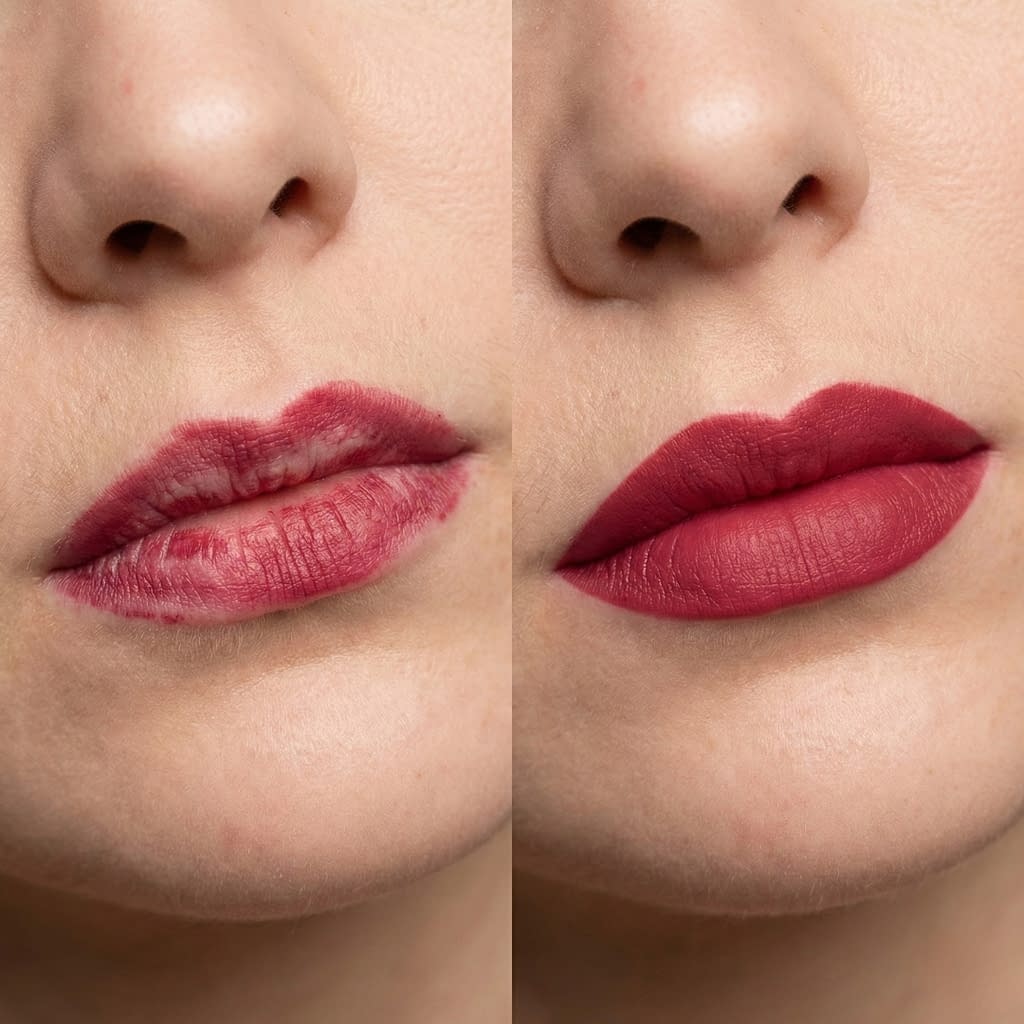
Layering Technique: Apply, Blot, and Reapply Like a Pro

Layering builds pigment without cake.
The classic layering method
- First thin layer: apply your lipstick or stain with a brush for precision.
- Blot: press a tissue between lips and press gently to remove excess top layer (this removes the oily layer that transfers).
- Second layer: apply another thin layer to intensify and even out color.
- Press (don’t rub) with a clean tissue to set slightly.
Why it works: blotting removes surface oils and forces the pigment to sink in, creating a longer-lasting finish.
Powder-Set Method for Extra Staying Power
A light powder stop-locks color—very effective for lipstick that tends to migrate.
Powder-set steps
- After your second thin layer, take a thin tissue and hold it over your lips.
- With a small fluffy brush, dust translucent powder lightly over the tissue—this sets the color without dulling the finish.
- Remove tissue and press lips together gently.
- If desired, reapply a micro layer of color for shine or intensity (optional).
This method reduces transfer and increases longevity while keeping texture natural.
Lip Stains vs. Traditional Lipstick — When to Pick Which
Choose based on finish and maintenance:
- Lip stain: picks for minimal transfer, light-feel days, or when you want a “no-makeup” look with color that stays. But stains can dry and may need balm on top.
- Traditional lipstick (with liner and setting): better for bold, opaque finishes; slightly more maintenance but a truer color payoff.
- Hybrid approach: stain first to lay down a base tint, then top with lipstick; blot and set — best of both worlds.
If you want the truest color with max life, stain+liner+powdered lipstick layer wins.
Foods and Drinks That Make Lip Color Last Longer (and Which to Avoid)
You can’t completely control what stains do, but you can minimize fallout.
Help your color survive:
- Sip through a straw (where appropriate).
- Choose cooler foods or cut food into small bites to avoid heavy rubbing.
- Eat with utensils and apply small, careful bites.
Foods/drinks to avoid (or be careful with):
- Oily or greasy foods (pizza, fries) — oils break down pigment.
- Sauces and soups that rub lips.
- Hot drinks that steam and soften lipstick — blot after sipping.
- Sauces with strong pigments (tomato, curry) that can stain and displace color.
If you can’t avoid greasy foods, blot after the meal and quickly reapply a thin layer or touch-up with liner + spot color.
Quick Touch-Up Tricks That Keep Color Fresh All Day

Carry a tiny kit: liner, small brush or bullet, translucent powder or blotting papers.
Fast touch-up routine
- Blot the center of the lips with a tissue to remove oil.
- Re-outline quickly with your liner if the edges faded.
- Fill center with a creamy lipstick or dab a little stain using a clean finger or brush.
- Press gently and blot if needed.
- Finish with a light press of powder (tissue + powder trick) to set if you’re going for long wear.
Small kit = big confidence.
Prevent Feathering and Bleeding with Simple Hacks
Feathering is when color wanders past the lip line — prevent it.
Feathering-fix steps
- Exfoliate and hydrate (prevents dry lines where feathering starts).
- Line the lips and consider a thin clear lip barrier or a dab of concealer around the outer lip edge to act as a physical barrier.
- Choose formulas labeled “long-wear” and avoid very creamy, runny textures.
- Press, don’t drag when applying and setting; friction lifts product and encourages migration.
Top tip: a tiny bit of translucent powder around the lip line before applying color helps control feathering.
How to Remove Long-Wear Lip Color Without Drying Your Lips
Long-wear formulas can be stubborn; remove them gently.
Removal steps
- Use an oil-based remover (cleansing oil, micellar oil, or cold-pressed oil like jojoba). Oil breaks down the pigment without scrubbing.
- Apply oil to lips, massage for 30–60 seconds to dissolve product.
- Wipe off with a soft tissue.
- Double clean with a gentle balm or micellar water if needed.
- Rehydrate: apply a rich lip balm or overnight mask to restore moisture.
No harsh scrubbing — oils are your friend here.
Emergency Fixes: What to Do When Your Lipstick Smudges

Immediate fixes for smudging:
- Blot excess color immediately with tissue.
- Clean edges with a cotton swab dipped in micellar water or makeup remover.
- Re-outline with liner to redefine.
- Press powder through a tissue if you need to set quickly.
- If smudge is large: remove all color with oil, re-prep quickly (blot + thin balm), and reapply the two-layer technique.
A calm, quick approach prevents a smudgy disaster.
Common Mistakes That Make Lip Color Disappear Fast
Avoid these classic errors:
- Applying thick, single coats without blotting.
- Skipping liner and primer on formulas that transfer.
- Eating greasy food without blotting or reapplying.
- Over-exfoliating lips right before application (leads to raw skin and poor adhesion).
- Using heavy gloss as a top coat for long wear — gloss speeds transfer (use sparingly in center only if you want shine).
Learn these and you’ll save time and product.
Quick 3-Step Morning Routine for All-Day Lip Color
When you’re short on time, this works:
- Prep (1–2 minutes): gentle exfoliate (if needed) and thin balm; blot.
- Prime + line (1–2 minutes): thin primer or concealer base + full-lip liner (fill in lips).
- Layer + set (2–3 minutes): thin first color layer, blot, thin second layer, tissue + translucent powder through tissue, optional micro reapply.
Total: ~5 minutes for a durable finish.
Final Words
Making lipstick last a whole day is totally achievable with a little prep, the right products, and careful technique. Exfoliate and hydrate, choose a formula that suits your comfort, use primer and a filled-in liner as anchors, layer and blot, set with powder through a tissue, and carry a tiny touch-up kit for emergencies. When you need to remove stubborn long-wear color, use an oil-based remover and follow with a nourishing balm.


