A smooth base is the part of makeup that makes everything else look better. When skin is prepped well and foundation sits evenly, your blush blends more naturally, your concealer looks brighter, and your whole face reads as polished instead of patchy or heavy. The secret is not using the most products. It is using the right prep, the right textures, and the right techniques in the right order.
This guide breaks the process down step by step so you can build a base that looks soft, balanced, and skin-like. The focus is on real, usable techniques that help makeup sit better on the skin without looking thick or dry.
Why Your Base Sets the Tone for Your Entire Makeup Look
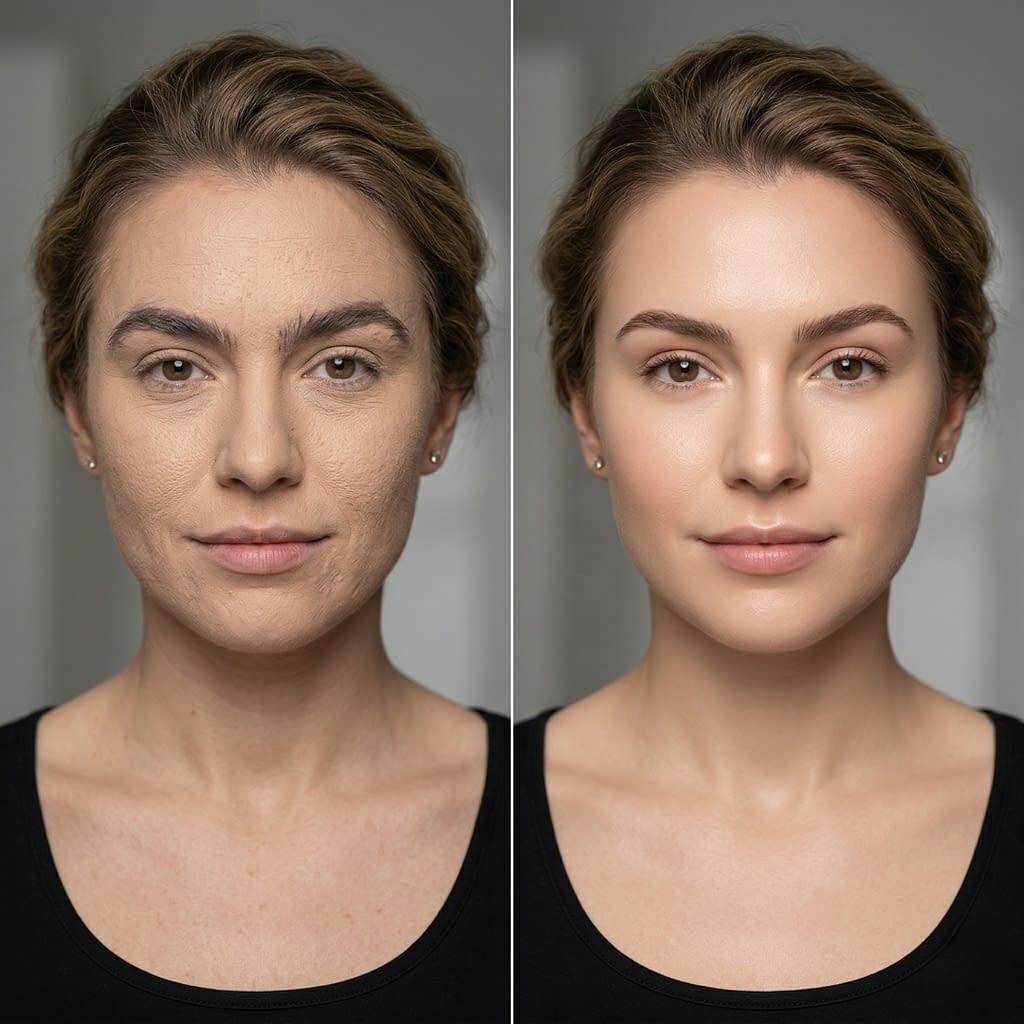
Your base is the foundation of the whole face, both literally and visually. If it looks smooth, everything on top of it tends to look smoother too. If it looks patchy, cakey, dry, or uneven, even the best eye makeup or lipstick can still feel unfinished.
A strong base does a few things:
- evens out tone
- softens the look of texture
- helps other products blend better
- makes makeup last longer
- gives the face a more polished finish
A smooth base does not mean hiding every bit of skin. It means creating a balanced surface that lets your natural skin still show through in a flattering way.
Skin Prep First: Cleanse, Exfoliate, and Hydrate Properly
Good makeup starts before makeup. If the skin is dry, flaky, oily, or congested, foundation has more to cling to and less chance of looking seamless.
Step by step skin prep
- Cleanse gently
Wash your face to remove oil, sweat, and leftover skincare. Use a cleanser that suits your skin type and avoid harsh scrubbing. - Exfoliate carefully
Smooth makeup sits better on skin that is not covered in dead flakes. Exfoliate only as often as your skin can handle. Too much exfoliation can make skin irritated and more textured. - Hydrate well
Apply a light serum or moisturizer so the skin feels comfortable and not tight. Hydrated skin usually helps foundation blend more evenly. - Wait a minute or two
Let products settle before putting makeup on. If skincare is still wet or slippery, foundation may slide around.
The goal is not to overload the skin. It is to create a clean, soft surface that makeup can sit on comfortably.
Understanding Your Skin Type Before Applying Makeup

Different skin types need different base strategies. What works on oily skin might look too dry on dry skin, and what works on mature skin might not work on acne-prone skin.
Main skin types and what they need
- Dry skin needs more hydration and softer, creamier products.
- Oily skin needs lightweight, long-wear formulas and careful powder placement.
- Combination skin often needs different products in different areas.
- Sensitive skin needs fragrance-free, gentle formulas that will not sting.
- Textured or acne-prone skin usually does best with thin layers and minimal rubbing.
Step by step
- Notice how your skin feels a few hours after washing.
- Identify where you get dryness, shine, or breakout-prone areas.
- Choose products that support those needs instead of fighting them.
- Adjust the routine by zone if needed, rather than using one heavy product everywhere.
The better you understand your skin, the easier it is to make your base look natural.
Choosing the Right Moisturizer for a Smooth Canvas
Moisturizer can make or break your base. Too little, and foundation can cling to dry areas. Too much, and makeup may slide or separate.
How to choose
- Dry skin: go for a richer cream that feels nourishing.
- Oily skin: use a lightweight gel or lotion.
- Combination skin: choose a balanced moisturizer that hydrates without feeling greasy.
- Sensitive skin: stick with fragrance-free, simple formulas.
Step by step
- Apply moisturizer after cleansing.
- Use enough to soften the skin, but not so much that it feels wet or heavy.
- Focus extra on dry areas like cheeks or around the nose.
- Wait until it absorbs before primer or foundation.
A good moisturizer helps makeup glide instead of gripping onto dry patches.
Primer: Do You Really Need It and How to Pick the Right One
Primer is helpful, but it is not mandatory for everyone. The right primer can smooth texture, help foundation grip, and improve longevity. The wrong one can pill, slide, or make makeup look worse.
When primer helps most
- large pores
- very oily skin
- dry patches that need smoothing
- makeup that fades quickly
- texture that needs a little blurring
How to choose
- Mattifying primer for oily areas
- Hydrating primer for dry skin
- Smoothing primer for texture or pores
Step by step
- Use only a small amount.
- Apply it to the areas that actually need it.
- Press it in gently instead of rubbing.
- Let it sit for a moment before foundation.
Primer should support the skin, not sit in a thick layer on top of it.
How to Choose the Perfect Foundation Formula and Shade
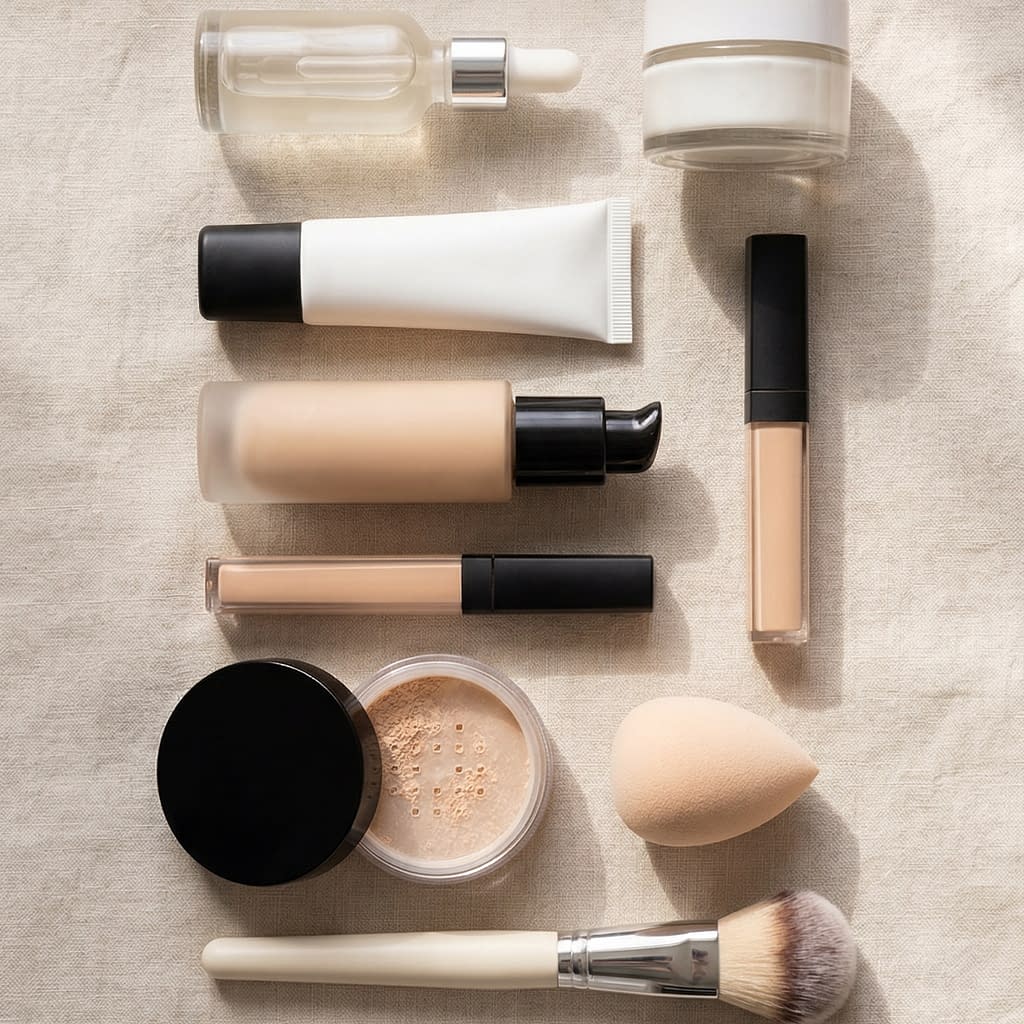
The perfect foundation is not just about color. It is also about finish, coverage, and texture.
Formula guide
- Light coverage for a skin-like look
- Medium coverage for more evening out without heaviness
- Matte finish for oil control
- Satin or natural finish for balanced skin-like appearance
- Dewy finish for dry skin that needs glow
Shade matching
- Test foundation on the jawline, not the hand.
- Check it in natural light.
- Pick a shade that disappears into your skin.
- Make sure the undertone matches too.
If the shade is too light, the base may look flat or gray. If it is too dark, it can look muddy or obvious. The right shade should blend in rather than sit on top of the skin.
Applying Foundation for a Skin-Like Finish (Brush vs. Sponge vs. Fingers)
The tool you use changes how the foundation looks.
Brush
Best for:
- fuller coverage
- a more polished look
- blending liquid foundation quickly
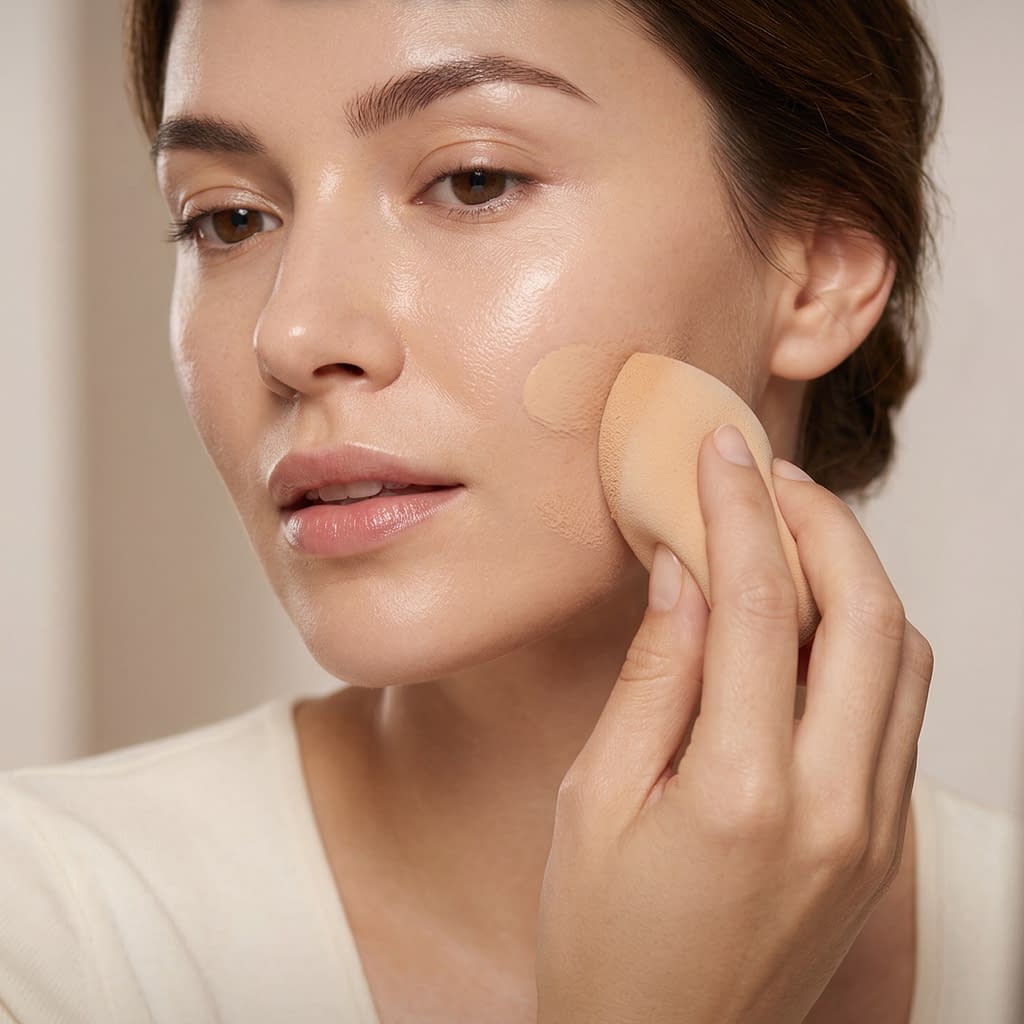
Sponge
Best for:
- sheer, skin-like finish
- pressing makeup into the skin
- softening heavy product
Fingers
Best for:
- tinted moisturizers
- cream formulas
- natural, melted-in finish
Step by step
- Start with a small amount of product.
- Place it in the center of the face first.
- Blend outward gradually.
- Use pressing or bouncing motions rather than dragging.
- Build only where needed.
A smooth base usually comes from thin layers blended patiently, not from one big layer all at once.
How to Build Coverage Without Looking Heavy or Cakey
Cakey makeup usually happens when too much product is layered too quickly or onto dry skin. The key is to build coverage slowly and only where necessary.
Step by step
- Apply a thin first layer.
- Check where coverage is actually needed.
- Add a second thin layer only to those areas.
- Let each layer settle before adding more.
- Avoid piling foundation everywhere just to cover one small spot.
If you need extra coverage on blemishes or redness, use concealer in those areas instead of making the whole face heavier.
Concealer Techniques That Brighten Without Creasing
Concealer should brighten, not sit in lines or look thick.
Best placement
- under the eyes
- around the nose
- on small blemishes
- on areas that need a little lift
Step by step
- Use a small amount.
- Place it only where needed.
- Blend the edges carefully.
- Do not overapply under the eyes.
- Set lightly if necessary.
For under-eyes, too much concealer tends to crease. A thin layer blended well usually looks fresher than heavy coverage.
Cream vs. Powder Products: What Works Best for a Smooth Base
Cream and powder each have their place. The best choice depends on the finish you want and your skin type.
Cream products
Great for:
- dry skin
- natural glow
- seamless blending
Powder products
Great for:
- oil control
- setting makeup
- a more matte finish
Step by step
- Use cream products first if you want a dewy base.
- Set only where needed with powder.
- Avoid layering too many powders over dry skin.
- Use powder blush or bronzer lightly if you need more longevity.
Creams melt into the skin well, while powders help lock everything in place. A mix of both often works best.
Setting Your Makeup Without Making It Look Dry
Setting makeup is important, but too much powder can flatten the face or make texture more visible.
Step by step
- Use a small amount of translucent or skin-toned powder.
- Focus on areas that crease or get oily.
- Press the powder in gently.
- Avoid dusting too much across the whole face.
- Leave drier areas a little more natural if possible.
The goal is to keep makeup in place while still letting the skin look soft.
Blending Techniques That Make Everything Seamless
Good blending is what separates makeup that looks placed on top of skin from makeup that looks like it belongs there.
Step by step
- Blend foundation from the center of the face outward.
- Use tapping, bouncing, or small circular motions.
- Soften any harsh edges around the hairline, jawline, and nose.
- Blend concealer into foundation so the layers disappear together.
- Step back and check in natural light.
Seamless makeup is often about patience. The more carefully you blend, the less product you need.
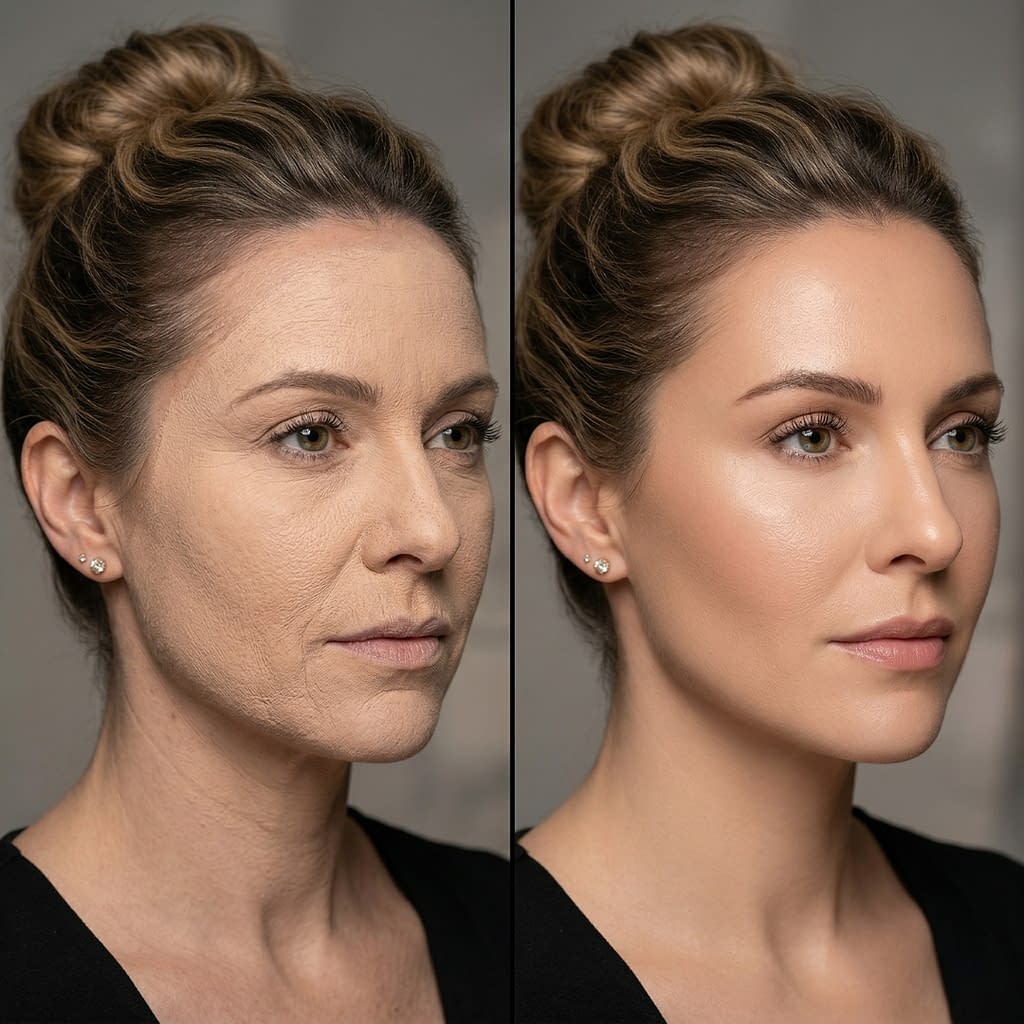
Fixing Texture Issues Like Dry Patches and Pores
Texture is normal. The trick is to work with it so it is less visible.
For dry patches
- hydrate well before makeup
- use creamier formulas
- avoid too much powder
- gently press makeup instead of rubbing it
For pores
- use a smoothing primer in those areas
- apply foundation with pressing motions
- avoid layering thick product over pores
- set only lightly
Step by step
- Identify the texture issue.
- Use the right product for that area.
- Apply thin layers.
- Blend carefully.
- Avoid overworking the area.
Trying to hide texture with heavy makeup usually makes it more obvious.
Common Mistakes That Ruin an Otherwise Smooth Base
A lot of base issues come from a few repeated mistakes.
Common mistakes include:
- using too much product
- skipping skincare
- not matching foundation properly
- applying makeup on very dry skin
- over-powdering
- using the wrong tool
- blending too aggressively
Step by step to avoid them
- Prep the skin properly.
- Use thinner layers.
- Match your formula to your skin type.
- Blend gently.
- Only set where needed.
Small technique changes can make your entire base look more polished.
Final Words
A smooth base does not come from piling on more and more makeup. It comes from creating the right surface, choosing formulas that suit your skin, and applying everything with care. When your skin is prepped well and your products are balanced, makeup looks softer, lasts better, and feels more comfortable.
If you remember only one thing, let it be this: smooth base makeup is built step by step. Cleanse, hydrate, choose the right foundation, apply in thin layers, and blend patiently. That is how you get a flawless look that still feels like skin.


