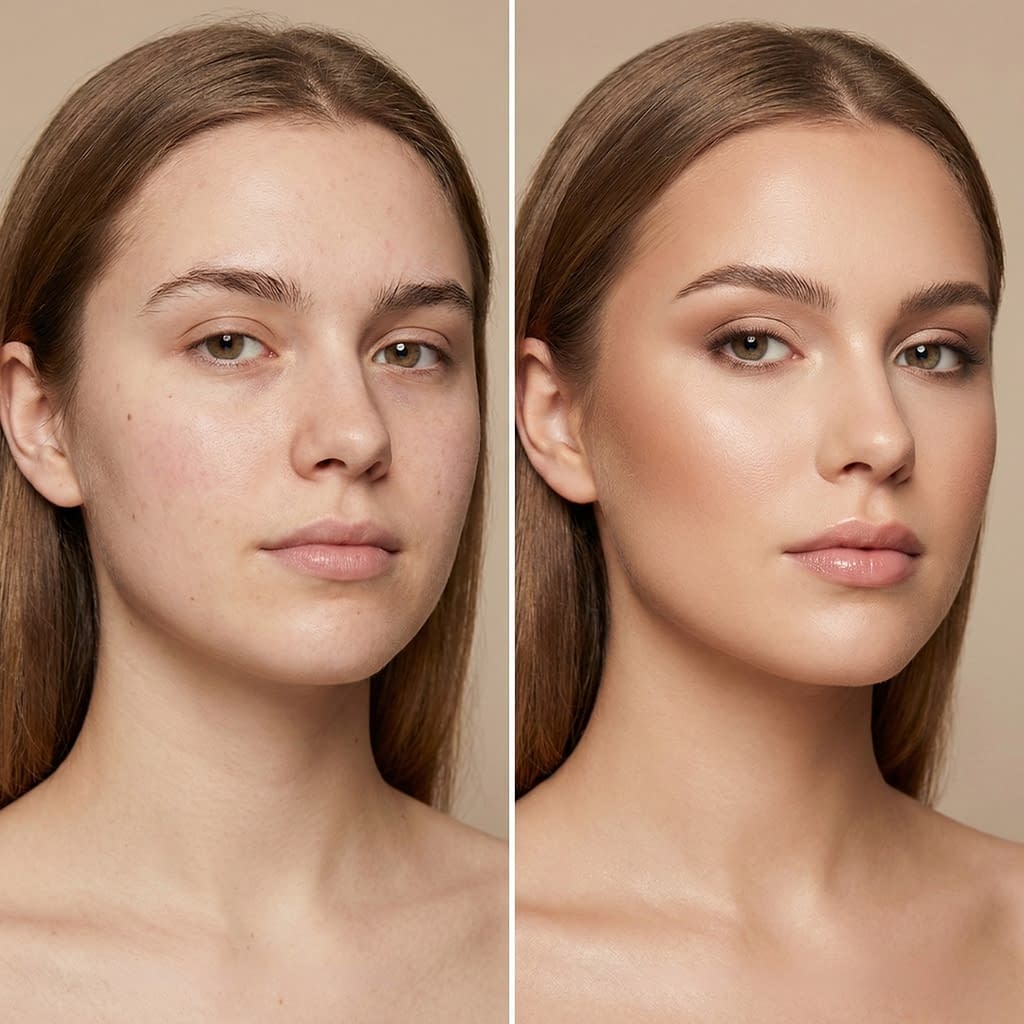
Makeup that reads “expensive” doesn’t come from the price tag — it comes from technique, thoughtful product placement, skin-first prep, clever texture choices, and tiny finishing touches that signal polish. This post breaks down the exact habits and steps that separate a luxe, camera-ready look from something that looks heavy, cakey, or amateur. Read it, practice it, and you’ll get the “invested-in-me” effect without spending a fortune.
“Expensive” Makeup Is About Technique, Not Price
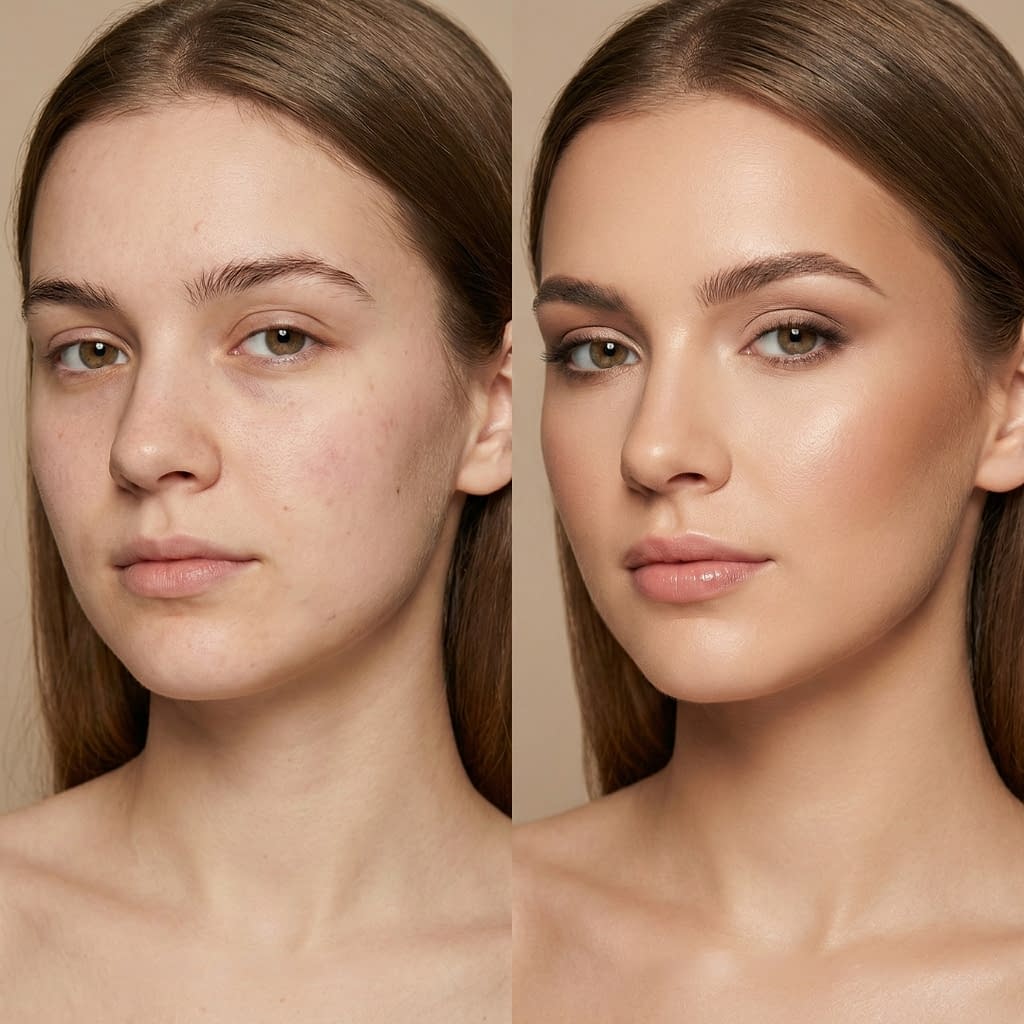
The expensive look = restraint + precision + skin health. High-priced products can help, but the same principles work with drugstore finds if you apply them right.
Step-by-step mindset shift
- Prioritize skin prep over product quantity.
- Use thin layers and build only where needed.
- Focus on edge control (soft edges, crisp lines where appropriate).
- Choose textures that flatter your skin (creams for dew, powders for control) and blend, blend, blend.
- Finish with a deliberate set & soften step (micro-powdering + setting spray).
Practice these consistently; technique multiplies quality.
Skin Preparation: The Real Foundation of a Luxury Look
No foundation, however expensive, can substitute a hydrated, calm canvas.
Step-by-step skin prep
- Double cleanse at night; morning: gentle rinse or light cleanse.
- Exfoliate 1–3×/week (gentle AHA/PHA or enzyme) to remove dead skin that makes makeup sit patchy.
- Hydrate: apply a humectant serum (hyaluronic acid or glycerin) on damp skin.
- Seal: follow with an appropriate moisturizer for your skin type.
- Prime strategically: only where needed — smoothing silicone for texture, hydrating primer for dry zones, mattifying on oily areas. Use a pea-sized amount and buff into skin.
Pro tip: let each step absorb 30–60 seconds so products don’t pill. Well-prepped skin reflects light evenly and reads expensive.
Perfecting the Base Without Heavy Coverage
A refined base evens tone while preserving skin texture and movement.
Step-by-step base application
- Choose the right formula: skin tint, light-buildable foundation, or thin medium coverage.
- Apply in thin layers: dot product at center of face and press outward with a damp sponge or fingertips.
- Spot-correct: use a small brush for concealer only on areas that need it (under-eyes, hyperpigmentation, blemishes).
- Blend edges into hairline and jaw — never stop at your face’s edge.
- Avoid matte overload: mix a drop of facial oil or moisturizing primer into your foundation if your skin looks too flat.
Luxury base = evened skin that still shows pores and movement, not a rigid mask.
Seamless Blending: The Biggest Difference Between Cheap and Chic
Seamless blending makes a look feel crafted.
Step-by-step blending rules
- Work in light passes. Blend each tiny layer fully before adding more.
- Use the right tool: sponge for dewy skin, dense brush for buffed coverage, fingertips for creams.
- Feather edges outward — don’t stop abruptly.
- Blend color transitions: bronzer, blush, and highlight should fade into each other, not sit as separate blocks.
- Check in natural light and from arm’s length — that’s how others will see you.
A soft edge is the #1 luxury cue.
Strategic Use of Concealer for a Polished Finish
Concealer should correct, lift, and brighten without drawing attention to itself.
Step-by-step concealer strategy
- Color-correct first if needed (peach/orange for blue under-eyes; green for redness). Very small amounts.
- Choose texture wisely: creamy concealer for under-eyes; a more full-coverage, thin consistency for stubborn spots.
- Apply sparingly: a rice-grain dot on spots, a triangle under each eye.
- Press to blend with a damp sponge; avoid rubbing.
- Set minimally where creasing is a problem — thin dusting or a light swipe of translucent powder with a small fluffy brush.
Conceal to enhance, not mask.
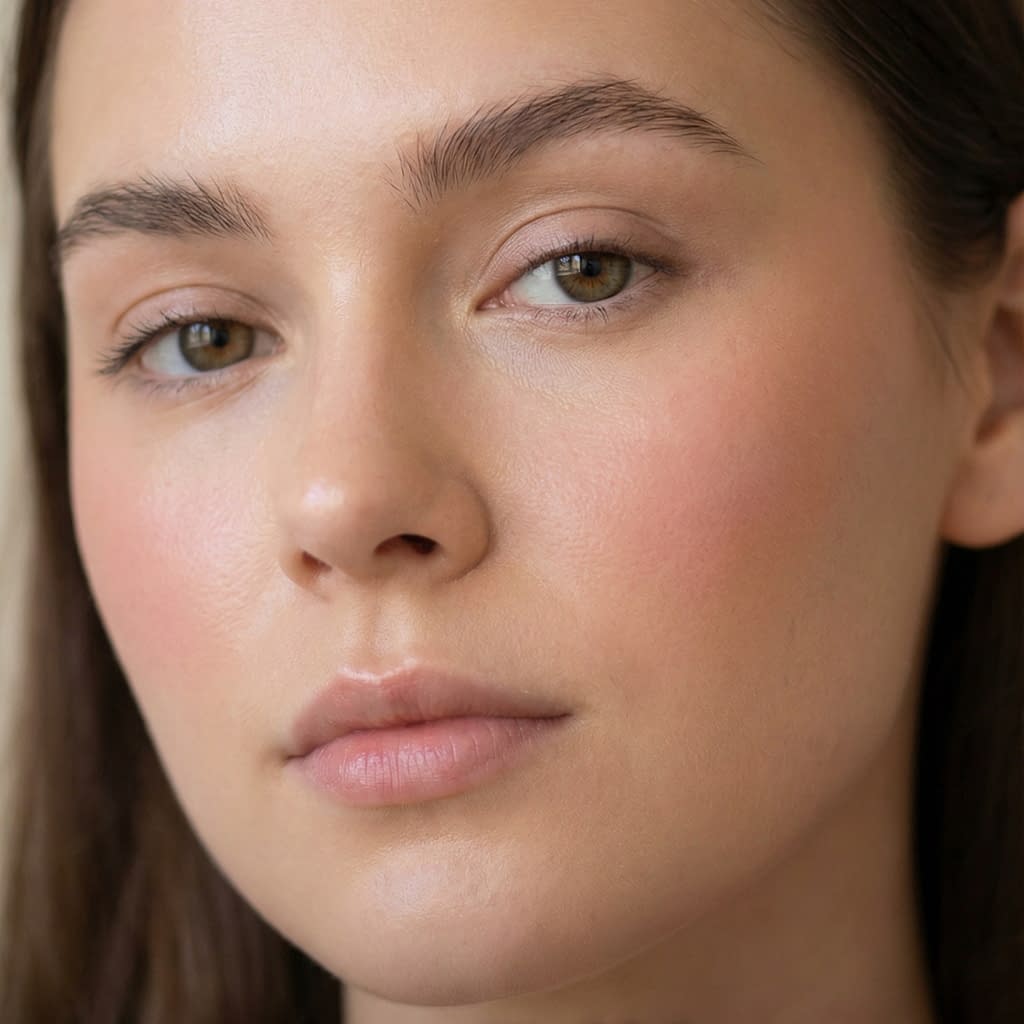
Subtle Sculpting: Soft Contour and Natural Dimension
Subtle shadowing adds structure without aging the face.
Step-by-step contouring
- Choose a natural shade (matte, 1–2 shades darker than skin, neutral undertone).
- Apply sparingly: under cheekbones, at temples, along jawline — in small strokes.
- Use cream for a skinlike finish; powder only to set if you need more hold.
- Blend upward and outward so contour reads like natural shadow.
- Finish with a soft highlight (not glitter) on the high points — cheekbones, nose bridge, cupid’s bow.
Think: lift and shape, not chisel.
Brows That Look Groomed, Not Drawn On
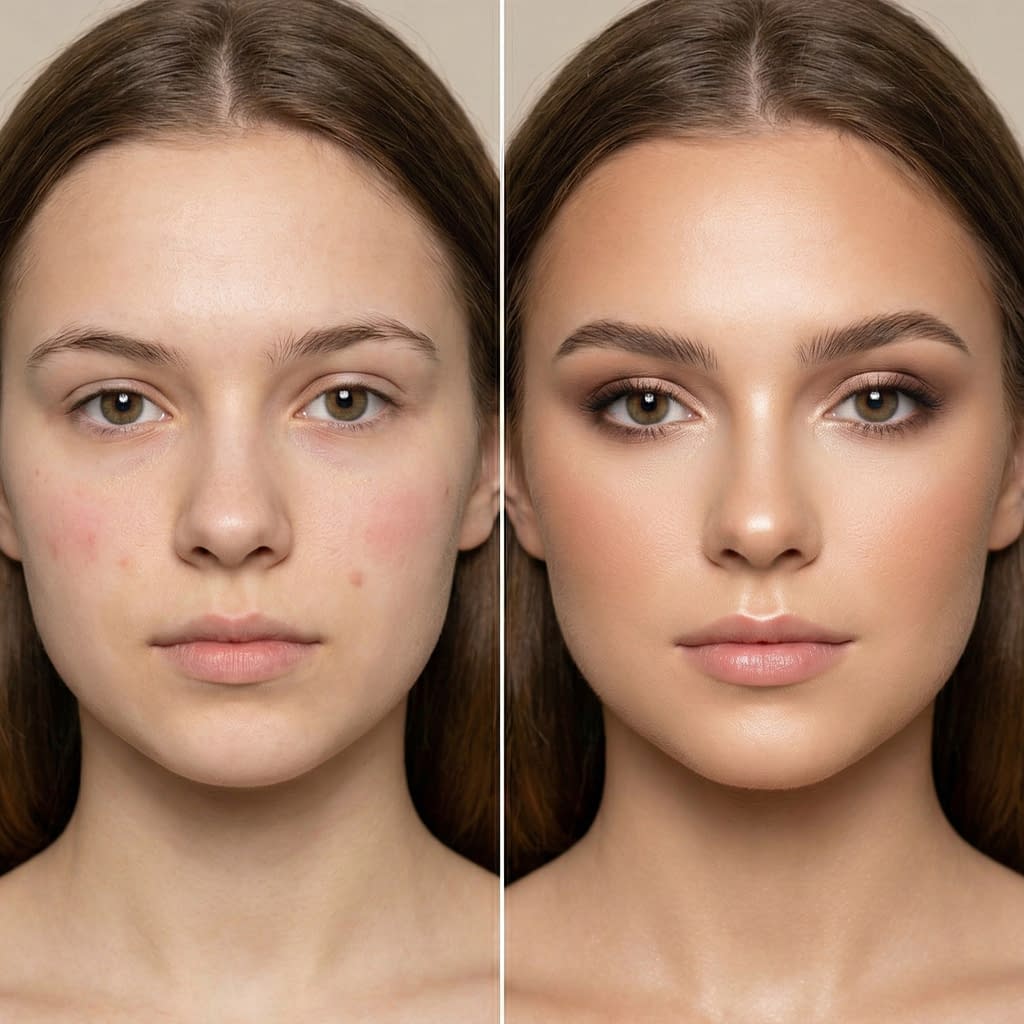
Well-executed brows frame the face and instantly look expensive.
Step-by-step brow grooming & fill
- Brush and trim long hairs; tweeze stray hairs outside your natural shape.
- Map start/arch/end quickly with a pencil to guide placement.
- Fill with hair-like strokes using a fine pencil or micro brush where sparse.
- Blend with a spoolie so strokes soften and read natural.
- Set with clear or tinted gel brushed upward for a polished, feathery finish.
Avoid drawn-on, blocky fronts — soft gradient at the inner brow is key.
Eye Makeup That’s Clean, Balanced, and Intentional
Eyes that read luxe are tidy, dimensional, and harmonized with the rest of the face.
Step-by-step eye approach
- Prime eyelids lightly to prevent creasing.
- Start with neutrals: a soft matte in the crease for definition and a slightly shimmery lid shade for polish.
- Define subtly: tightline or use a soft-brown liner; avoid heavy black lines unless it’s the desired style.
- Blend the outer edges into skin — no sharp stray edges.
- Finish with lifted lashes: curl, mascara focusing on roots, and consider a natural set of individual lashes if you want more polish.
Luxury eyes look edited and intentional, not overworked.
Choosing the Right Textures: Creams vs. Powders
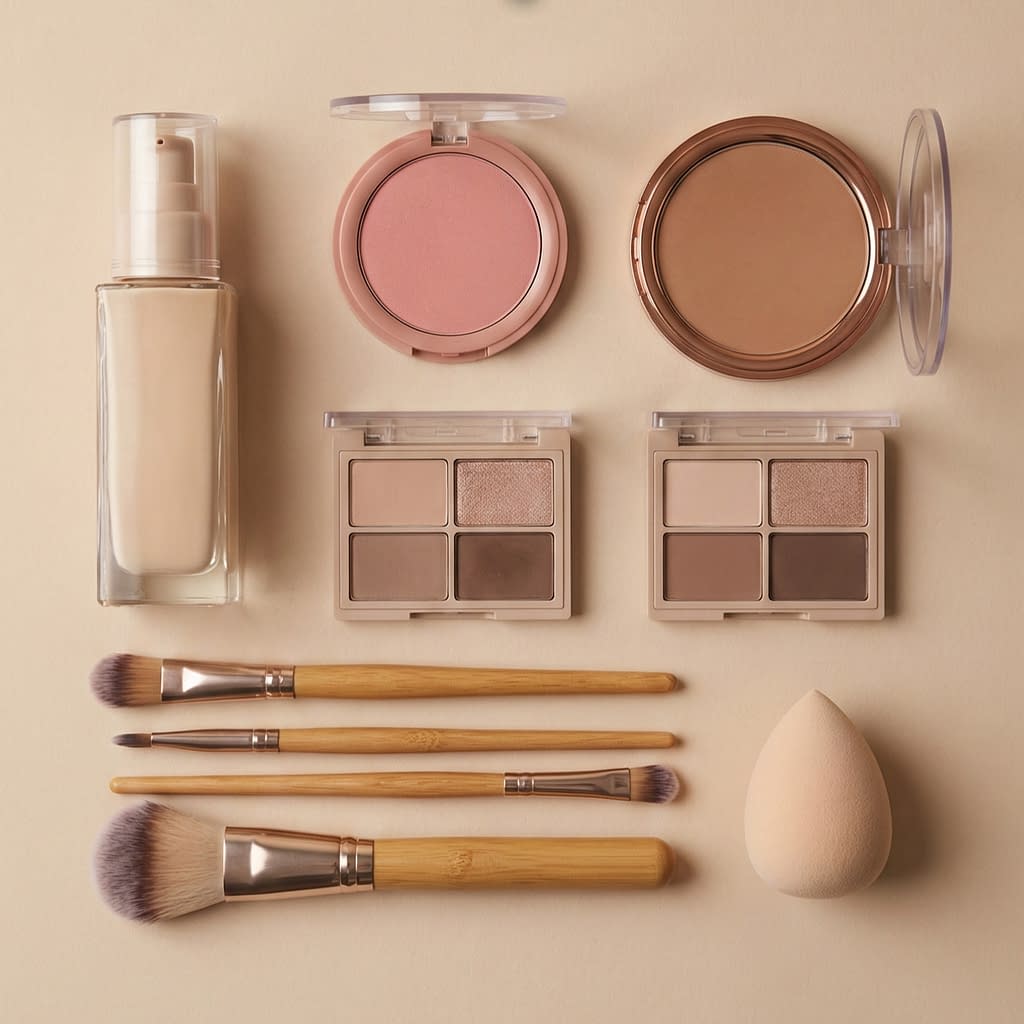
Texture choice affects finish — creams look skinlike and supreme, powders give control.
How to choose and layer
- Creams for glow and blending: cream blushes, bronzers, and highlighters melt into skin for a modern, expensive finish.
- Powders for longevity and control: use thin, finely-milled powders where you need hold (T-zone).
- Layering trick: cream product first for depth; very light powder to set only where needed — this keeps luminosity but improves wear.
- Avoid chunky shimmer — choose finely-milled luminizers for a subtle sheen.
Think of creams as flesh and powders as clothing — combine them thoughtfully.
Less Product, Better Placement
A little placed perfectly beats a lot scattered everywhere.
Step-by-step minimalism
- Identify focal points (eyes or lips, not both at full intensity).
- Use tiny amounts — dot concealer, sweep blush on apples, and blend outward.
- Patch-correct, don’t repaint — spot conceal and blend into a sheer base instead of full reapplication.
- Quality placement tools (small brushes, precision sponges) make tiny amounts perform better.
Makeup that whispers looks more expensive than makeup that shouts.
Color Harmony: Matching Makeup to Skin Tone and Outfit
Coordinated color choices elevate the entire look.
Step-by-step color harmony
- Know your undertone (warm, cool, neutral) and lean into complementary shades.
- Choose a cohesive palette for eyes, lips, and blush — tones in the same family look curated.
- Consider outfit and occasion — cooler tones for crisp outfits, warmer tones for earthy or autumnal looks.
- Test in natural light — colors can shift indoors.
When your makeup palette reads intentional and matched, it signals sophistication.
Finishing Touches That Elevate the Whole Look
Tiny rituals make big impressions.
Finishing steps (short checklist)
- Micro-powder the center of the face lightly where oil builds; avoid the cheekbones to keep glow.
- Use a setting spray to melt powders and add a skinlike finish.
- Add a final brightening touch — inner-corner highlight, brow bone sweep, or a tiny dab of clear gloss on lips.
- Blot, don’t re-layer — blot oil and re-mist or touch up lightly.
Finishing is the difference between “applied” and “crafted.”
Common Mistakes That Make Makeup Look Cheap
Avoid these pitfalls — they instantly date a look.
Mistakes to avoid & fixes
- Heavy cakey layers: build in thin layers; blot before reapplying.
- Unblended edges: feather everything out.
- Mismatched undertones: always check in natural light.
- Too many competing focal points: pick one (eyes or lips).
- Ignoring skin prep: skip this and even luxury products look flat.
Fix these, and even simple makeup will feel elevated.
Final Words
Expensive-looking makeup is an attitude: precise, restrained, and skin-first. It’s about prepping well, layering thoughtfully, choosing the right textures, and mastering blends and edges. Small, considered finishes — a soft highlight, a neatly groomed brow, a skinlike base — transform ordinary makeup into something polished and luxe. You don’t need an endless vanity or designer labels to look high-end; you just need technique, a few reliable products, and an eye for subtlety.


