
New sandals can create a perfect storm of friction, heat, and pressure on the feet, especially around the heel, arch, and toes. A normal friction blister is the skin’s way of protecting itself, but if a blister fills with pus, that is often a sign of infection rather than a routine blister. That changes how it should be treated: the safest approach is usually gentle cleansing, protection from further rubbing, and medical attention if the area looks infected or keeps getting worse.
The goal here is not to “tough it out.” It is to calm the skin, prevent more damage, and avoid turning a small shoe problem into a bigger infection or scar. For ordinary blisters, dermatology and first-aid guidance generally recommend keeping the blister roof in place when possible, protecting it with a clean dressing, and avoiding unnecessary popping or scraping. If pus is present, however, that is a warning sign and deserves extra caution.
Why New Sandals Cause Painful Blisters
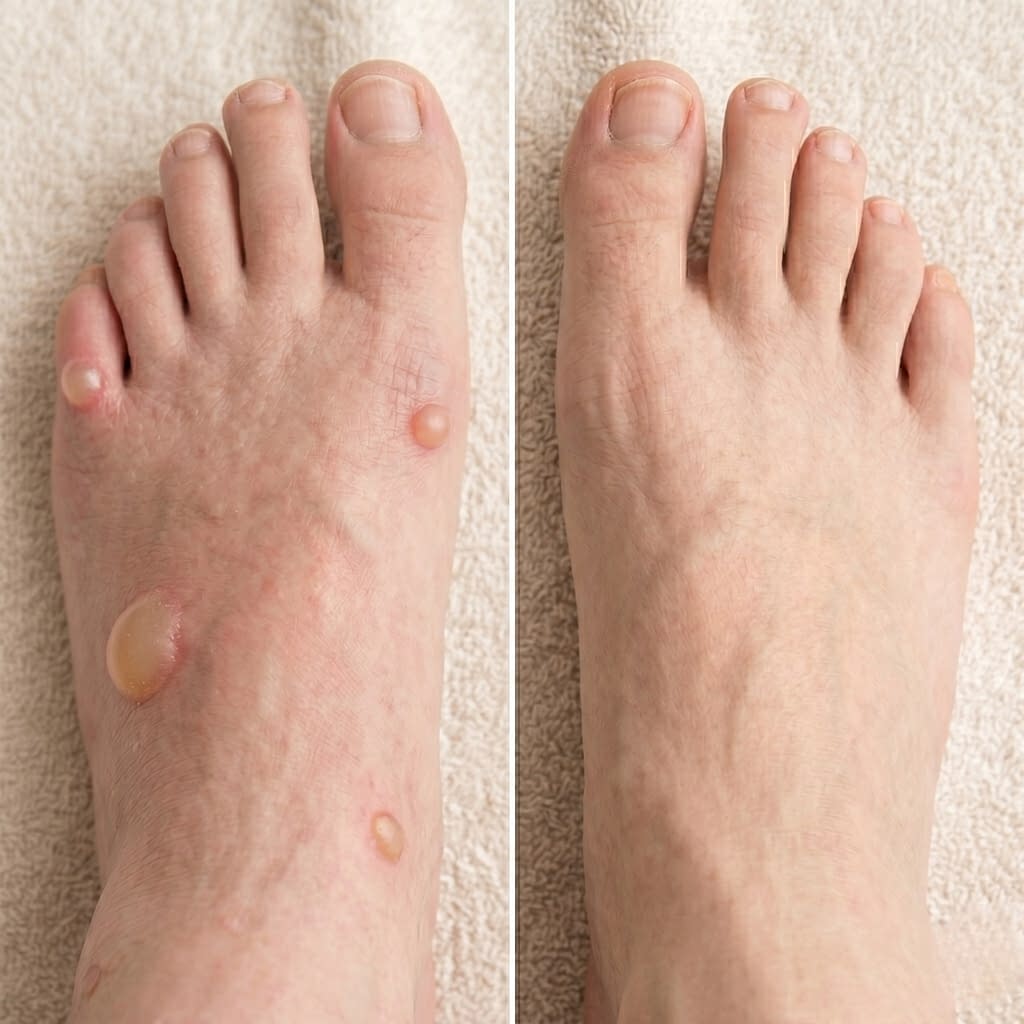
New sandals often cause blisters because the skin is rubbing against stiff straps, seams, or edges that have not softened yet. Friction separates the outer layers of skin, fluid collects underneath, and a blister forms as a protective cushion. Friction blisters are commonly caused by repetitive rubbing, pressure, and heat, which makes new shoes and sandals a classic trigger.
Step by step, it usually happens like this: the sandal rubs on the same spot over and over, the skin warms up and softens, the top layer starts to separate, and fluid collects under that skin layer. The result is a painful bubble that may start small and quickly become tender if you keep wearing the sandals.
What Makes a Blister Fill with Pus
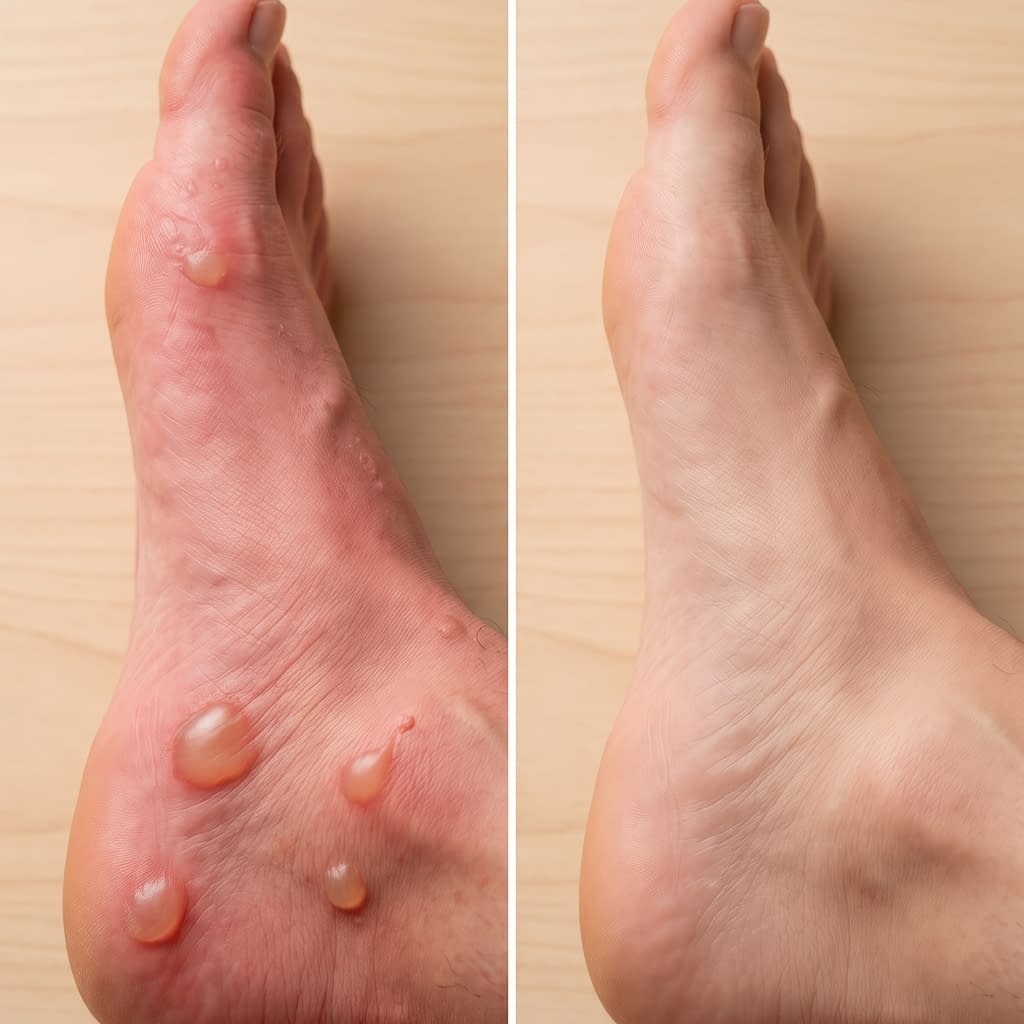
Pus is usually a sign of infection. Cleveland Clinic notes that if a blister becomes infected, it may fill with milky-white pus, and Mayo Clinic says pus, heat, or red streaking are warning signs that the area may need medical attention.
A blister can turn infected when it is popped, repeatedly irritated, or exposed to dirt and bacteria. Once the skin barrier is broken, bacteria can get in more easily. That is why a blister that was originally just friction-related can later become more serious if it is handled roughly or left unprotected.
Step by step, infection often starts with an already irritated blister, then repeated rubbing or popping opens it up, bacteria enter the damaged skin, and fluid turns cloudy, yellowish, or milky. That is the point where home care should become much more cautious.
Signs Your Foot Blister Needs Extra Care
A regular friction blister is painful, but a pus-filled blister needs more caution. Signs that the area may be infected include white, yellow, or green pus, increasing redness, swelling, warmth, severe tenderness, or red lines spreading away from the blister. Mayo Clinic and Cleveland Clinic both flag pus, heat, and spreading redness as signs to watch carefully.
Step by step: check the warning signs
- Look at the fluid color. Clear fluid is more typical of a simple blister; milky-white, yellow, or green fluid is more concerning.
- Notice whether the skin around it is red and swollen.
- Check for warmth, worsening pain, or red streaks.
- Watch for fever or feeling generally unwell. That can mean the infection is not just local.
- If you have diabetes, poor circulation, or frequent infections, be extra cautious and get professional advice sooner.
What to Do Right Away When a Blister Forms
If the blister is still a simple friction blister and not infected, the first step is to stop the rubbing immediately. Mayo Clinic and the NHS both recommend protecting the area and avoiding bursting it, because the intact skin helps lower infection risk.
Step by step: immediate action
- Take off the sandals or switch to a pair that does not rub the area.
- Clean the skin gently with soap and water. The NHS advises washing the area and avoiding rough handling.
- Leave the blister roof in place if it is intact.
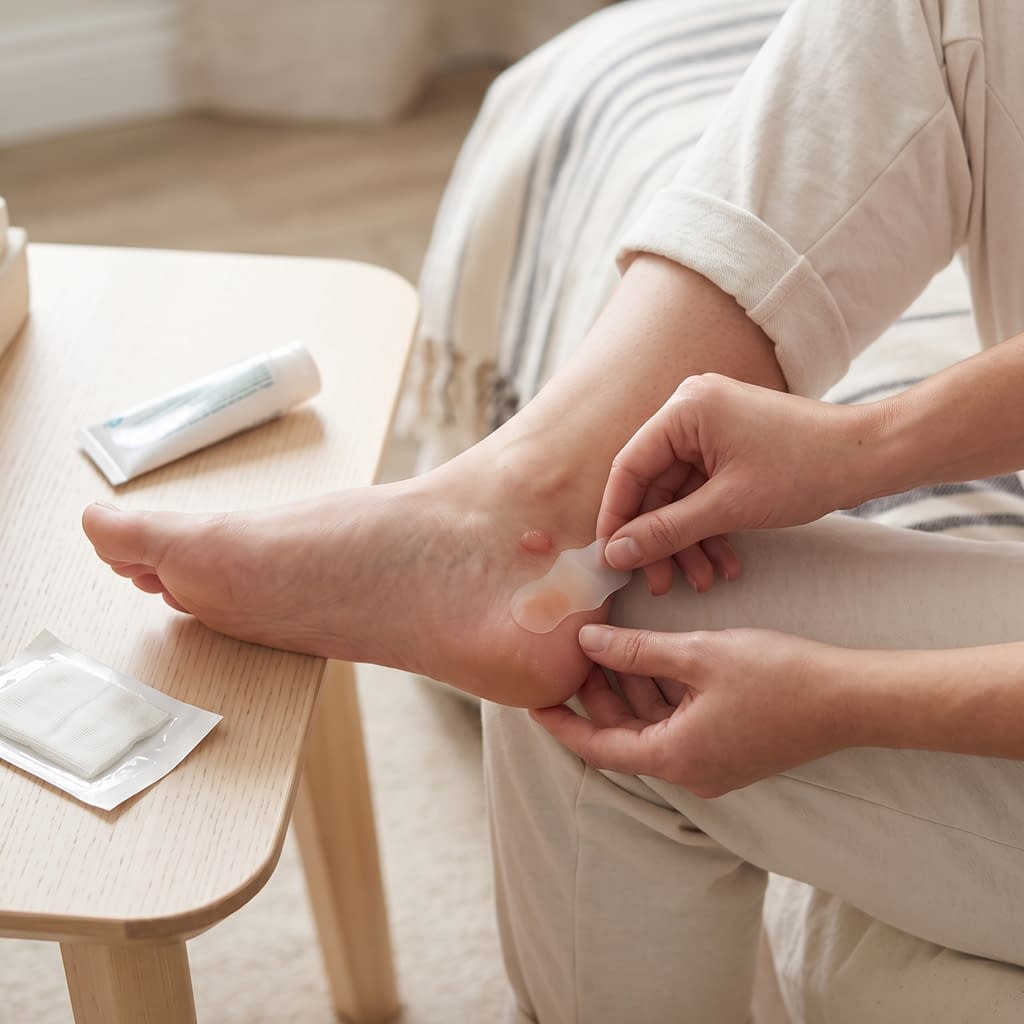
- Cover it with a clean, non-stick dressing or a hydrocolloid blister dressing to reduce pressure and protect it from friction.
- If the blister already looks infected or has pus, do not keep treating it like a normal friction blister; monitor closely and seek medical care if needed.
How to Clean the Area Without Making It Worse
Cleaning should be gentle. The NHS advises washing blisters with soap and water and not bursting them, while Mayo Clinic recommends keeping the surrounding skin clean and protected if the blister is open.
Step by step: gentle cleaning
- Wash your hands first.
- Rinse the area with mild soap and water, without scrubbing.
- Pat dry with a clean towel rather than rubbing.
- If the blister is open, keep the skin as clean as possible and cover it with a dressing.
- Avoid harsh products, alcohol, or strong antiseptics unless a clinician tells you to use them.
The Best Way to Protect a Pus-Filled Blister
Because pus usually means infection, the safest move is to protect the area from more pressure and get it assessed if the signs are significant or worsening. Cleveland Clinic says pus in a blister is a sign of infection, and Mayo Clinic notes that infected-looking blister fluid, swelling, heat, or streaking warrants medical attention.
Step by step: protection plan
- Stop wearing the sandals that caused the blister.
- Clean the area gently.
- Cover it with a clean, non-stick dressing to reduce friction.
- Do not squeeze, pop, or peel at it. The NHS and AAD both warn that bursting can increase infection risk.
- Get medical advice promptly if the pus, redness, swelling, or pain is increasing.
How to Reduce Pain and Pressure on the Heel or Toes
Pain usually gets worse when the blister keeps taking pressure from walking. Taking pressure off the blister is one of the fastest ways to feel better. Mayo Clinic and NHS guidance both emphasize covering the blister and protecting it from further rubbing.
Step by step: pressure relief
- Switch to softer, roomier footwear if possible.
- Use padding or a non-stick dressing over the blister.
- Reduce walking until the area calms down.
- If the blister is on the heel or toes, make sure the area is not being squeezed by straps.
- If pain is severe or increasing, get it checked rather than forcing through it.
What Not to Do When Treating a Blister
There are a few common mistakes that make blisters worse. The NHS says not to burst blisters, and AAD warns that popping or draining a blister can lead to infection unless medical guidance is needed for a very large, painful blister.
Step by step: things to avoid
- Do not pop a blister just because it is uncomfortable.
- Do not peel off the skin roof unless a clinician tells you to.
- Do not use sticky dressings that rip the blister open when removed. The NHS suggests a clean, non-stick or hydrocolloid dressing instead.
- Do not keep wearing the rubbing shoes.
- Do not ignore pus, spreading redness, or heat.
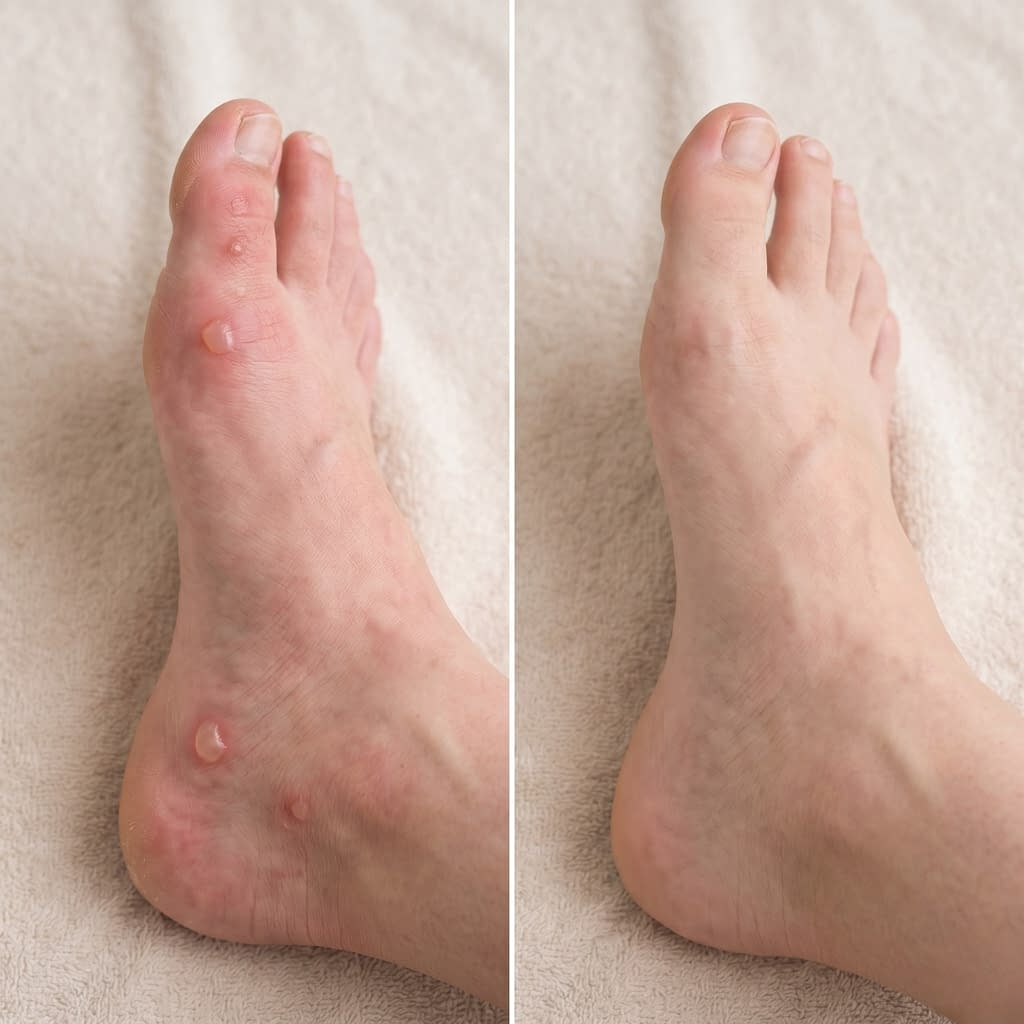
How to Help the Skin Heal Faster

Healing goes faster when the area is protected, clean, and not being re-injured every time you walk. Hydrocolloid dressings can help protect a blister while it heals and may reduce pain, according to the NHS.
Step by step: healing support
- Keep the blister clean.
- Cover it with the right dressing to reduce friction.
- Rest the foot when you can.
- Avoid further rubbing or pressure.
- Watch for signs that the blister is getting better rather than worse.
If the blister is infected, healing can be slower and may require prescription treatment, so don’t wait too long if the area looks worse instead of better.
When to Stop Wearing the Sandals That Caused the Blister
If the sandals caused one painful blister, they are likely to keep rubbing the same spot. That is why the simplest prevention step is to stop wearing them until they fit better or the blister heals. The NHS and friction-blister guidance emphasize removing the source of rubbing to let the skin recover.
Step by step: decide when to pause the sandals
- If the sandals caused friction once, assume they can do it again.
- Stop wearing them until the blister is fully calm.
- Check whether the straps, seams, or fit are the real issue.
- Break them in more slowly later, with socks or short wear periods if appropriate. This is a practical inference from friction-blister prevention guidance.
- If the sandals repeatedly cause blisters, replace them or have the fit assessed.
How to Prevent Blisters from Happening Again
Preventing future blisters is mostly about reducing friction, moisture, and pressure. AAD and NHS guidance both support using protective dressings, reducing rubbing, and choosing footwear that does not repeatedly irritate the same spots.
Step by step: prevention plan
- Break in new sandals gradually rather than wearing them for a full day immediately. This is a practical prevention step based on friction-blister causes.
- Keep feet dry when possible. Moisture increases friction.
- Use a blister dressing or protective tape on hot spots before they become a problem.
- Make sure straps fit well and do not rub at the heel or toes.
- Stop and adjust footwear as soon as you feel a hot spot. Early protection helps prevent a full blister.
Final Words
A regular friction blister from new sandals often improves when you protect it, stop the rubbing, and keep the area clean and covered. But pus changes the situation: pus is usually a sign of infection, so a blister that is white, yellow, or green, or one that is getting hotter, redder, more swollen, or more painful, should be treated more cautiously and may need medical attention.
For a simple blister, the best path is gentle cleansing, a non-stick or hydrocolloid dressing, and rest from the offending sandals. For a pus-filled blister, the safest approach is not to keep treating it like a normal shoe blister; instead, keep it clean and protected, and watch for signs that it needs a clinician’s help. If you have diabetes, poor circulation, or frequent infections, it is especially important to be careful.
If you want, I can also turn this into a more polished SEO blog version with a softer, more personal voice and a meta description.


