
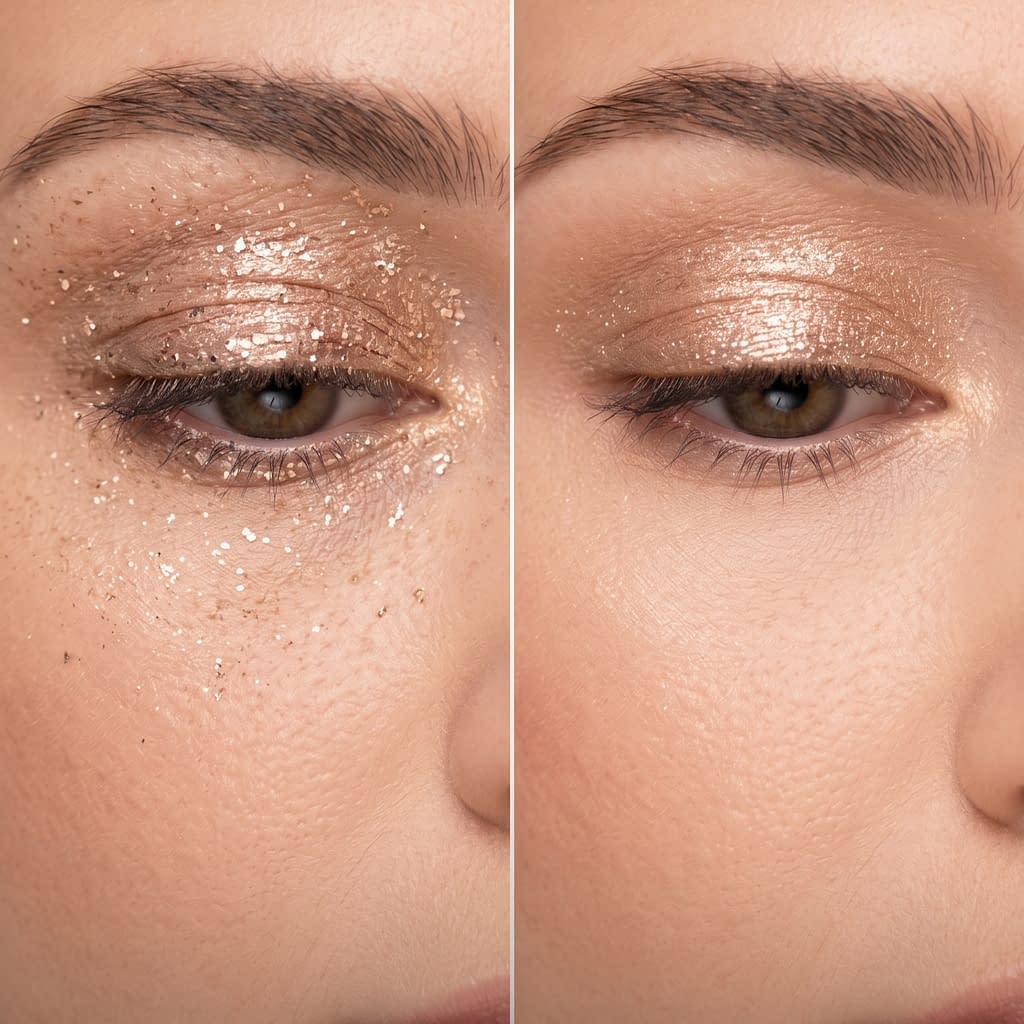
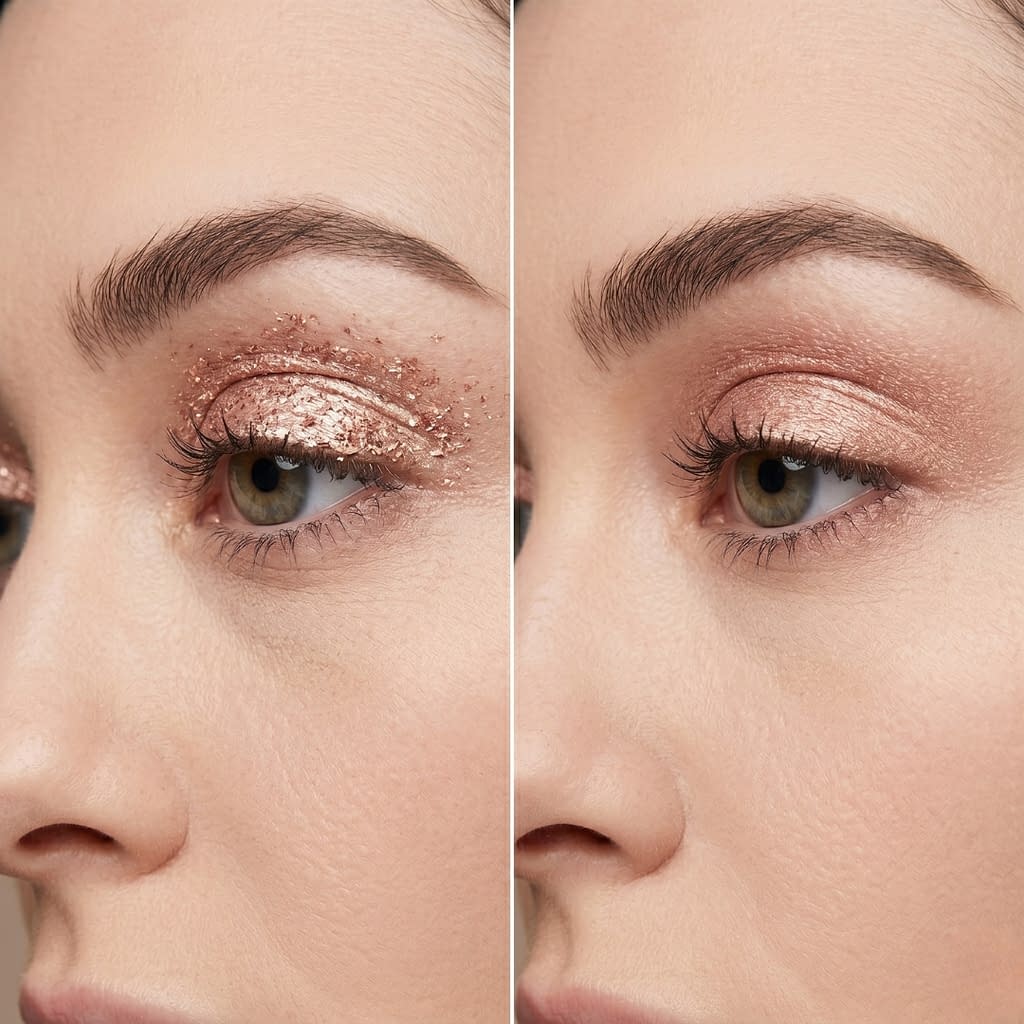
Liquid glitter eyeshadow is one of those products that can look absolutely stunning when it is applied well. It catches the light, adds sparkle in seconds, and can turn even a simple eye look into something dramatic and fun. But when it starts to look flaky, patchy, or cracked, the effect can go from polished to messy very quickly. Instead of smooth shimmer, you end up with glitter sitting on dry-looking patches, separating at the edges, or emphasizing texture on the eyelid.
The good news is that flaky glitter shadow is usually fixable. In most cases, the issue comes down to how the eyelids were prepped, how much product was applied, or how the shadow was blended before it dried. Once you understand what is causing the problem, it becomes much easier to prevent it and keep the glitter looking smooth, even, and long-lasting.
In this guide, you will learn why liquid glitter eyeshadow flakes, how to prep the eyelids properly, how to apply it in thin layers, how to blend before it sets, and how to fix it if it starts looking dry later on. Each section breaks the process down step by step so you can get a smoother, more seamless glitter finish without the frustrating patchiness.
Why Liquid Glitter Eyeshadow Starts to Look Flaky
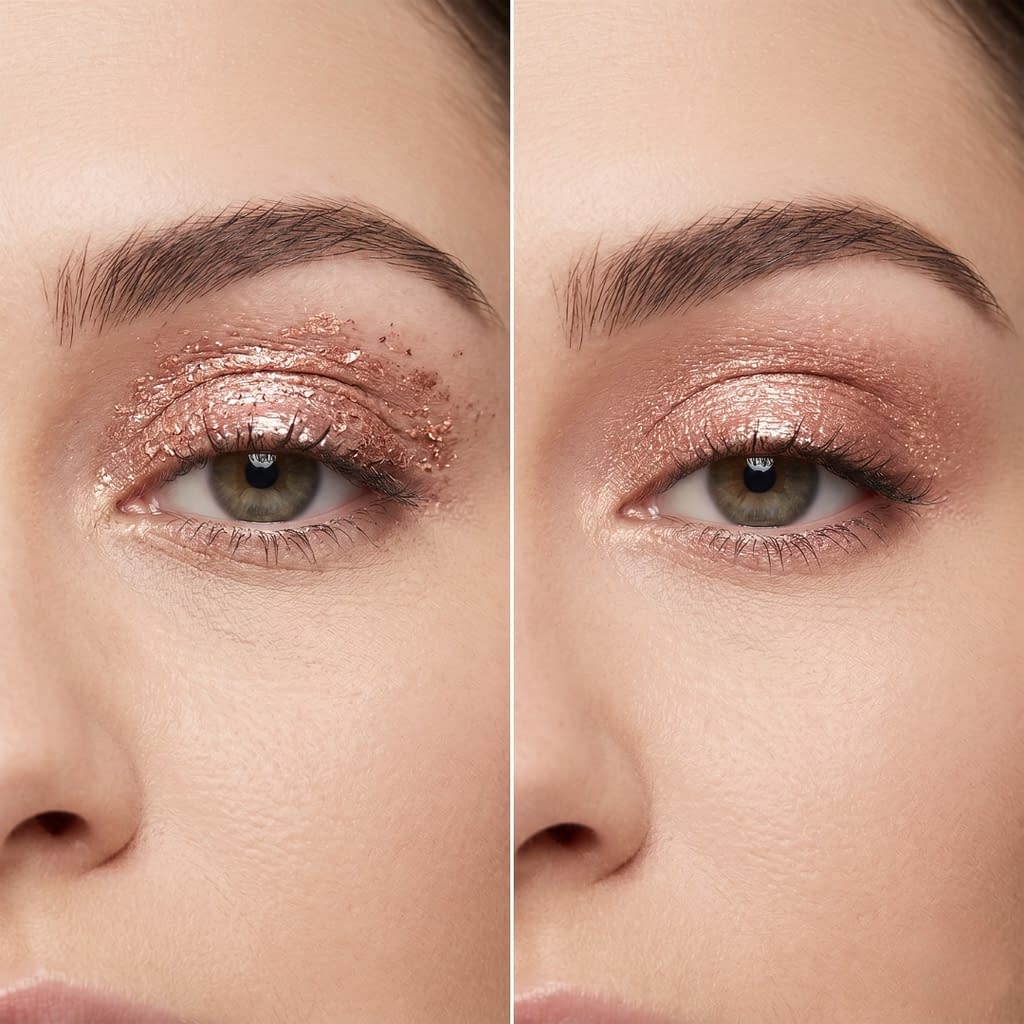
Liquid glitter eyeshadow often starts looking flaky when it dries unevenly or sits on top of texture instead of melting into the lid. The eyelid is a delicate area with natural movement, oils, and fine lines, so glitter formulas can crack or separate if they are not applied carefully.
Sometimes the shadow itself dries too fast. Other times the issue is underneath the product: dryness, creasing, or an uneven base. If the eyelids are not smooth and properly primed, the glitter may cling to dry spots and lift away from the skin in other areas. That is what creates the flaky look.
Step by step: why flakiness happens
- The formula dries before it is blended properly.
- The eyelid texture shows through underneath.
- The glitter sits unevenly on the skin.
- Movement of the eye causes cracking or separation.
- The finish looks dry, patchy, or flaky instead of smooth.
When the product is applied the right way, the shimmer should look like part of the lid, not like a layer sitting on top of it.
What Causes Glitter Shadow to Separate or Crack
Separation and cracking usually happen when the formula is not bonding well with the skin. A liquid glitter shadow needs a clean, smooth base and a controlled application. If the lid is too oily, too dry, or layered with too many products, the shadow can break apart as it sets.
Another common cause is over-applying. A thick layer of glitter can dry unevenly and form cracks as the eyelid moves. The same thing can happen if you apply one layer, wait too long, and then try to build more on top without blending the first layer first.
Step by step: main causes of cracking
- The lid is oily or not prepped properly.
- Too much product is applied at once.
- The formula dries before it is smoothed out.
- The eyelid moves and the product breaks apart.
- The finish separates into dry pieces instead of staying flexible.
Understanding this helps you avoid the habits that lead to a flaky finish in the first place.
How to Prep Your Eyelids for a Smooth Finish
Good eye prep is one of the biggest secrets to keeping liquid glitter eyeshadow smooth. If the eyelids are oily, textured, or covered in leftover makeup, the product will not sit evenly.
Step by step: eyelid prep
- Clean the eyelids gently to remove oil and residue.
- Pat the area dry completely.
- Apply a light eye primer or a thin base product.
- Let the base settle for a moment.
- Make sure the eyelid feels smooth but not slippery before applying glitter.
Helpful tips
- Do not use too much skincare right before eye makeup
- Keep the lid balanced, not overly greasy or dried out
- A smooth base helps the glitter adhere more evenly
The better the prep, the smoother the glitter will look once it is applied.
The Best Eye Primer for Liquid Glitter Eyeshadow

A good eye primer helps grip the glitter and reduces the chance of cracking or patchiness. For liquid glitter, the ideal primer is lightweight, smooth, and slightly tacky without feeling heavy.
What to look for
- A formula that helps hold eye makeup in place
- A smooth finish that evens out the lid
- A lightweight texture that does not crease easily
- A primer that works well with shimmer or long-wear products
Step by step: using primer correctly
- Apply a thin layer across the eyelid.
- Blend it evenly from lash line to crease.
- Let it sit briefly until it is ready for shadow.
- Do not add too much product on top.
- Use a small amount of glitter shadow once the primer is set.
Helpful tips
- A little primer usually works better than a thick layer
- If the lid is oily, blot before priming
- If the lid is dry, make sure the base is not too matte or tight
The right primer gives the glitter something to hold onto without making it look heavy.
How to Apply Liquid Glitter Shadow Without Patchiness
Patchiness usually happens when the shadow is dabbed on unevenly or dragged before it has time to settle. The key is to use light, controlled placement and to build the color gradually.
Step by step: application method
- Pick up a small amount of shadow on the applicator or brush.
- Place it on the lid in thin sections.
- Tap or sweep gently instead of rubbing.
- Build the color slowly where needed.
- Check both eyes for even coverage before the product sets.
Helpful tips
- Start in the center or middle of the lid and work outward
- Use a flat brush or the product’s applicator for better control
- Avoid going back and forth too much, which can break the finish
Thin, careful application is usually what creates the smoothest glitter look.
Why Thin Layers Work Better Than Heavy Application
Heavy glitter application might seem like it will create a stronger look, but it usually causes more problems. Thicker layers take longer to dry, crack more easily, and are more likely to collect in lines or folds on the eyelid.
Thin layers give the formula a better chance to dry evenly. They also let you control the shine and build intensity only where you want it. This is especially important for liquid glitter because a little goes a long way.
Step by step: layer properly
- Apply one thin layer first.
- Let it begin to set.
- Add a second small layer only if more sparkle is needed.
- Keep the edges smooth as you build.
- Stop before the lid starts to look thick or overloaded.
Helpful tips
- More product does not always mean more glam
- Thin layers make the glitter look smoother and more skin-like
- The product will usually last better if it is not piled on
Building slowly is the best way to avoid flakiness and cracking.
How to Blend Glitter Eyeshadow Before It Dries

Blending matters a lot with liquid glitter because once it dries, it can be difficult to fix without disturbing the finish. You want to smooth the edges while the formula is still workable.
Step by step: blending before drying
- Apply the product to the lid.
- Immediately soften the edges with a clean brush or fingertip.
- Keep the center more concentrated if you want extra shine.
- Blend the outer edges so there are no harsh lines.
- Let the glitter dry without touching it again.
Helpful tips
- Work quickly but gently
- Do not overblend, or you may remove the glitter
- Focus on softening the borders, not spreading the product everywhere
The earlier you smooth the edges, the more seamless the final effect will be.
Tips for Keeping Glitter Smooth and Even All Day
Once liquid glitter sets, the goal is to keep it from cracking, flaking, or fading unevenly. A few smart habits can help the finish stay smooth longer.
Step by step: all-day wear tips
- Prep the lids well before makeup.
- Apply thin layers instead of one thick coat.
- Avoid rubbing the eyes throughout the day.
- Keep the lid area free of too much oil.
- If possible, set the rest of the eye makeup in a way that supports the glitter.
Helpful tips
- Gentle wear habits make a huge difference
- Blot excess oil carefully if the lids get shiny
- Avoid piling more product on top of an already dry layer
A well-set glitter shadow usually lasts much longer when the eyelids are left alone as much as possible.
How to Fix Flaky Glitter Eyeshadow After It Sets
If the glitter has already dried and started to look flaky, do not panic. You can often smooth it out with a tiny amount of product and very careful blending.
Step by step: fixing flakiness
- Check whether the problem is small or widespread.
- If the area is only slightly dry, tap a tiny amount of matching glitter product on top.
- Use your fingertip or a small brush to smooth the edge gently.
- Refrain from rubbing, which can make the flakiness worse.
- Let the area dry again without touching it.
Helpful tips
- A tiny amount is usually enough
- Keep the repair local instead of covering the whole lid
- If the product has fully cracked, it may be easier to remove and reapply only that section
Small touch-ups can restore the smooth look without having to redo everything.
Common Mistakes That Make Glitter Shadow Look Dry
Several common habits can make liquid glitter eyeshadow look dry even when the product itself is good.
Mistakes to avoid
- Applying on unprepped lids
- Using too much product at once
- Letting the shadow dry before blending
- Layering over a base that is too oily
- Rubbing the lid after application
- Using a formula that is too matte for the look you want
Step by step: avoid the dry look
- Prep the lid with a smooth base.
- Apply the glitter in thin layers.
- Blend quickly while the formula is still workable.
- Do not keep adding product after it has dried.
- Leave the lid alone once the look is set.
Most dry-looking glitter problems come from too much product or too little prep.
How to Remove Liquid Glitter Eyeshadow Without Irritation
Removing glitter properly is just as important as applying it properly. If you rub too hard, the delicate eye area can become irritated or the skin can look even drier the next time you apply makeup.
Step by step: gentle removal
- Saturate a cotton pad or soft cloth with eye makeup remover.
- Hold it over the closed eye for a few seconds to loosen the product.
- Wipe gently instead of scrubbing.
- Repeat with a fresh pad if necessary.
- Clean the area softly and moisturize if your eye area feels dry afterward.
Helpful tips
- Oil-based or makeup-removing formulas often work best
- Avoid harsh rubbing at the lash line
- Be patient so the glitter can dissolve before you wipe
Gentle removal keeps the eyelids healthy and helps your next glitter look go on more smoothly.
Final Words
Flaky liquid glitter eyeshadow is frustrating, but it is usually easy to fix once you know what causes it. The biggest factors are almost always prep, layering, and drying time. When the eyelids are smooth, the primer is right, and the product is applied in thin layers, the glitter has a much better chance of staying sleek and seamless.
The best approach is to keep the lid balanced, not greasy or dry, and to blend the shadow before it sets completely. If flakiness does show up later, a tiny touch-up can often bring the look back to life. The goal is not to pile on more product, but to support the glitter so it stays smooth and even.
With the right technique, liquid glitter eyeshadow can look bright, polished, and beautiful instead of dry or patchy.


